Homesfornh.com – The kitchen is one of the important interiors for you to create comfortably and beautifully in your home. You can create a comfortable kitchen in various ways according to your wishes. For example, you can determine the interior design, interior style, layout, and so on. One of the essential things for you to pay attention to in your kitchen interior is color. Color in the kitchen gives a certain character and expression in your cooking activities every day. In addition, color also provides an atmosphere that you can determine based on the color choices you use in the interior. For that, in this article, we will discuss 21 Blue and White Kitchen Ideas: Aesthetic and Refreshing Atmosphere. The white color will give a bright look to your kitchen. Meanwhile, the blue color will give a fresh atmosphere to the interior. Let’s discuss!
-
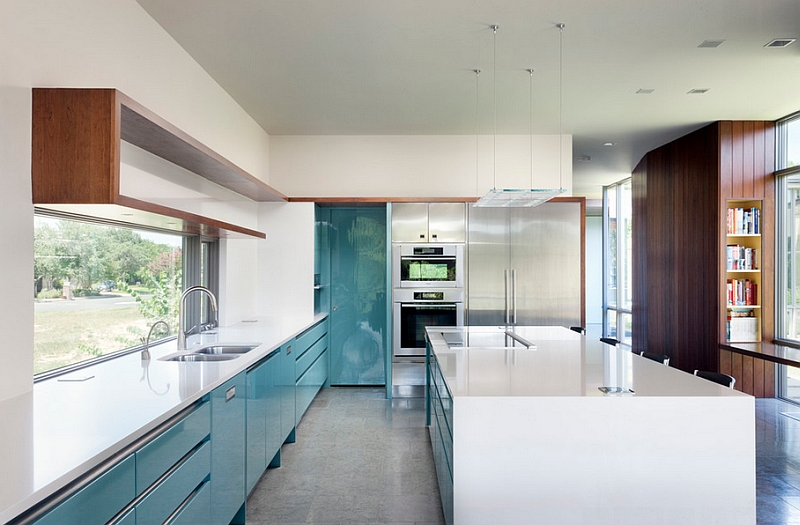
Minimalist Blue And White Kitchen
The first blue and white kitchen idea that you can use in your home is a minimalist concept. Creating a minimalist kitchen will give you a simply attractive appearance. You can create this minimalist concept in a variety of ways as comfortably as you like.
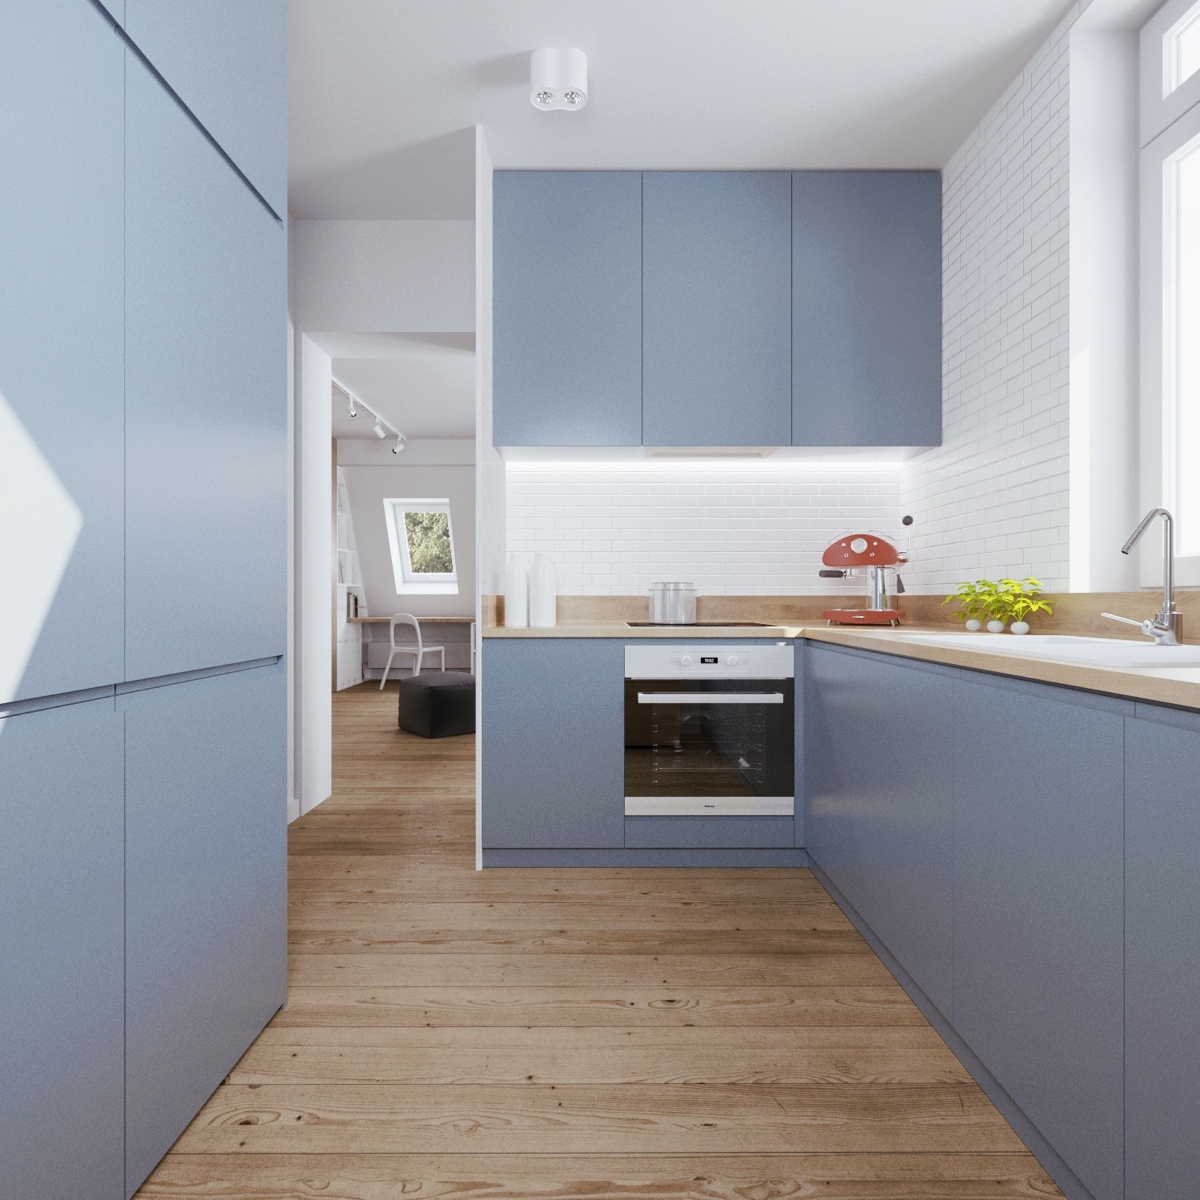
For example, you can use simple or modern furniture and decorations according to your creativity. In addition, in the use of blue and white, you also need to create a simple one. Use these colors in simple textures and patterns to create a minimalist look that is simply beautiful.
1 of 21
-
Scandinavian Blue and White Kitchen
Another simple concept besides minimalist style for your blue and white kitchen is Scandinavia. You can use the Scandinavian style in a variety of concepts that you want in your kitchen. This is because you can flexibly create this interior style in the various sizes of the kitchen interior you have.
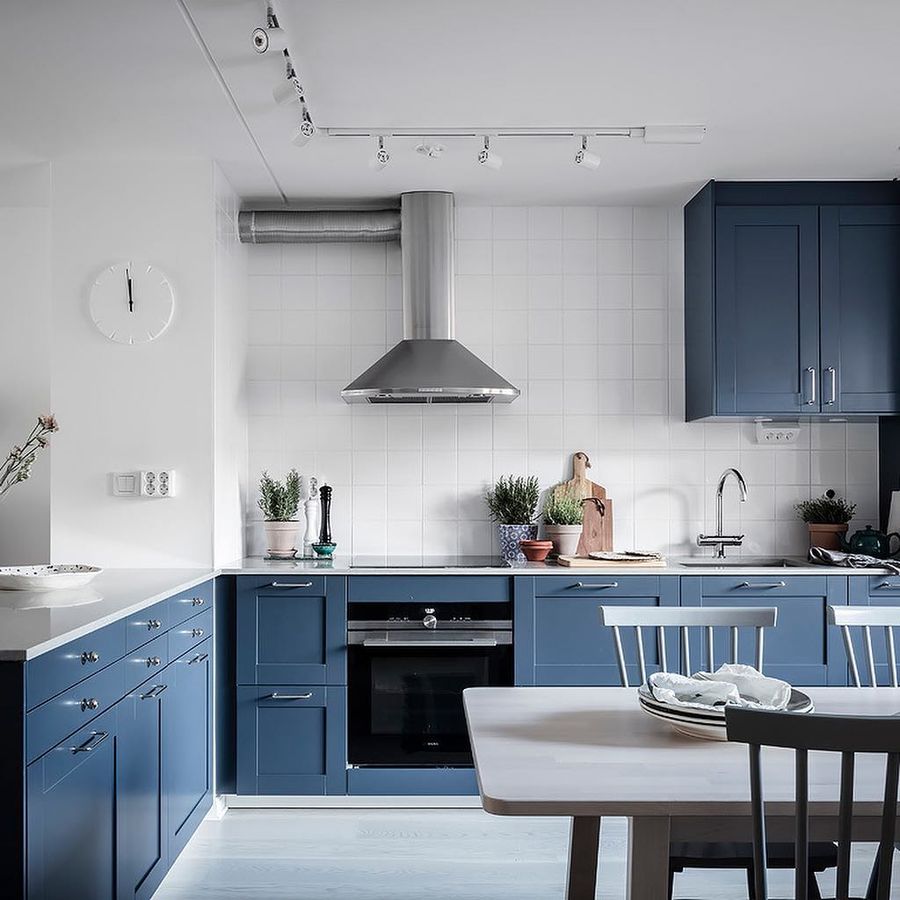
Most importantly, in creating this interior style you have to pay attention to the furniture, decorations, and layout of your kitchen. Make sure these things are created harmoniously in the interior of your kitchen. Also, provide warm Scandinavian style accents and accessories to make your kitchen cozy and refreshing in a simple concept.
2 of 21
-
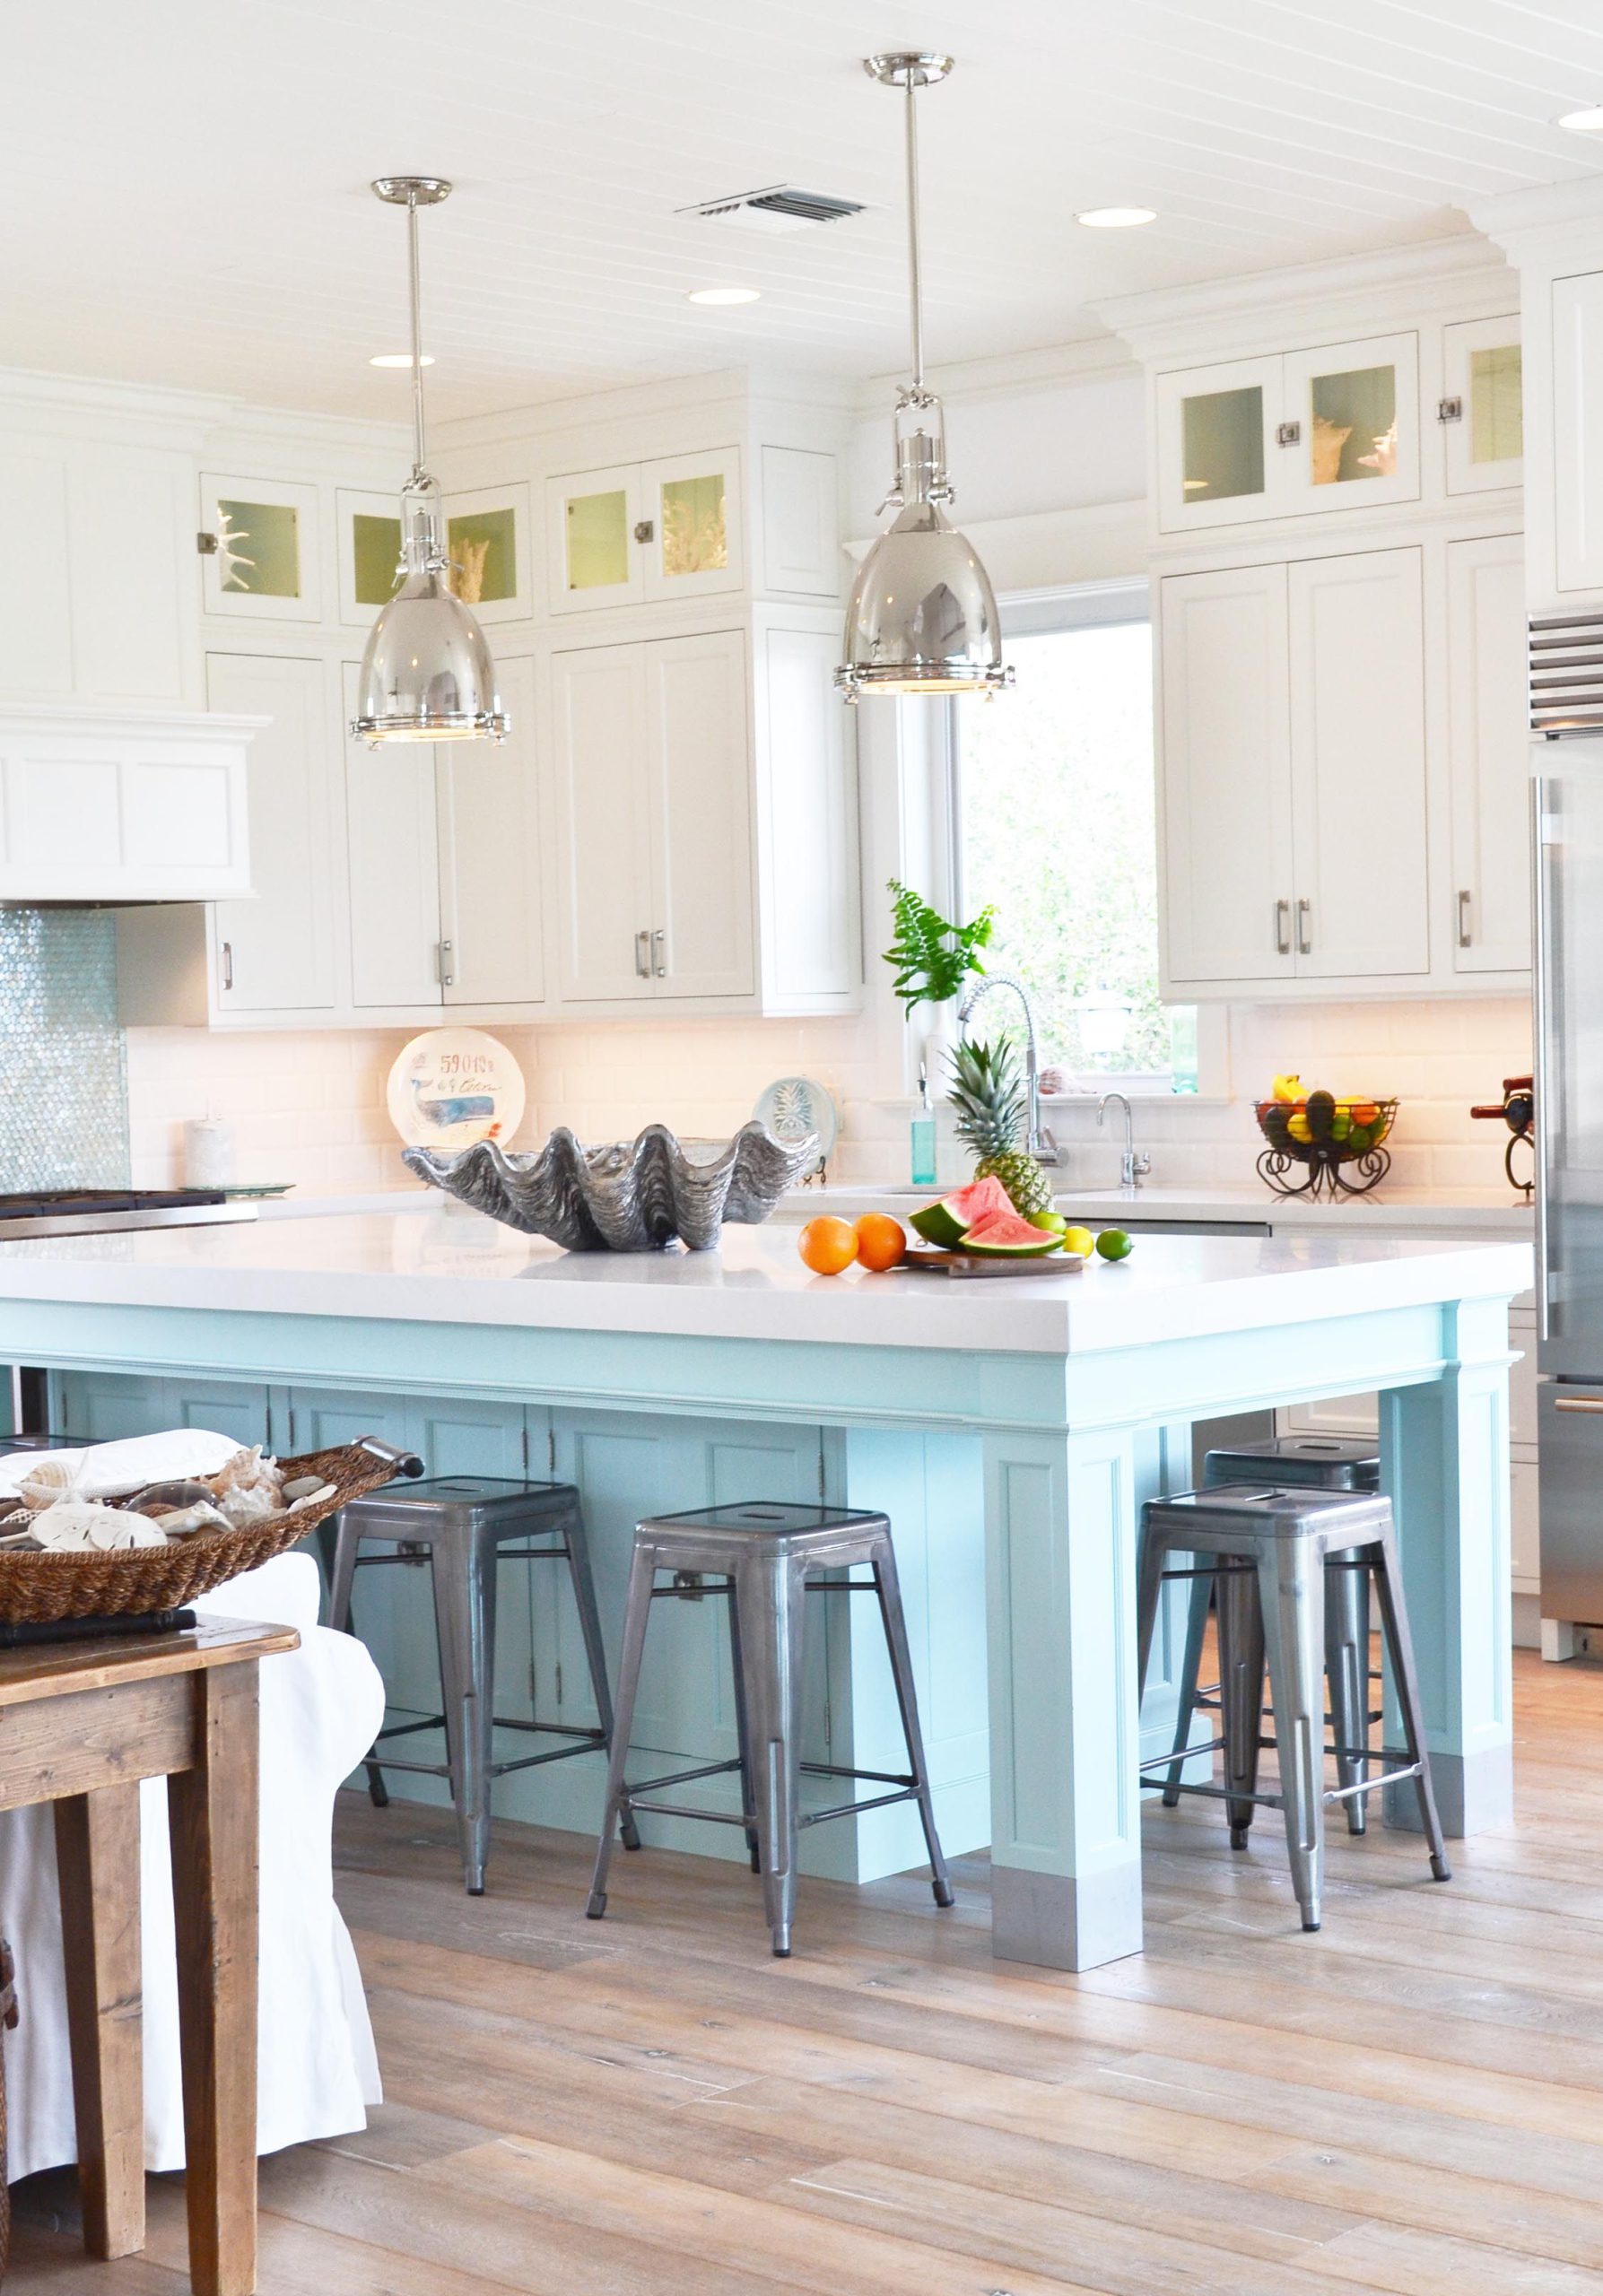
Coastal Blue and White Kitchen
Blue and white colors will be perfect for you to create in a coastal interior style in your kitchen. You can create this interior style by using a variety of accents, decorations, concepts, and furniture in coastal design. You can also combine coastal and nautical styles in a creative concept.
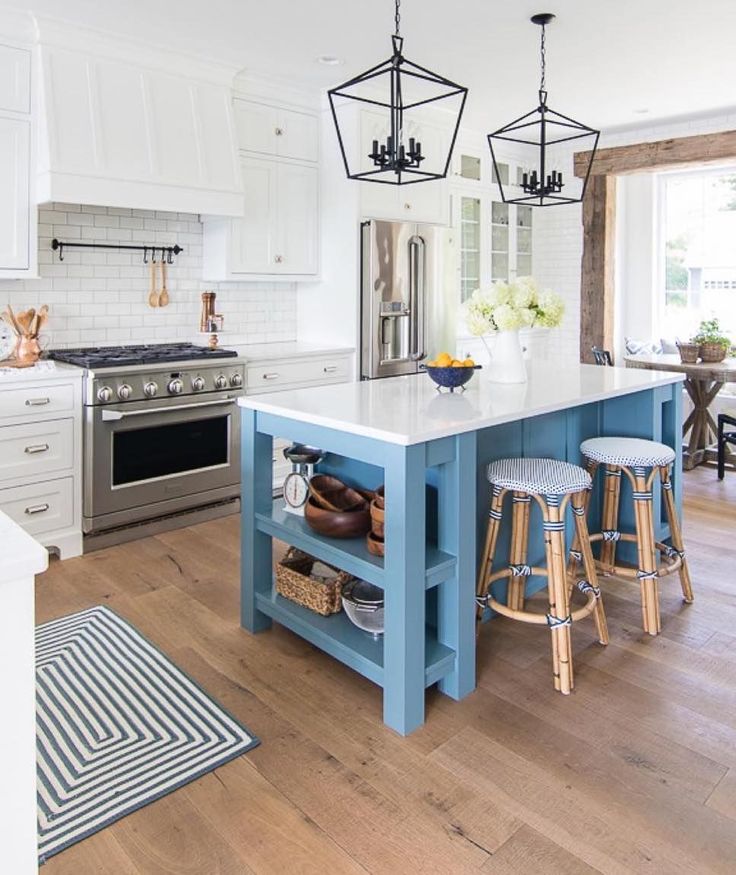
For that, in addition to using bright blue and white colors, you also need to create good natural lighting. You can add windows and skylight roofs that are effective and efficient for your kitchen interior. Besides being beautiful, natural lighting will also give you comfort for your daily activities.
3 of 21
-
Rustic Blue and White Kitchen
You can also use traditional concepts such as a rustic interior style for your blue and white kitchen interior. Using this interior style will give you a concept, character, and a warm interior atmosphere. This is because you can use furniture, decorations, and accessories from a variety of natural materials.
For example, you can use wood as the main material, ornamental plants as decorations, and effective natural lighting. Also, create textural accents in your rustic kitchen interior. This will provide a unique and aesthetic interior concept in a warm natural nuance.
4 of 21
-
Industrial Blue and White Kitchen
Aside from using a rustic interior style for your kitchen, you can also use an aesthetic industrial style. To create this interior style, you can use a variety of characteristics that can give an industrial concept aesthetic. For example, you can use raw materials such as iron and wood as the main material.
You can use this raw material for furniture and decorations in your kitchen. Meanwhile, for your kitchen walls, you can use exposed concrete or brick materials according to your wishes. For blue and white, you can use it as an accent, main color, or a harmonious combination as creative as possible.
5 of 21
-
Modern Blue and White Kitchen
You can also create a modern concept in harmony with blue and white in your kitchen. Therefore, you can use modern interior styles as creatively as possible in the various kitchen concepts you want. To create this interior style, you can determine the furniture and decorations you use.
For example, you can use furniture and decorations in bold geometric designs. This will give a modern and elegant look to your kitchen. In addition, create good lighting and good finishing in the interior. Thus, the appearance of your kitchen will look more modern in an elegant concept.
6 of 21
-
Vintage Blue and White Kitchen
A vintage style can be a harmonious concept for you to combine in white and blue. You can create your kitchen in this concept as impressive as possible according to your expression and character. This is because the vintage style can be freely created for you to be as simple as possible to be as creative as possible in your kitchen.
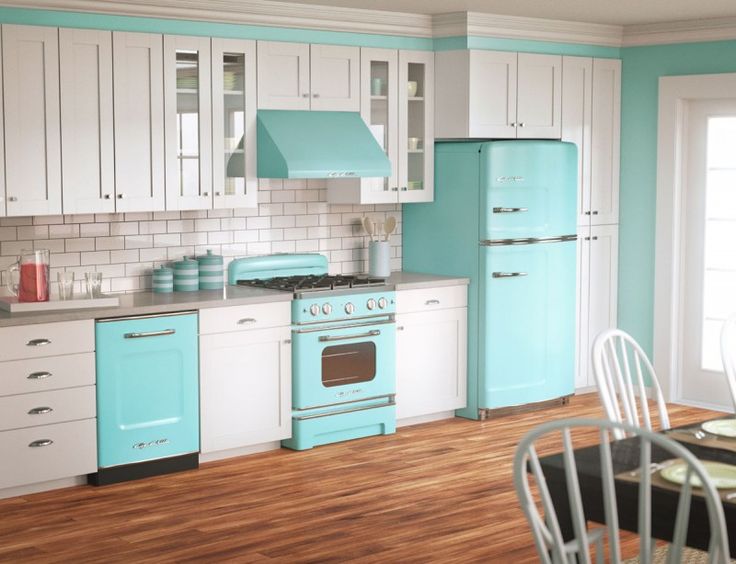
Moreover, you can also use your blue and white colors in a variety of furniture, decorations, and accessories in any design you want. Use vintage designs and other classic designs to make your kitchen as attractive as possible in an elegant old-school concept.
7 of 21
-
Luxurious Blue and White Kitchen
You can also create blue and white colors in your kitchen interior in a luxurious concept. You can create a luxury kitchen interior style and concept by determining a variety of essential things. These things include the size of the kitchen, kitchen layout, furniture, and decorations that you use in it.
Create these things in a concept that is luxurious and harmonious with each other. Moreover, also create a layout that is as comfortable as possible for your daily activities in it. In addition to this, for your convenience, you also need to create magnificent lighting in your kitchen. You can use large windows or fancy chandeliers to create it.
8 of 21
-
Kitchen with Cozy Mini Bar
In addition to discussing the various interior styles that you can use in your blue and white kitchen, we will also discuss concepts that you can create. You can create a kitchen concept in blue and white with a cozy mini bar in it. A mini bar is a place you can use to hang out with your friends and family.
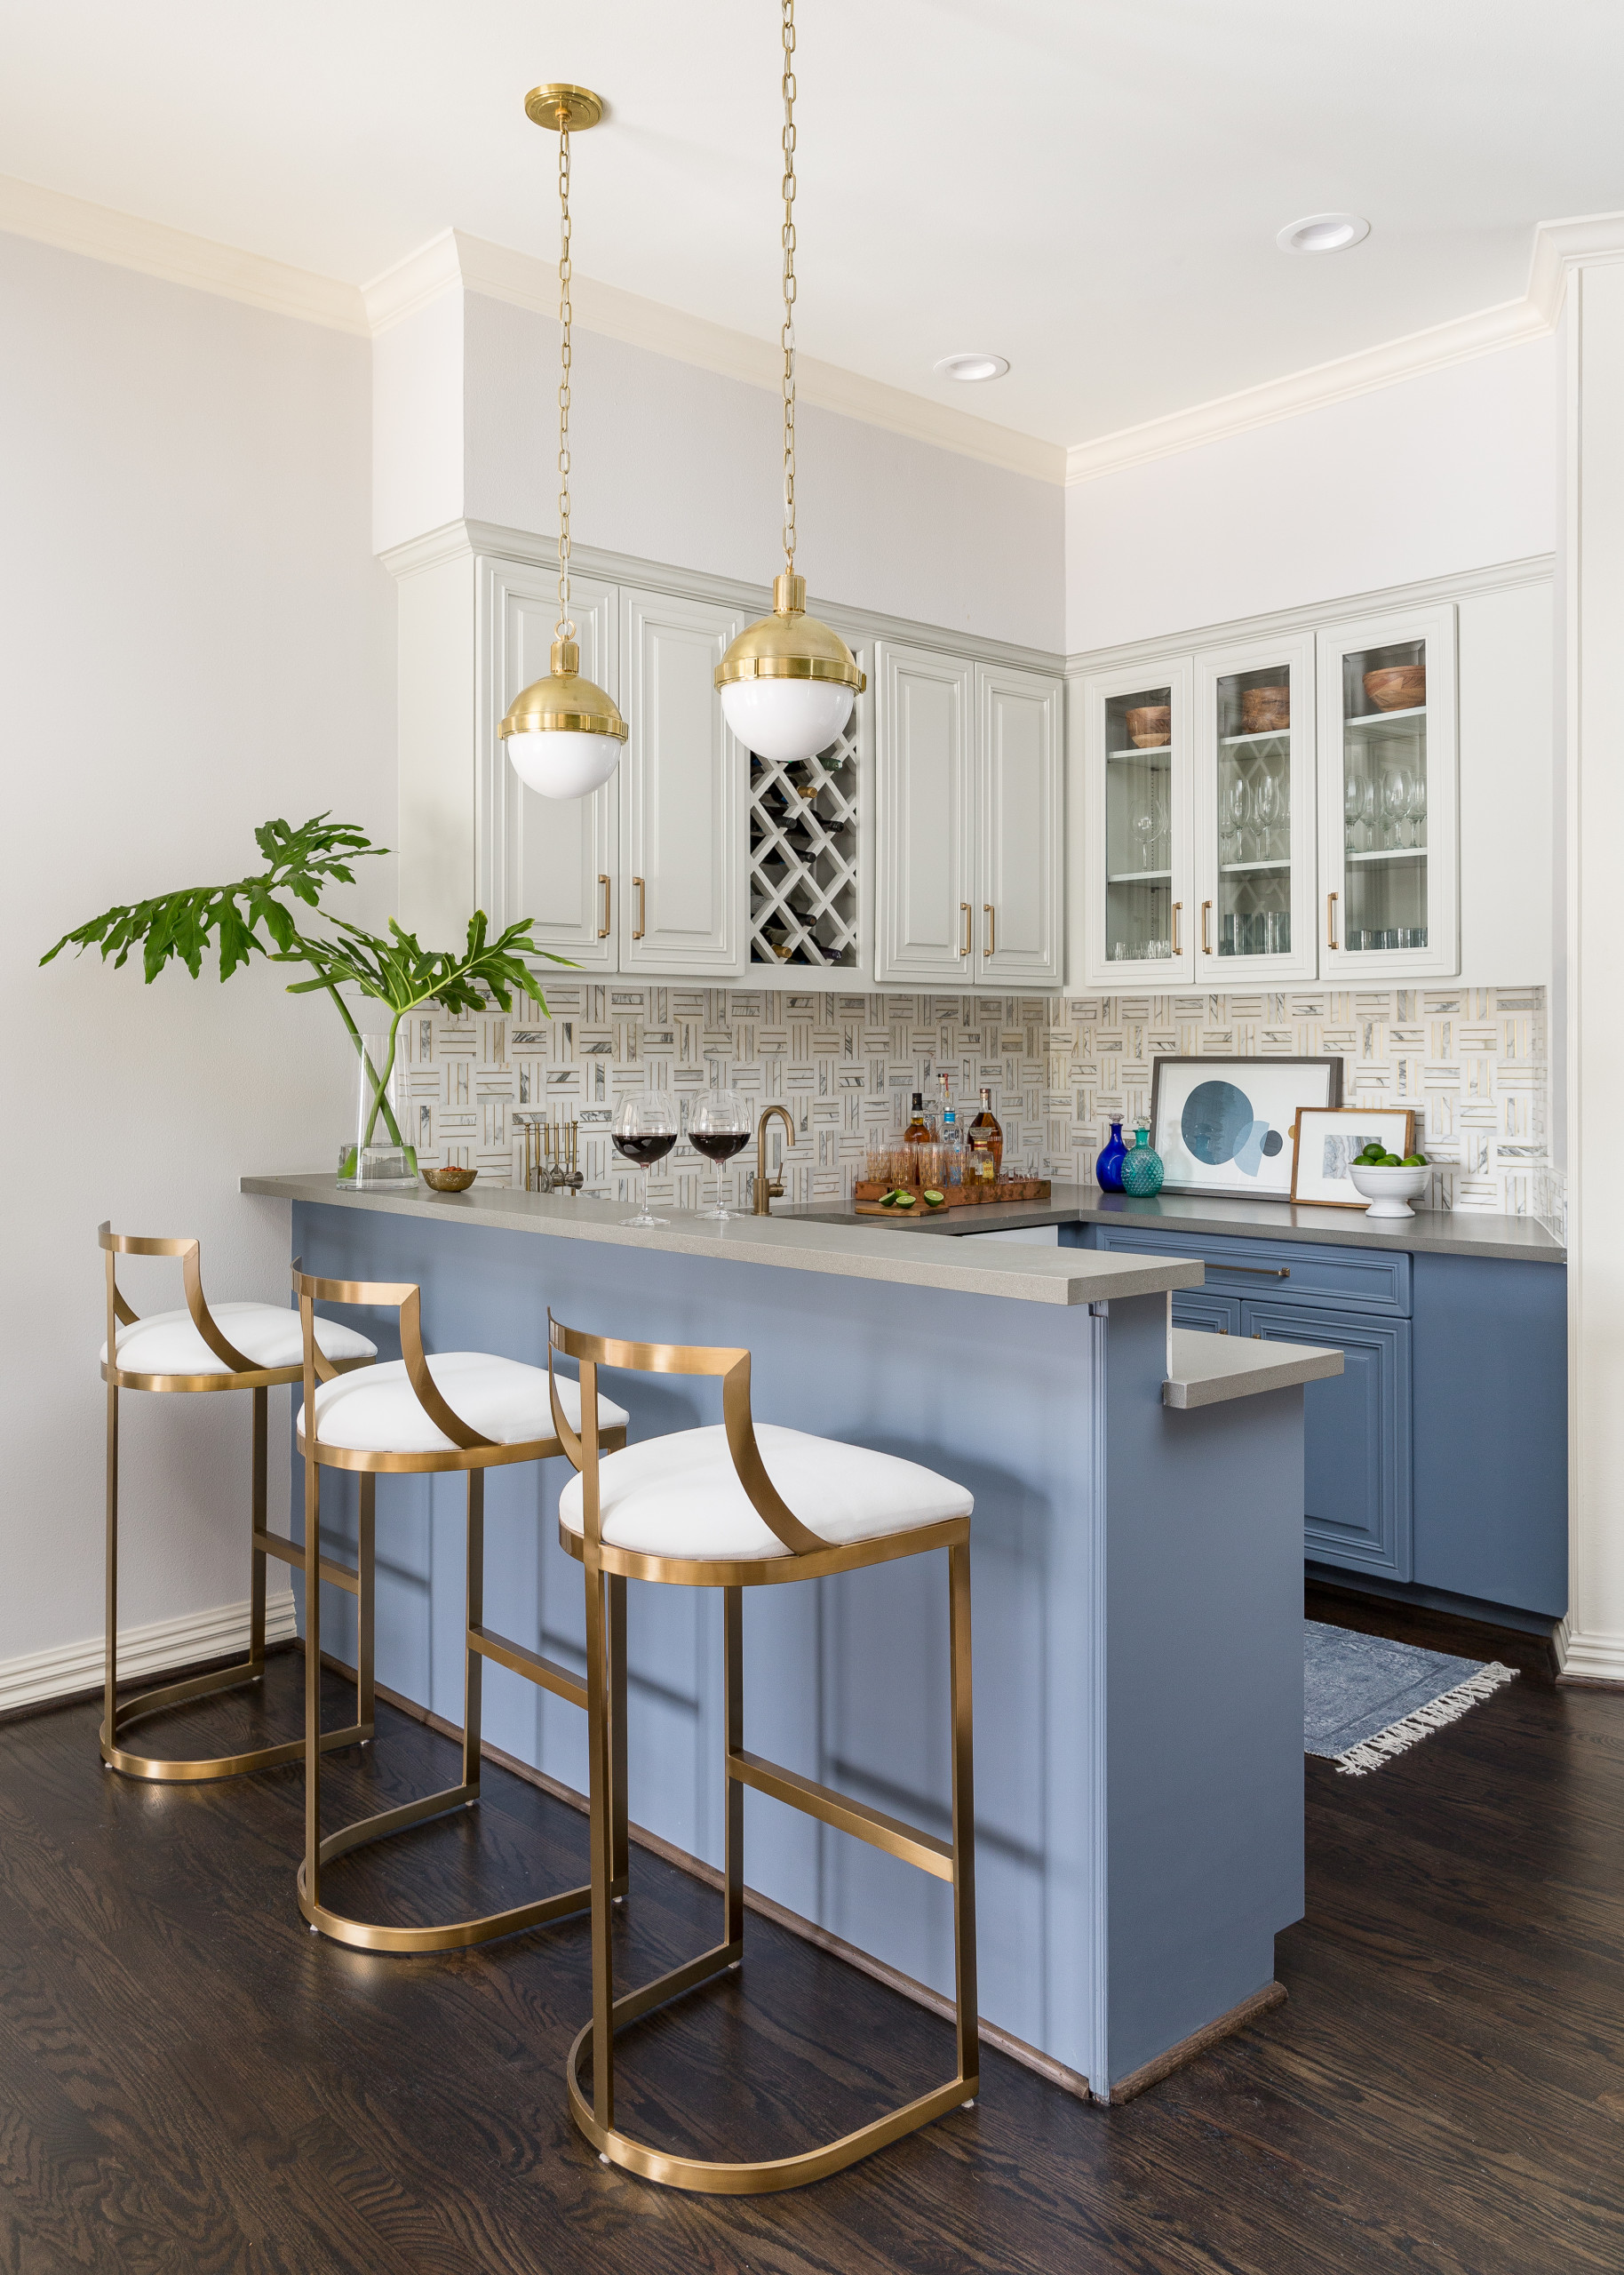
You can create your mini bar in the concept you want as creatively as possible. This is because you can use your mini bar for your wine collection or a place to brew coffee. Moreover, you can also combine them and customize them according to the event you have.
9 of 21
-
Create an Arch Decoration Concept
You can create an arch decoration in your kitchen interior as creatively as possible. Creating this concept will give you an attractive appearance in a creative and impressive concept. You can use this arch decoration in the concept of patterns, wall art, backsplashes, accents, and much more.
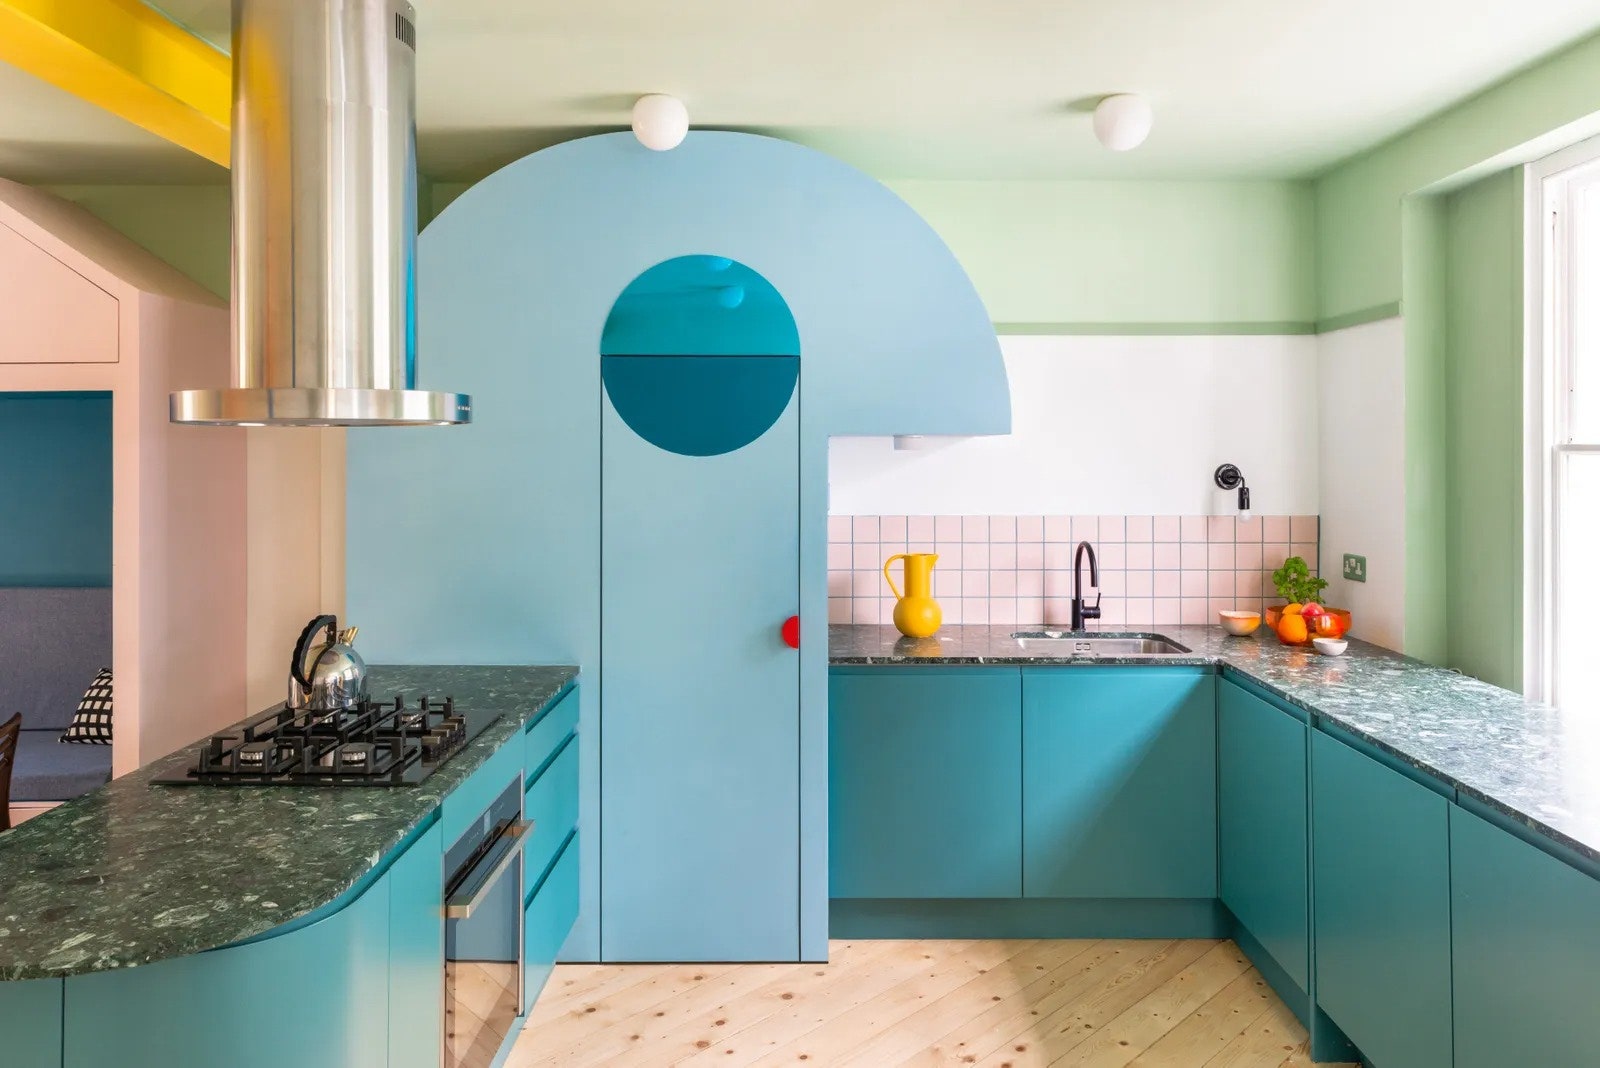
Create blue and white in this concept according to your wishes. You can create this color as an interesting accent in the interior or use it as the main color. Most importantly, make your kitchen a beautiful and comfortable place for you to cook every day.
10 of 21
-
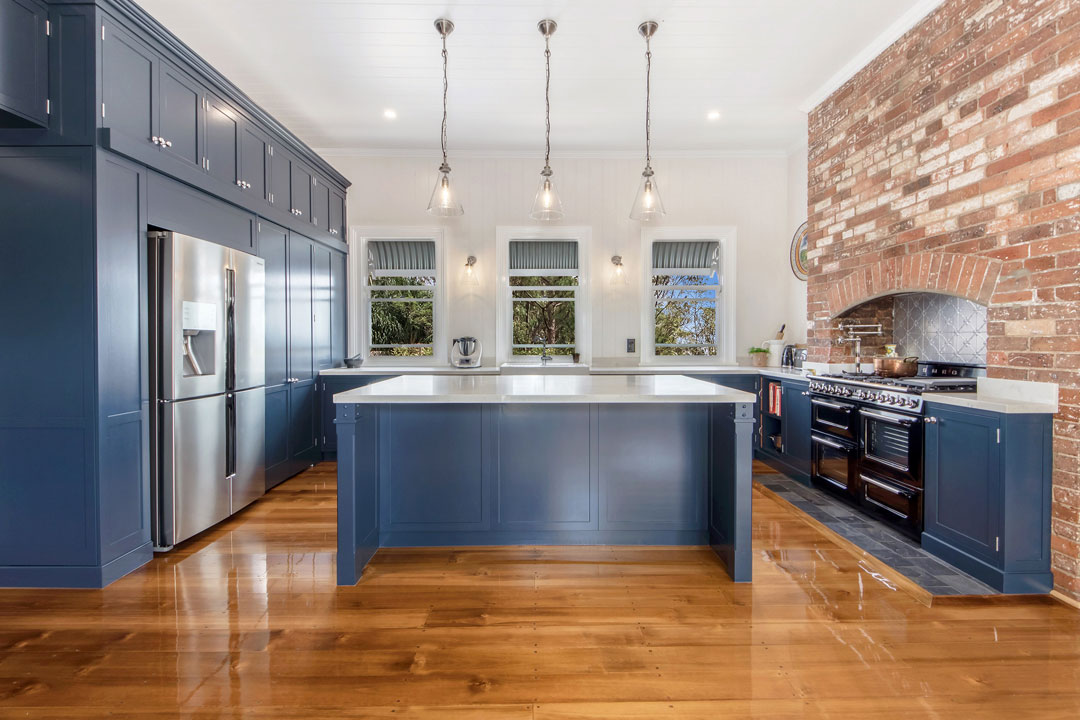
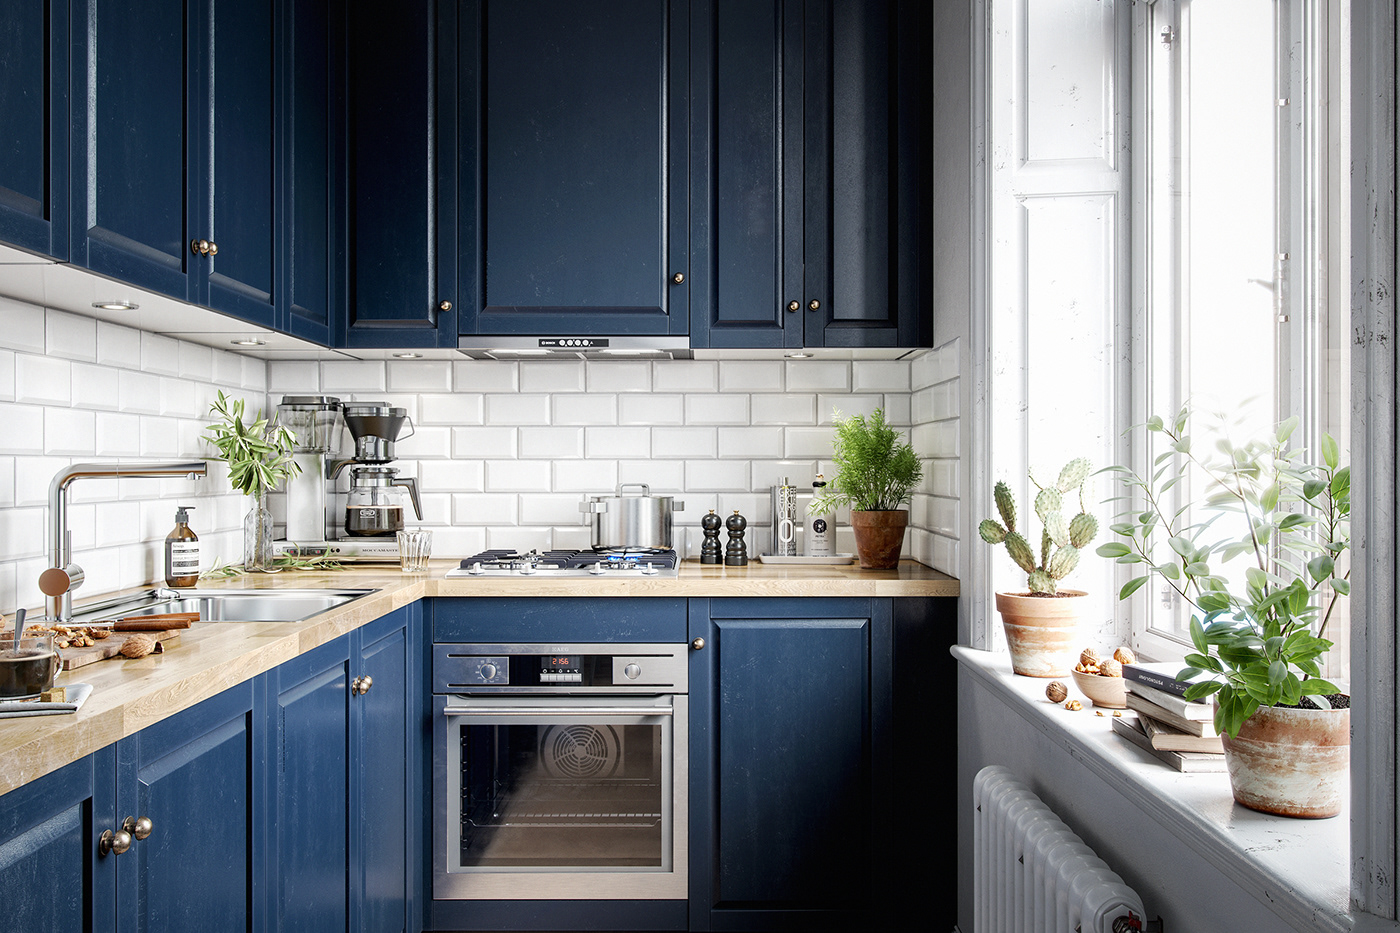
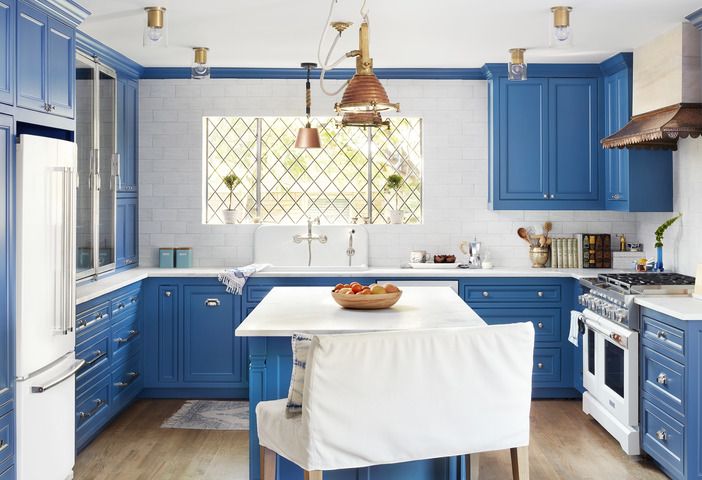
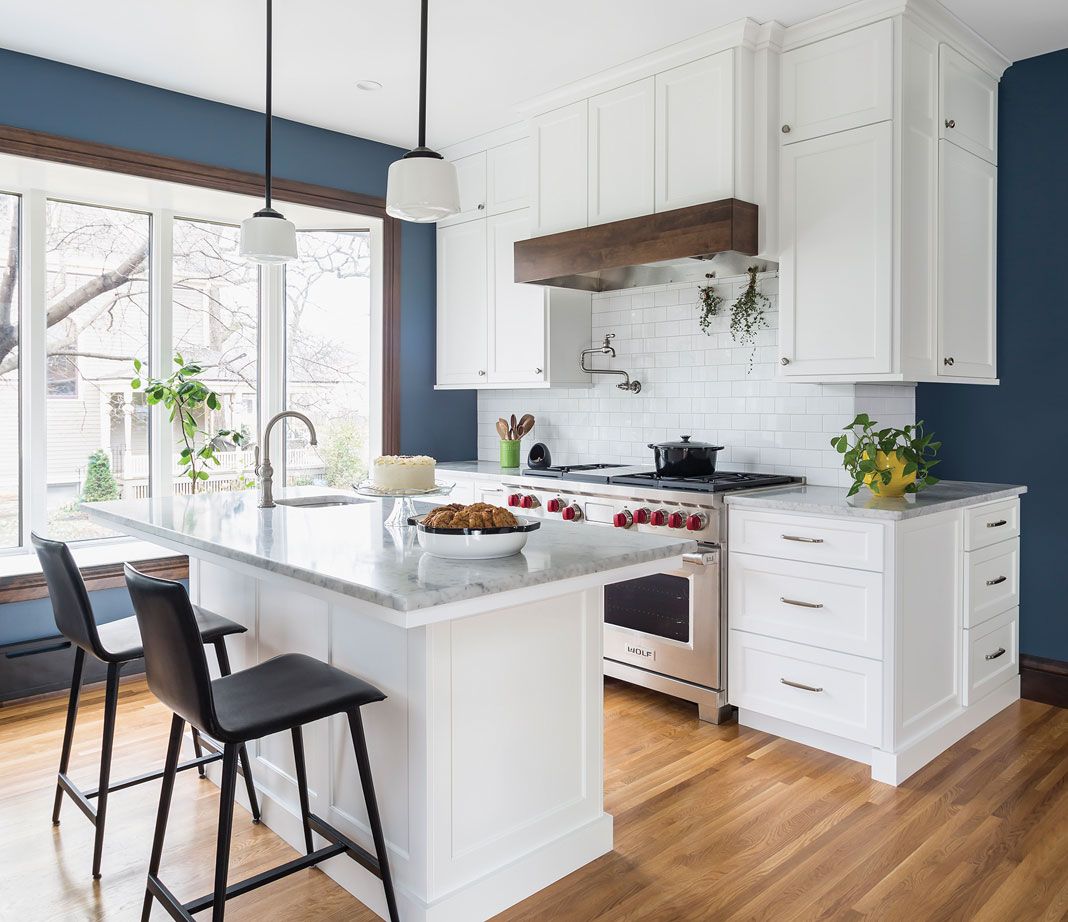
Create a Navy Blue Concept
In a wide selection of blue tones that you can use, you can create an aesthetic and elegant concept using navy blue. You can use blue with this dark color tone in a variety of interior styles that you want in your kitchen.
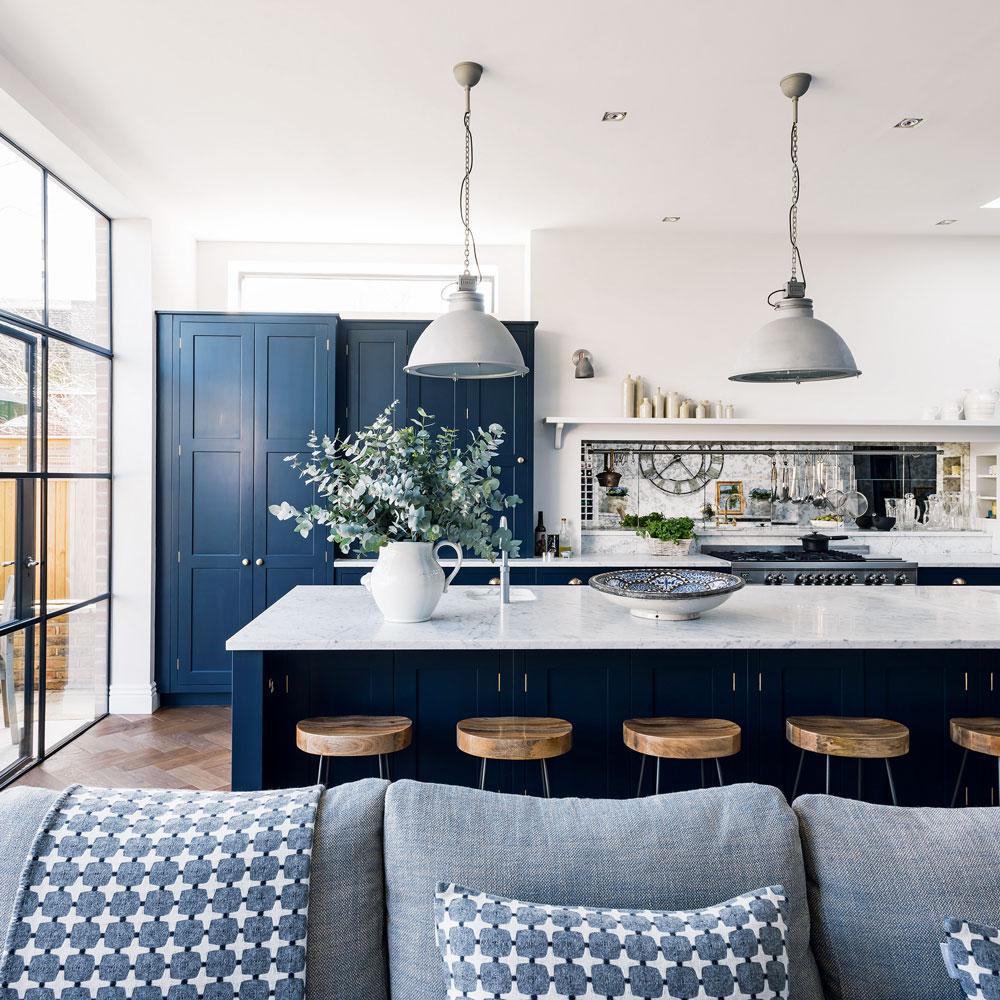
A dark kitchen will give you an aesthetic, dramatic, unique, and elegant look. Even so, the white color for you to combine with navy blue also plays an important role in creating a lively look. You can create this white color in harmonious compositions and combinations as both an accent and a balanced color.
11 of 21
-
Create a Soft Blue Concept
You can also use blue in soft color tones in your kitchen interior. Using soft color tones can give you a sense of comfort and tranquility in your daily activities. To create a soft atmosphere, you can use a variety of methods and concepts.
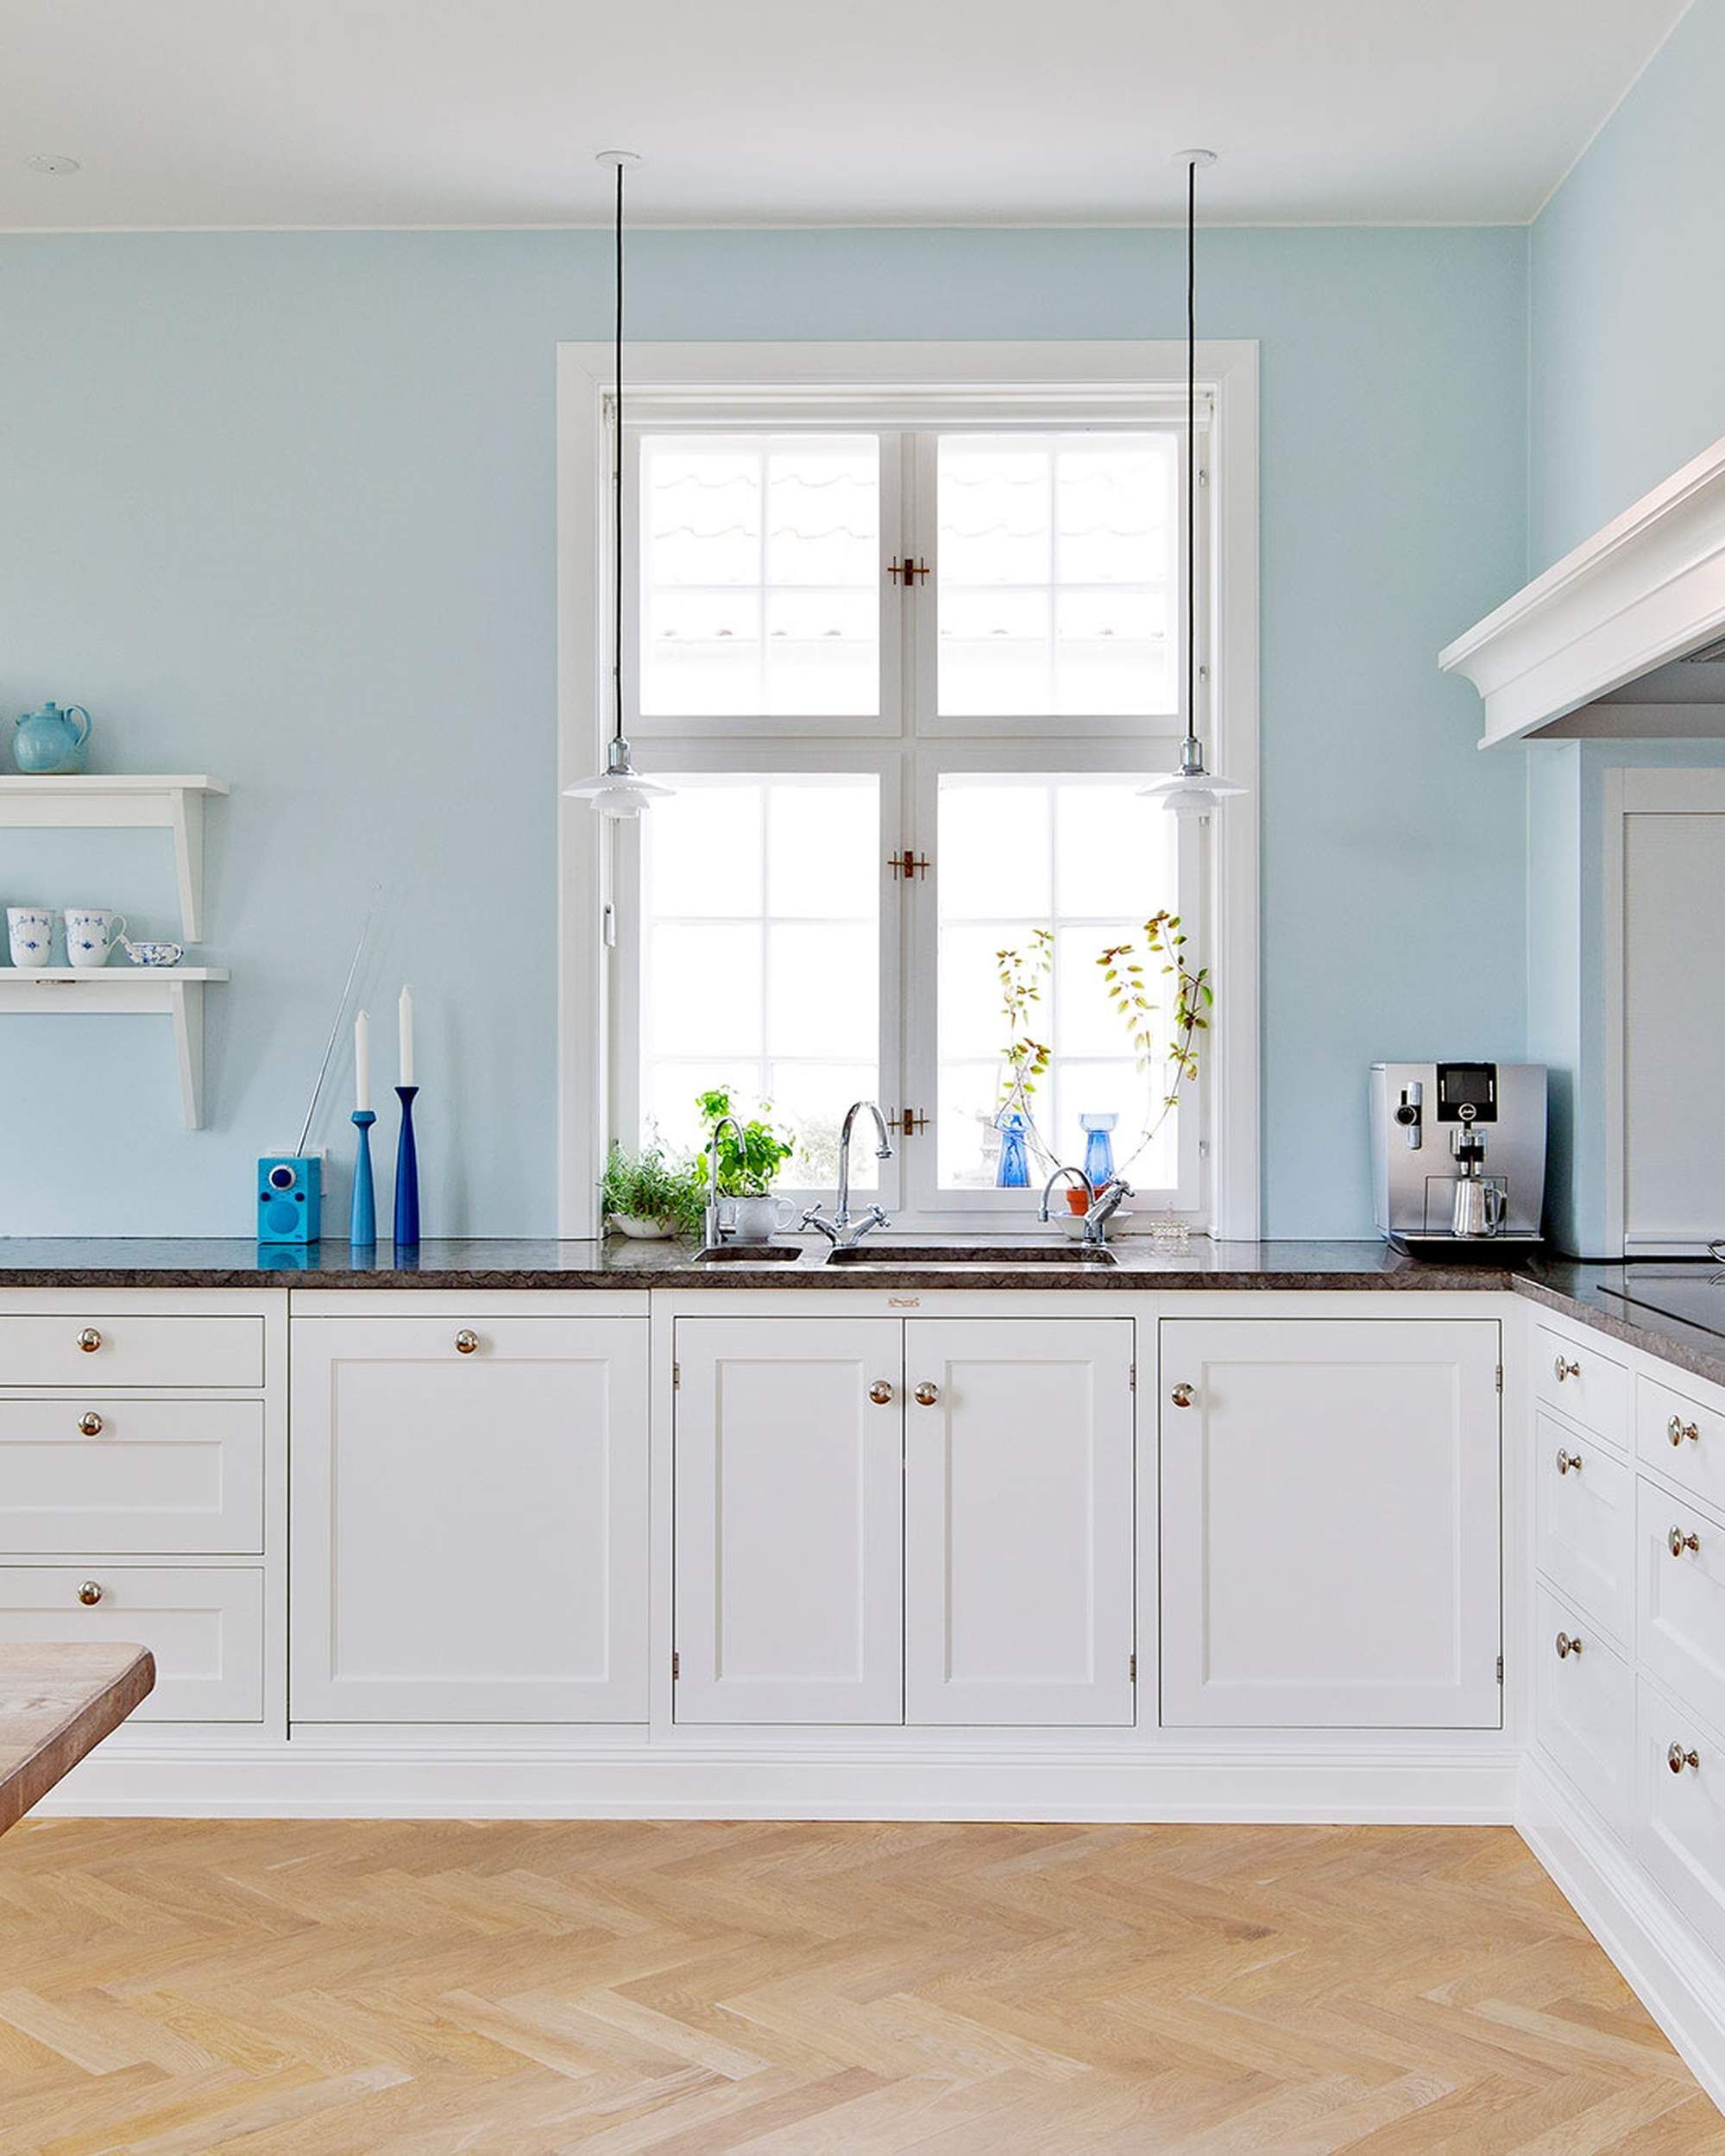
For example, you can use bright blue and pale white tones. The combination of these two colors will give a calm, soft, and cozy look. Meanwhile, you can also create a soft concept from the interior style you use. You can use shabby chic, Scandinavian, and other soft interior styles that you want.
12 of 21
-
Create a Bright Refreshing Concept
In addition to creating an elegant and soft look, you can also create bright color tones in your kitchen interior. Create a combination of blue and white in bright colors in the interior of your home. Using this bright color you can create in a variety of creative and impressive ways. For example, you can use bright blue in various parts of your kitchen interior.
Meanwhile, also use white in a harmonious concept as the main bright color in the interior. A bright interior concept will make all the furniture and decorations you use appear more stand out and attractive. Especially if you also create magnificent lighting in your kitchen.
13 of 21
-
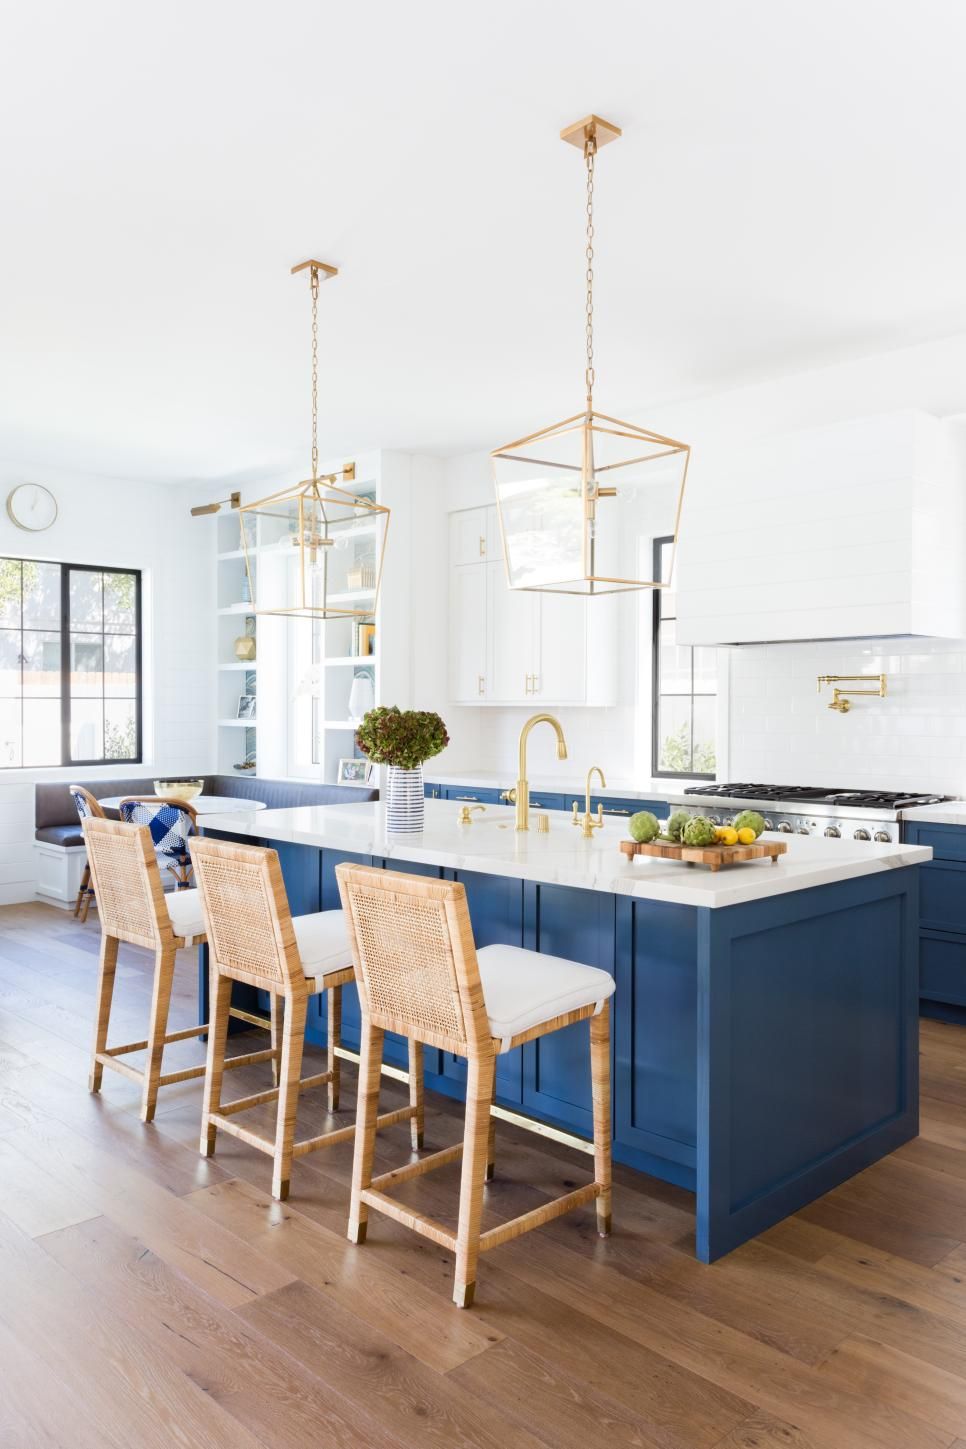
Give an Elegant Gold Color Accent
Aside from using blue and white as the main colors, you can also add other color accents that are no less interesting. One of the accents that you can create in your blue and white kitchen interior is gold. Using gold accents is very flexible for you to create creatively in your kitchen interior.
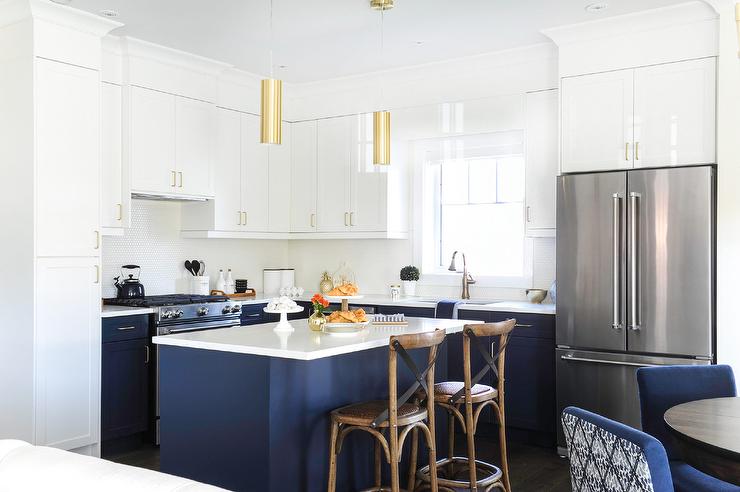
For example, you can create it in this golden color concept on furniture, decorations, and accessories in your kitchen. Most importantly, the gold color accents that you create are not too excessive and tacky. Thus, you can create a harmonious combination of blue, white, and a little gold in an elegant concept.
14 of 21
-
Give a Refreshing Plant Accent
Besides using an elegant gold color as an accent, you can also use natural accents from ornamental plants. Ornamental plants will give you a refreshing look in your kitchen interior. You can use various types of plants that you want according to your creativity to create natural accents.

Moreover, you can use ornamental plants or vegetables according to your needs. Ornamental plants will provide a refreshing natural aesthetic value. Meanwhile, vegetable plants will give you a beautiful and functional value for your food ingredients when you need them.
15 of 21
-
Give a Warm Wood Material Accent
You can also create natural accents from other materials that are no less interesting for your blue and white kitchen interior. Use natural accents from wood materials freely for various parts of the kitchen interior you want. For example, you can use this wood material for furniture, decorations, ceilings, floors, and various other interior parts.
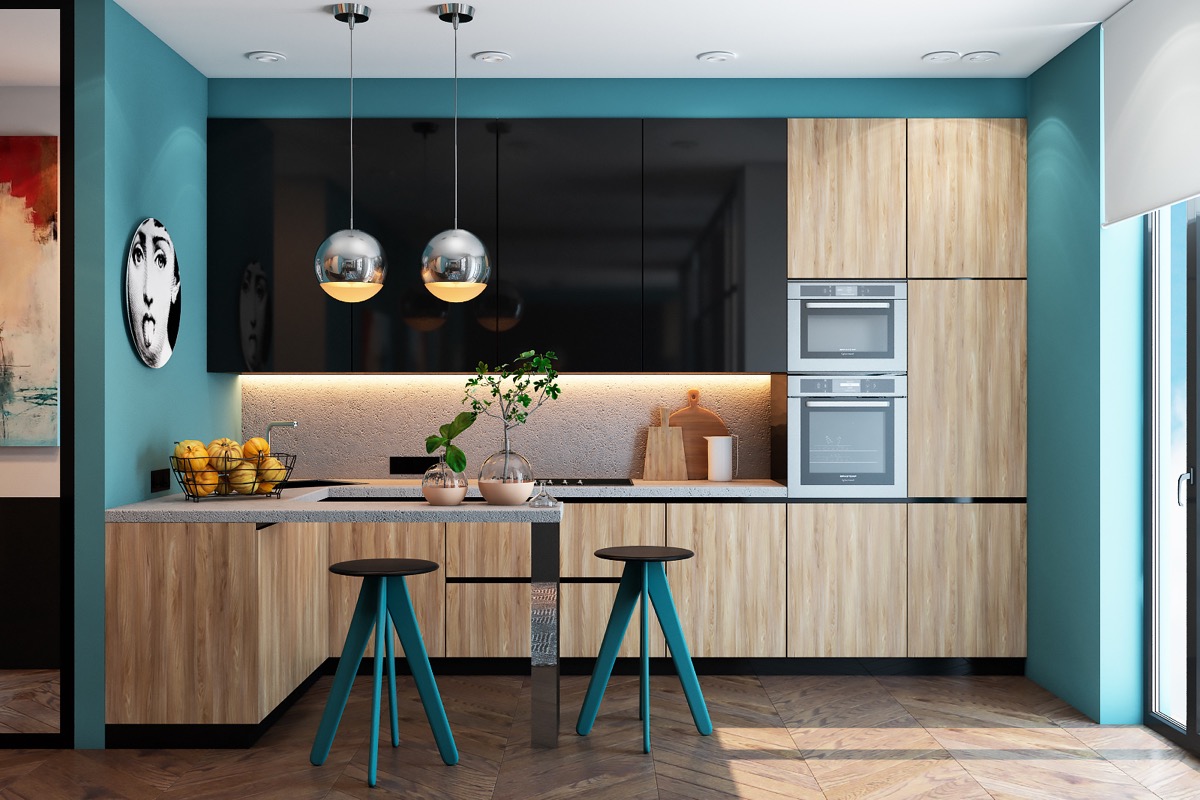
Moreover, you can use this wood material also in its warm natural color or blue and white. Create the concept and style you want in using this wood material in your kitchen. Thus, you can create a cozy, bright, and refreshing kitchen in a warm atmosphere.
16 of 21
-
White Color for Bright Backsplash
You can create a very diverse combination of blue and white in your kitchen according to your expression and character. One of the color concepts that you can create is to create white as a bright accent in the interior. One of the right white accents for you to create is on your kitchen backsplash.
Creating a white backsplash in your kitchen will give you an attractive look. You can create a bright accent between the various color displays. This is because you are free to choose blue tones both in dark, bright, soft, and soothing tones.
17 of 21
-
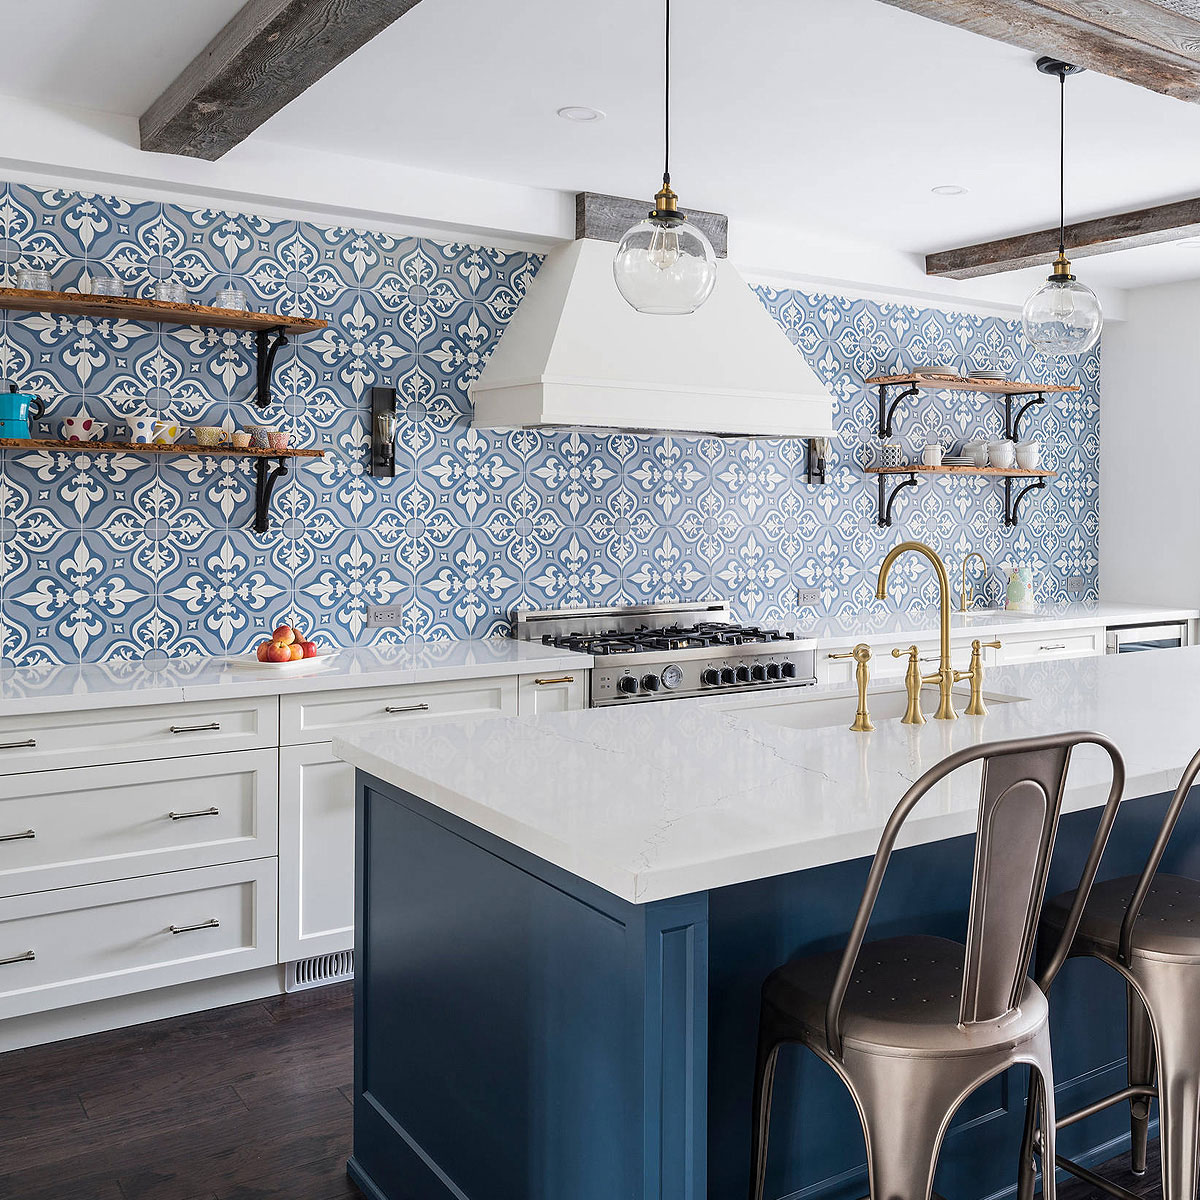
Blue Color for Aesthetic Backsplash
In addition to using white for your kitchen backsplash, you can also use blue as an alternative. You can create this interestingly in a bright white kitchen interior. Use this blue backsplash in a variety of patterns, designs, and concepts that you want in your kitchen.
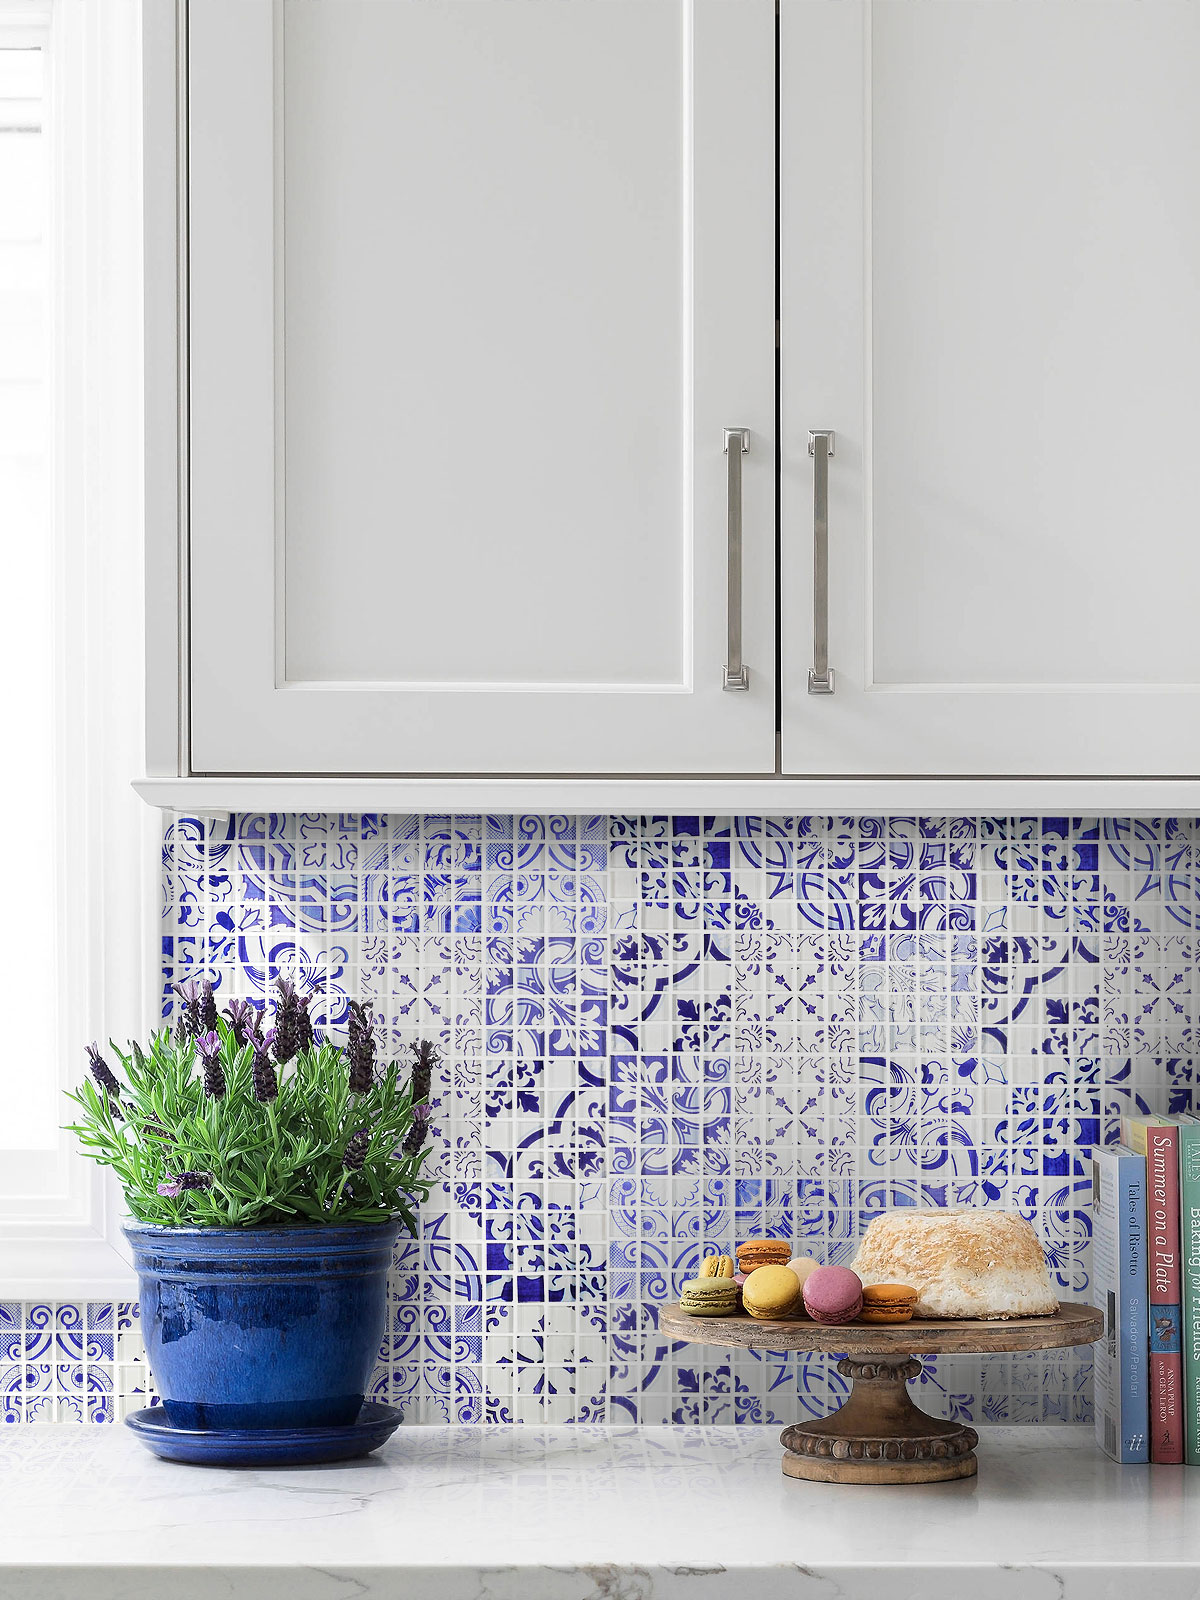
You can make it simple to festive according to the style of the kitchen interior you want to create. In addition, various blue tones can also make it easier for you to create a creative and impressive backsplash concept.
18 of 21
-
Blue Color for Pendant Lamp in the Kitchen
You can create lighting in the interior of your kitchen as creatively as possible using a variety of ways you want. One way that you can use is to determine the color of the frame and lighting cover you use. For that, the next idea that you can create in your blue and white kitchen is to use blue for your pendant lamp.
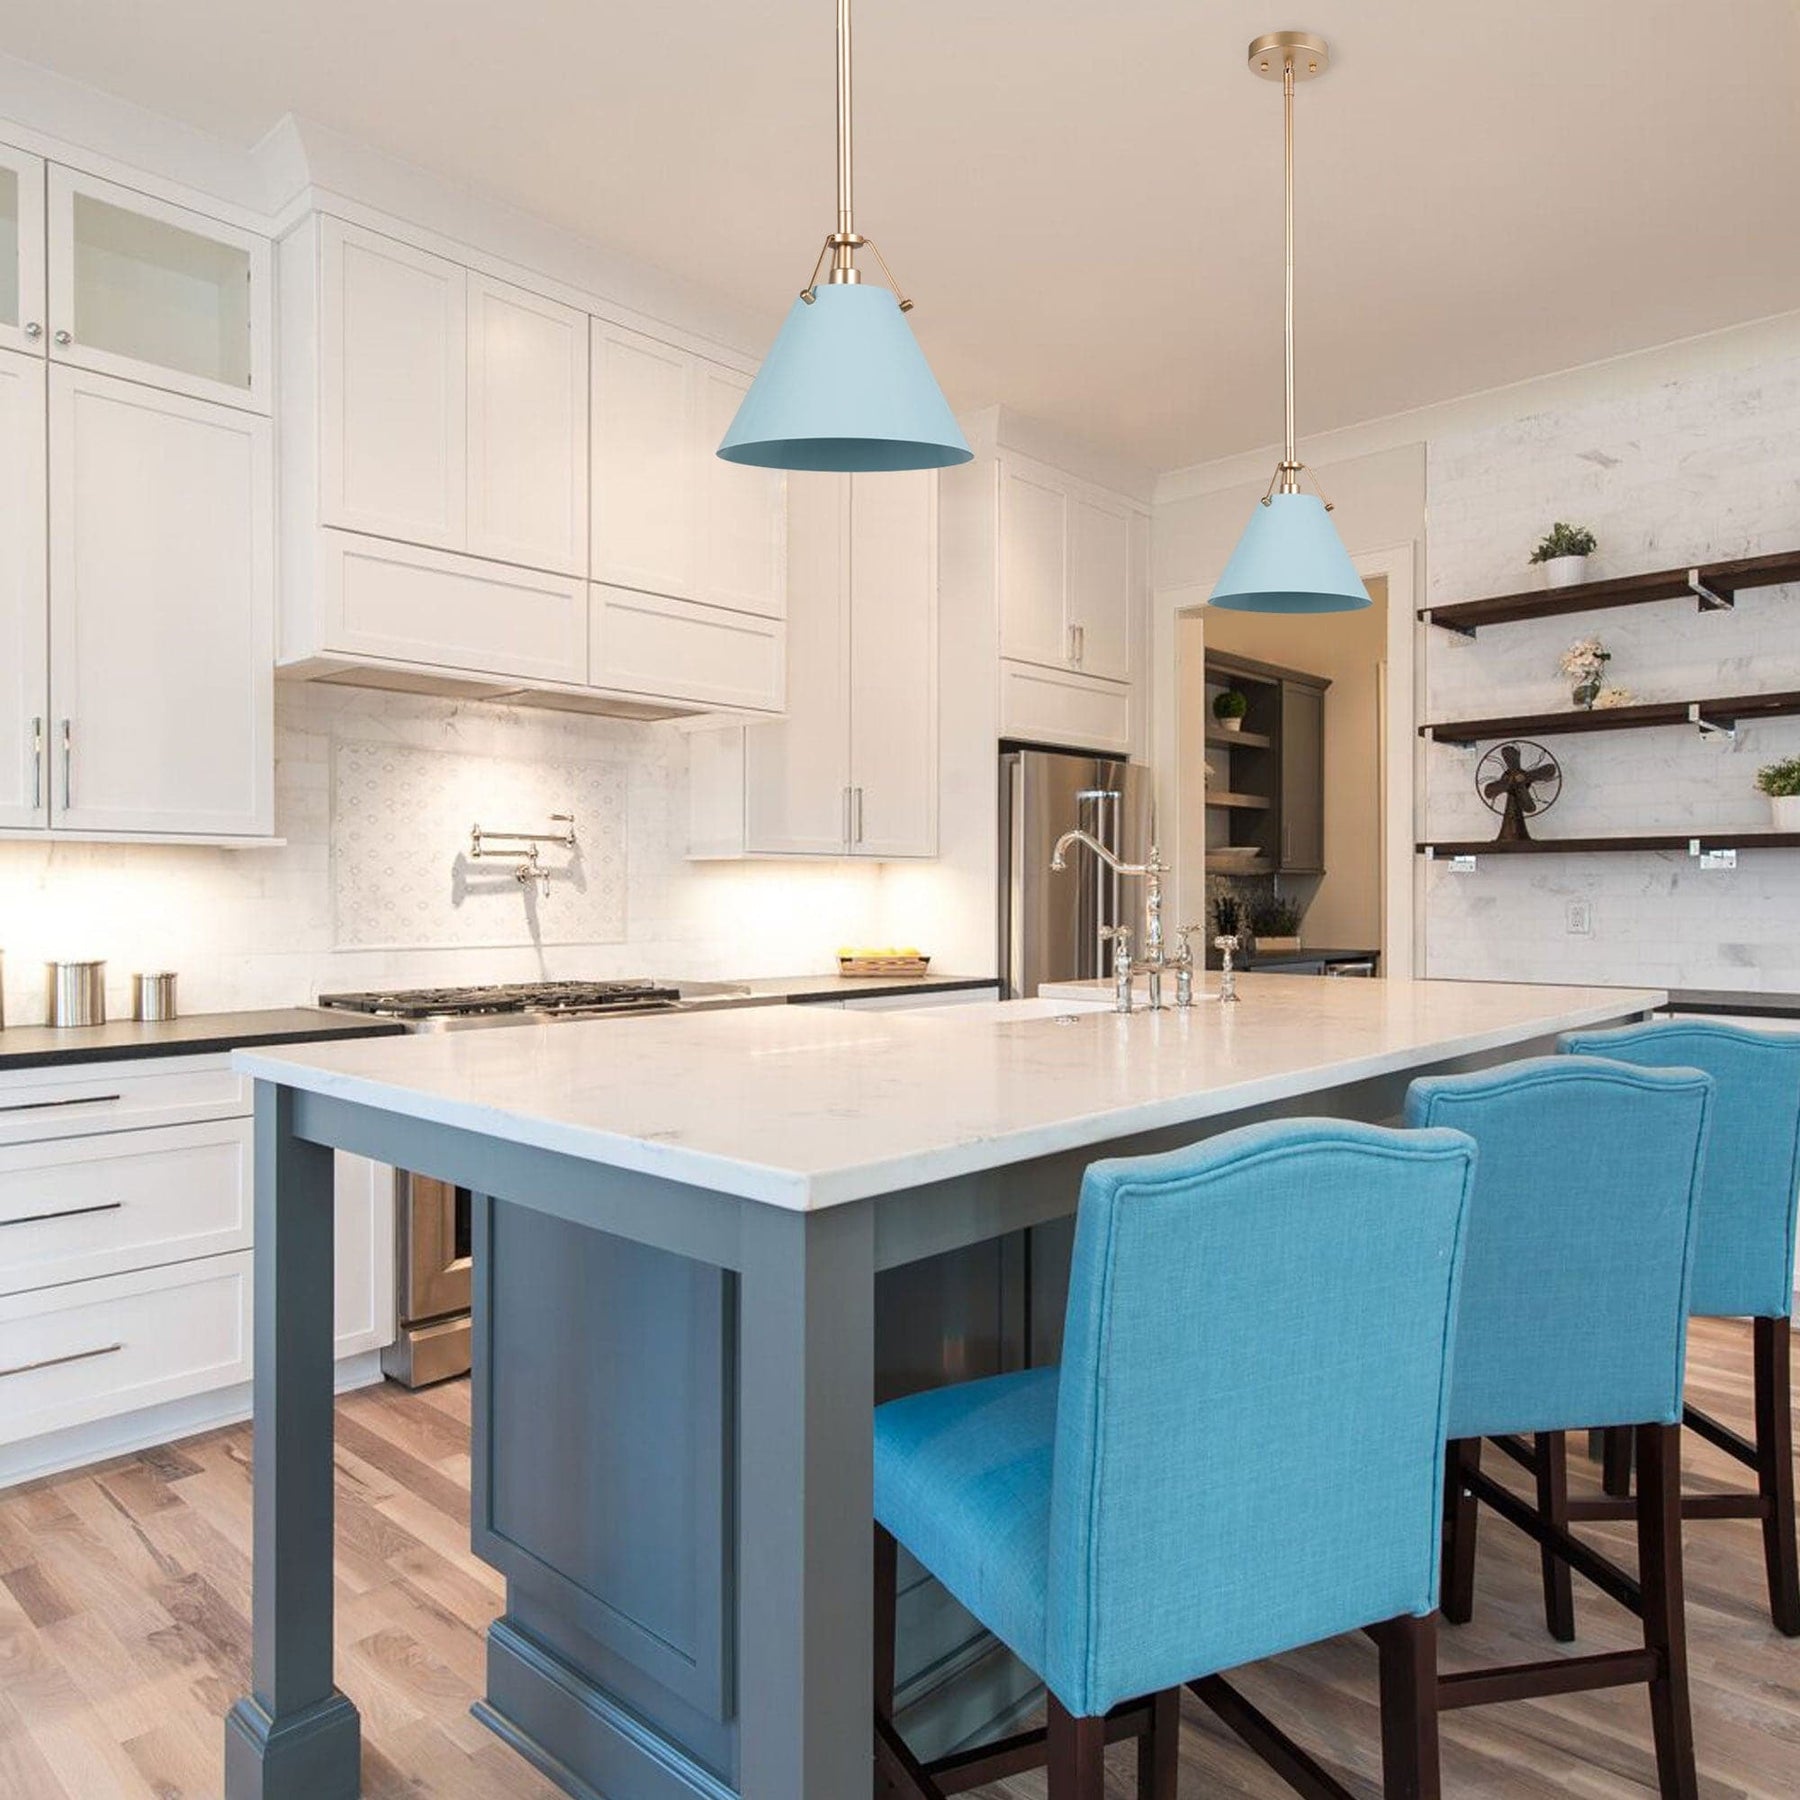
You can use pendant lamps in various parts of your kitchen according to your needs. In addition, you can also choose a pendant lamp in harmony with the interior style that you create. For that, this concept will be very flexible for you to create in an aesthetic blue color.
19 of 21
-
Blue as an Accent in the Kitchen
The next idea that you can create in your kitchen is to use blue as an accent. In combining colors, you can create compositions freely according to the appearance of the interior you want to create. For that, using blue as an accent can be an option that you can follow. You can use blue as an accent in various parts of the kitchen interior that you want.
For example, you can use it for furniture, decorations, accessories and so on. Meanwhile, you can create the main color in your kitchen interior in bright white. The concept of this color combination can also be very flexible for you to use in a variety of interior styles, especially minimalist.
20 of 21
-
Blue and White in a Unique and Aesthetic Pattern
The last idea in creating the concept of blue and white in your kitchen is in an aesthetic pattern. You can create aesthetic patterns in your kitchen in a variety of ways you want. For example, you can use it on wallpapers, backsplashes, compositions, and so on.
Create these patterns as a unique color combination in your kitchen. Besides being beautiful, the aesthetic pattern will also give you a good mood and vibes. This will give you enthusiasm and comfort in your daily activities in your kitchen.
21 of 21
Thus our discussion of 21 Blue and White Kitchen Ideas: Aesthetic and Refreshing Atmosphere. With a variety of concepts, ideas, and inspiration that we have discussed, you can choose according to your creativity. You can use blue and white in your kitchen in a variety of concepts that you want. This is because you can create this color combination in the simplest to the most festive concept. For that, create a kitchen interior with the most impressive designs, styles, concepts, and colors in your home. Choose and combine refreshing blue and bright white creatively in the kitchen interior that you create. Happy decorating!