Home Blog Page 28

Tropical Ornamental Plant Ideas for Your Home Garden

0

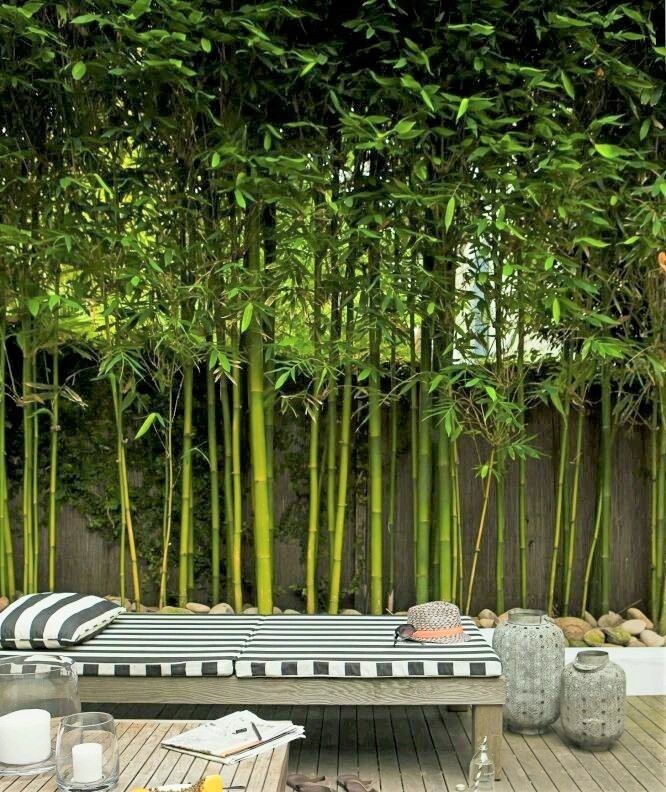
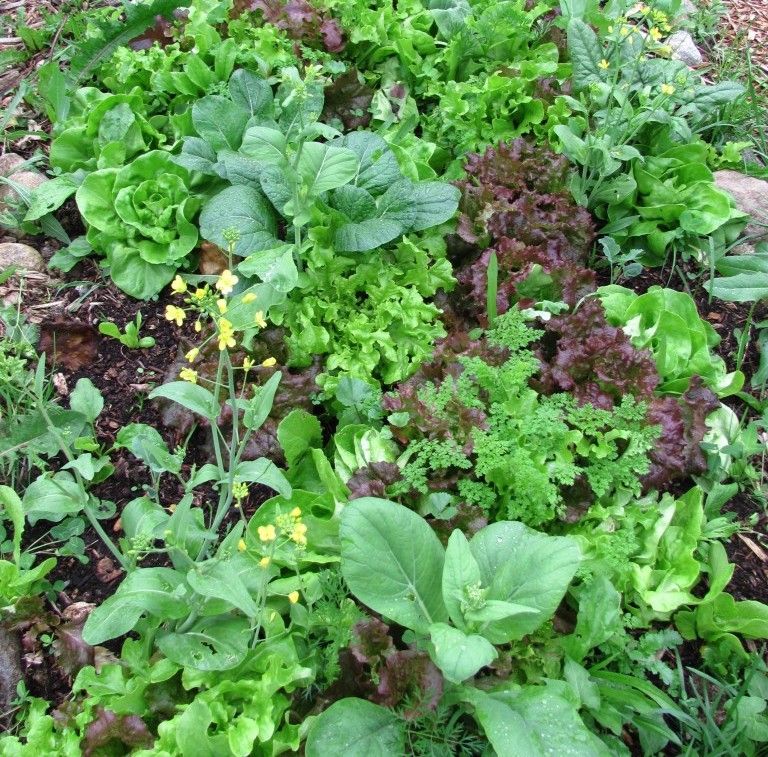
Homesfornh.com – A tropical garden is a jungle-like place to get fresh air. This garden consists of many tropical plants. You can find the big and large foliages in this garden. The natural atmosphere in this garden brings a cool and fresh ambiance, especially if the plants grow in your home area. Besides, it creates a shady impression. For that, in this article, we will discuss Tropical Ornamental Plant Ideas for Your Home Garden. You can read this article to find out the arrangement of these tropical ornamental plant ideas in a tropical garden. We start from the biggest plant to the smallest plant. This structure is beneficial to guarantee the plant’s roots grow. Let’s see them!

Big Foliages

The first ornamental plants we discuss are the big foliages plant variety. You can use a variety of these ornamental plants for decoration and various parts of the house you want. What’s more, you can use it for your tropical garden, starting from a mini garden to your backyard garden. Let’s discuss!

  • Plumeria

Plumeria

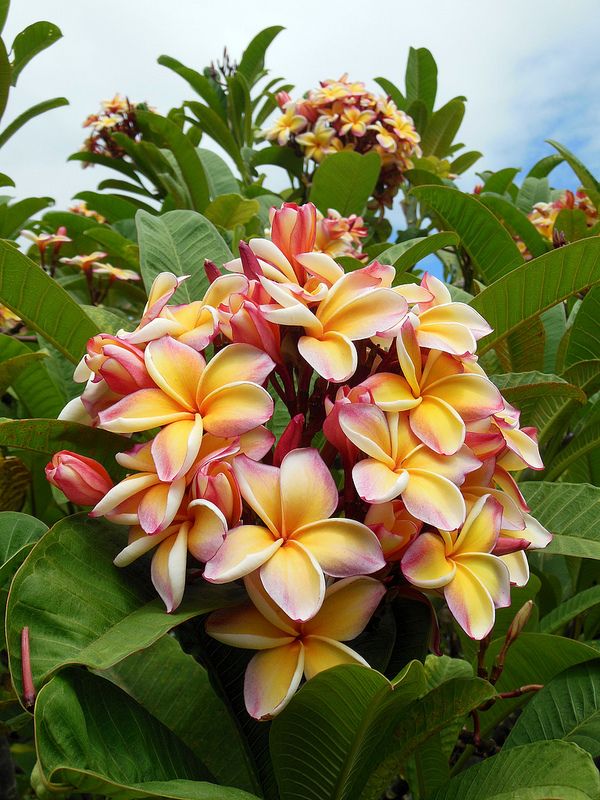
Plumeria or Frangipani is a tropical tree with beautiful flowers on its branches. This plant usually grows in dry conditions. You may ever see this plant dominates a garden because it grows fast in the fertile soil. Plumeria is nice to grow as the tropical plant in the first row. It will draw attention to its woody stem and stunning flowers. You can grow and arrange smaller plants in front of this plant.
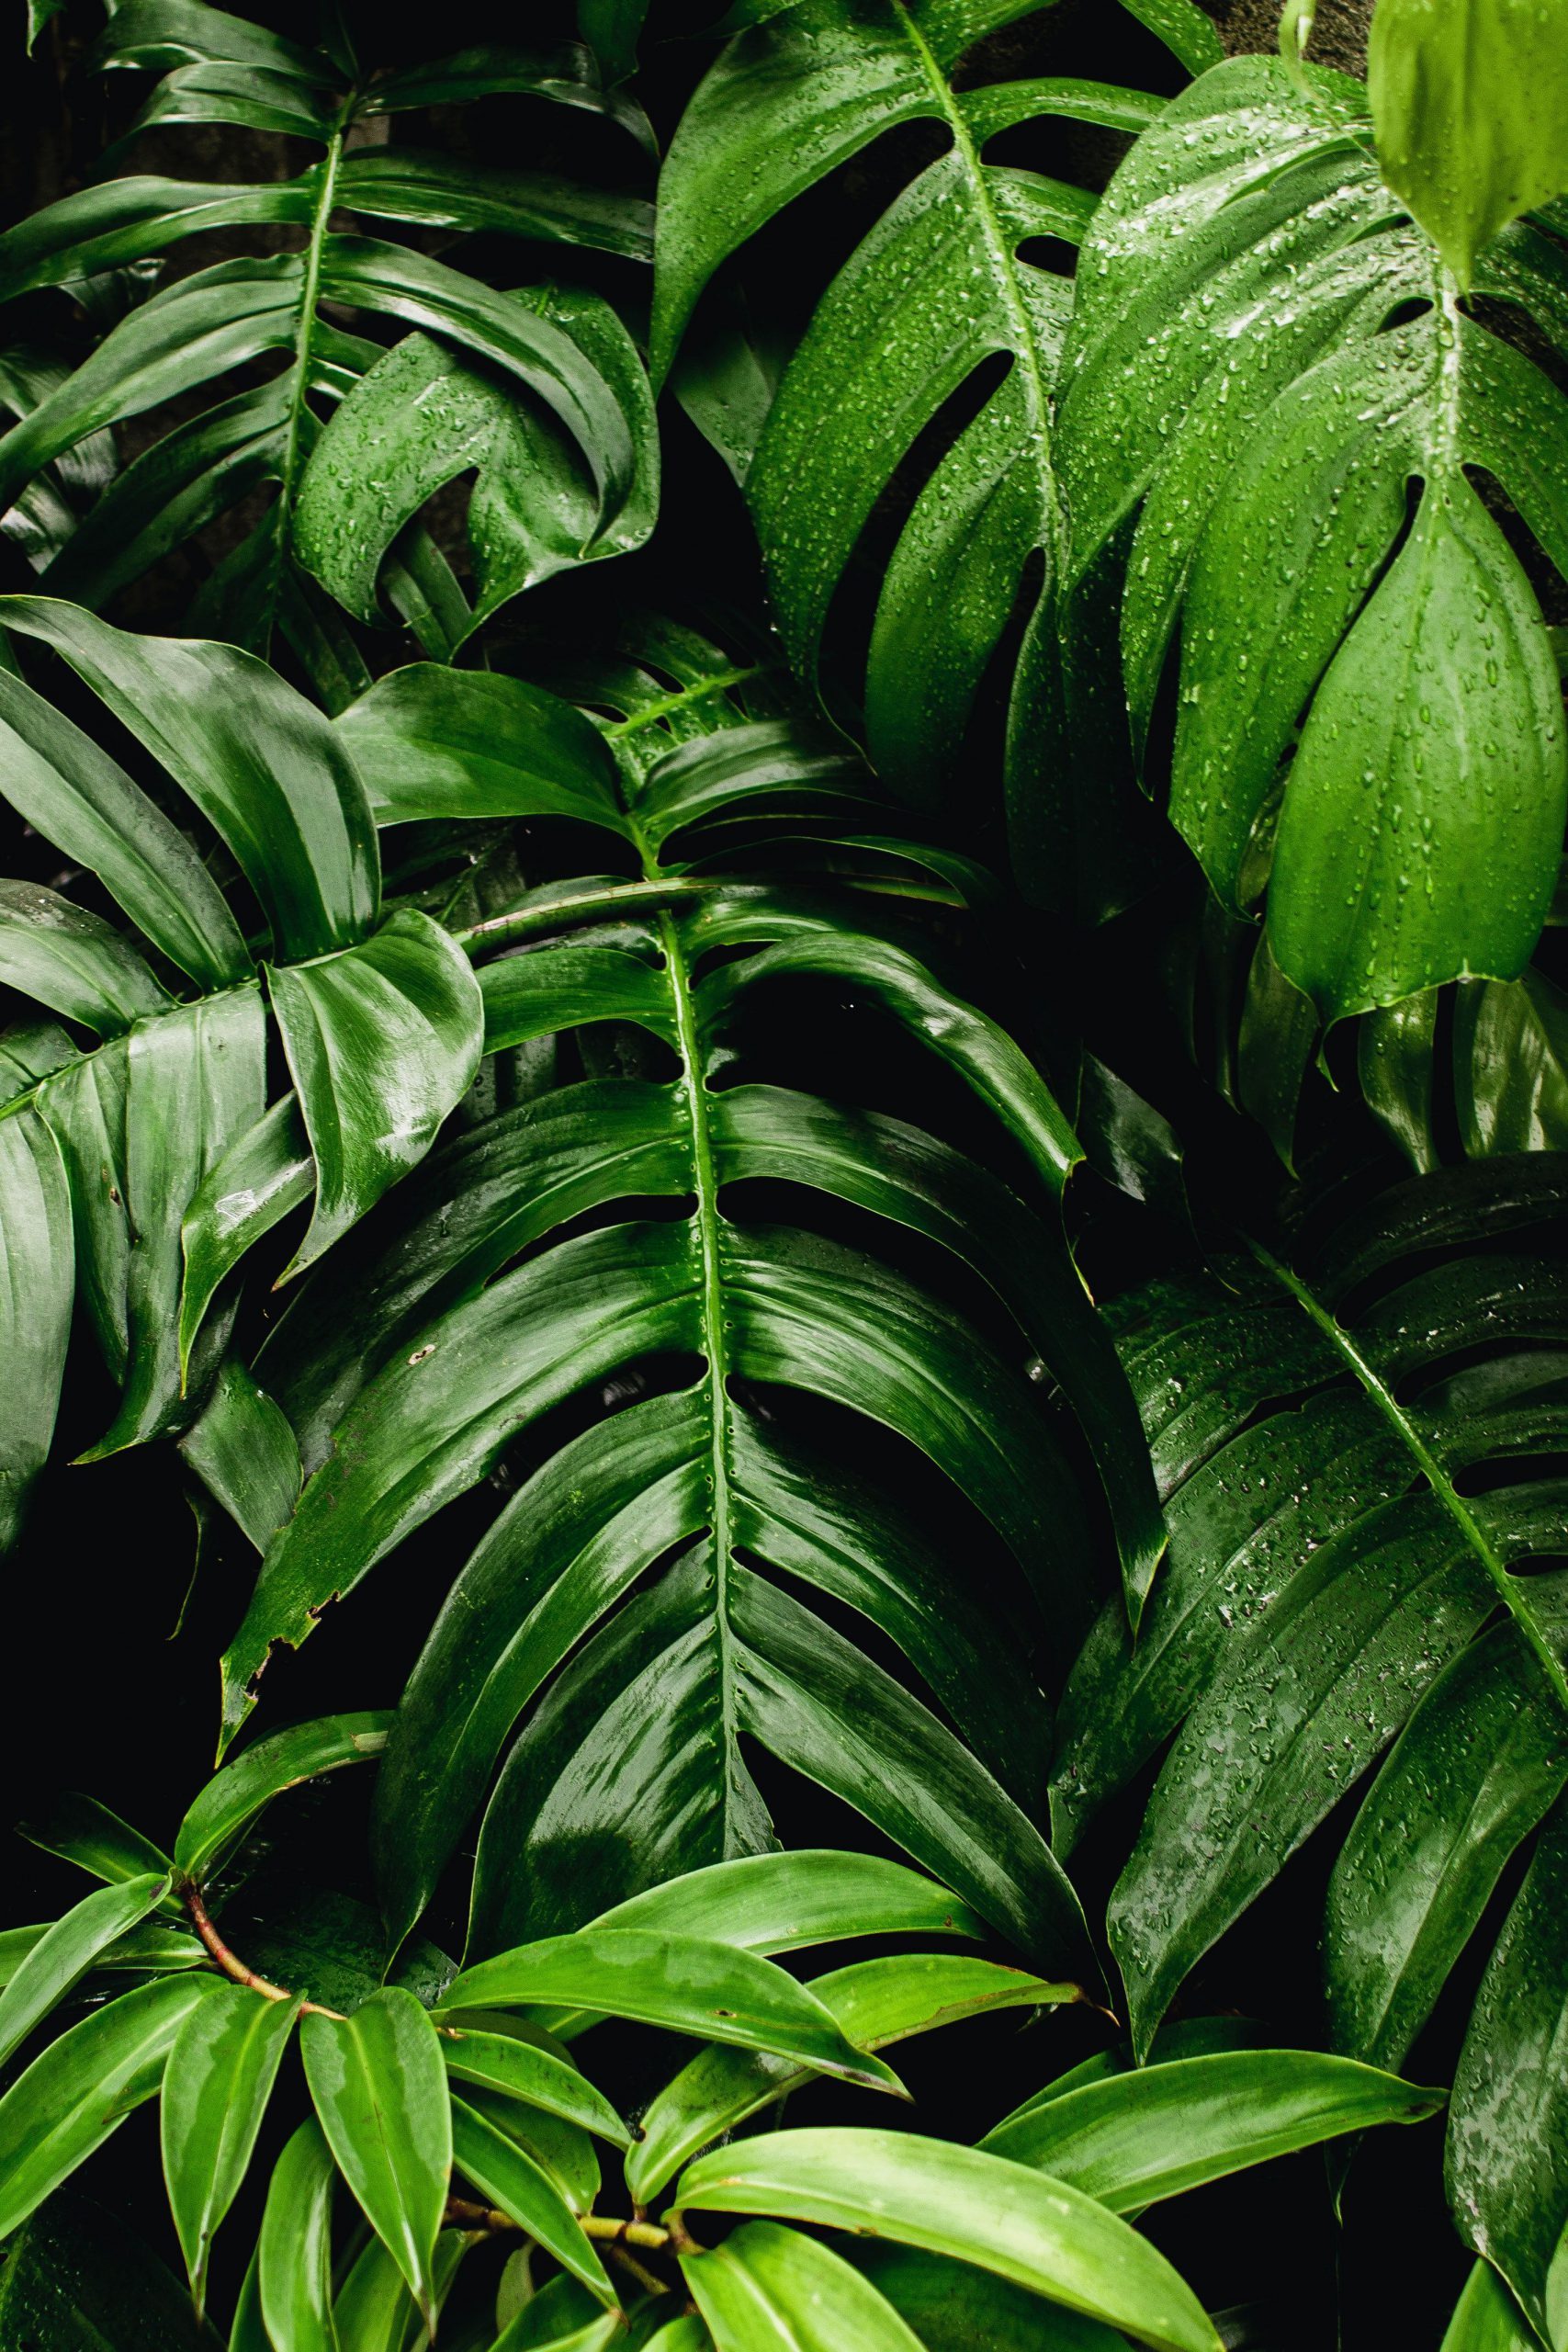
  • Monstera Deliciosa

Monstera Deliciosa

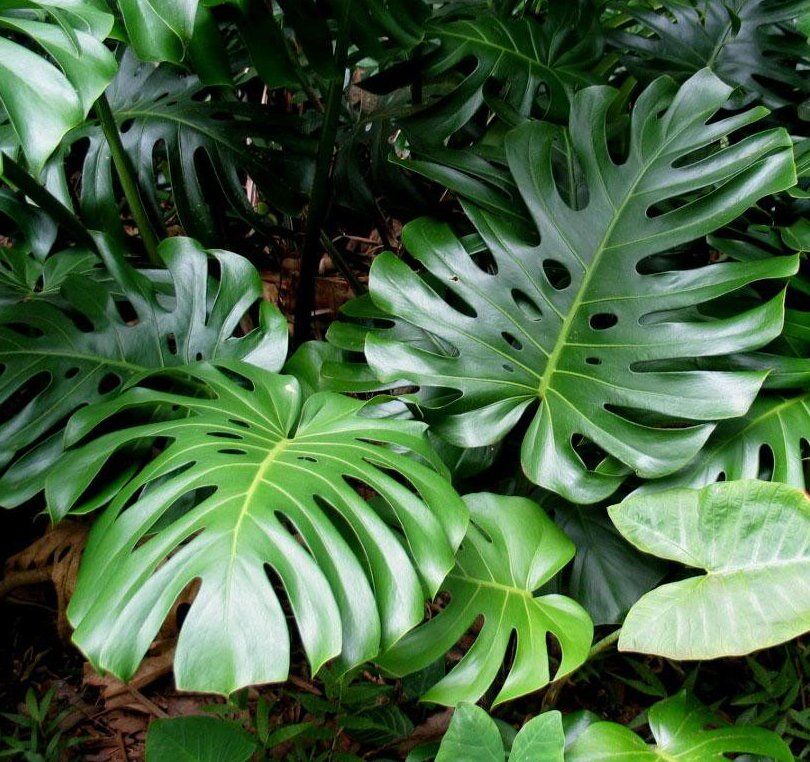
Monstera Deliciosa is a stunning perennial plant. This plant likes to get bright indirect light. The leaves can grow up to four feet tall. The giant Monstera has 10 feet tall, thus this plant is nice to grow at the first row in your tropical garden.  Monstera grows well in moist soil, thus, you need to water it quickly when the soil starts to dry. It likes to grow in well-draining soil. Make sure that you grow Monstera in fertile soil from the beneficial ingredients of soil.

  • Calocasia

Calocasia

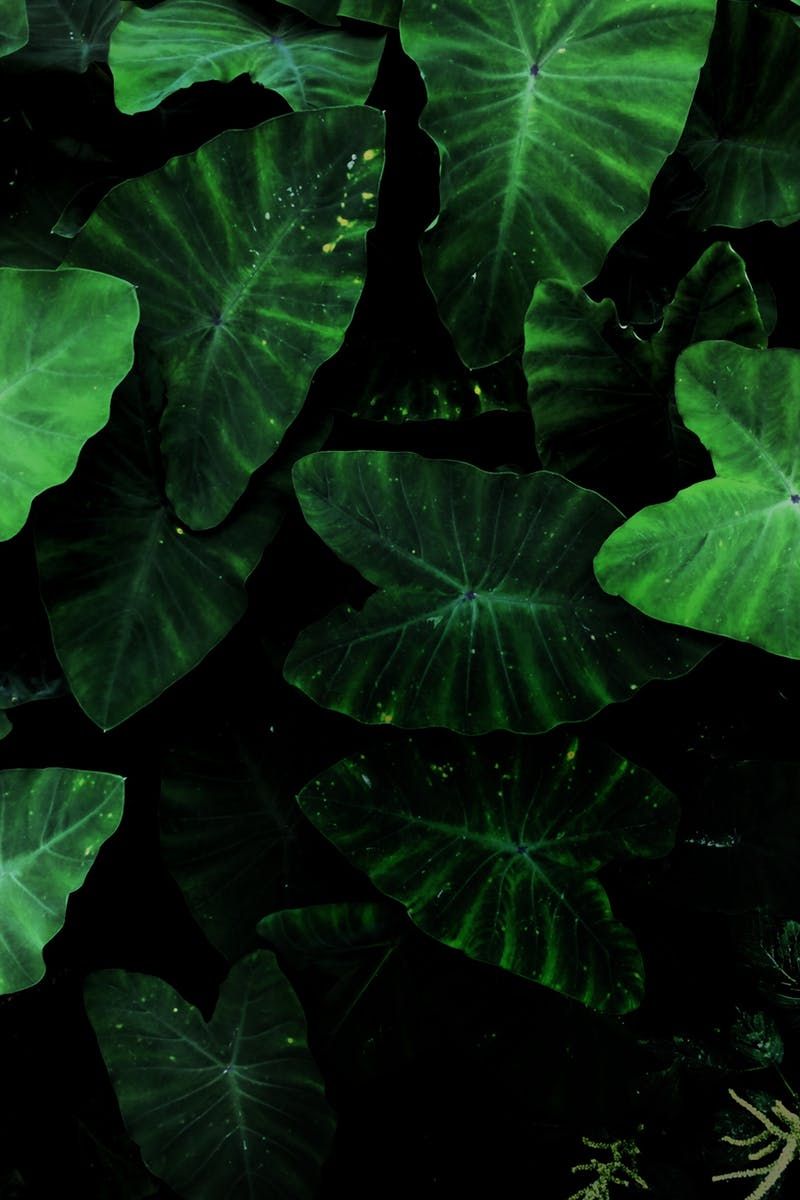
Calocasia or Elephant ear plant is an excellent large perennial plant. It loves bright indirect sunlight and it is happy to live in moist soil. Calocasia thrives well for outdoors because their foliages like to meet the sunlight and get fresh air. If you bring Calocasia to your garden, you should make sure that the soil is rich and well-draining.

  • Ruffled Fan Palm

Ruffled Fan Palm

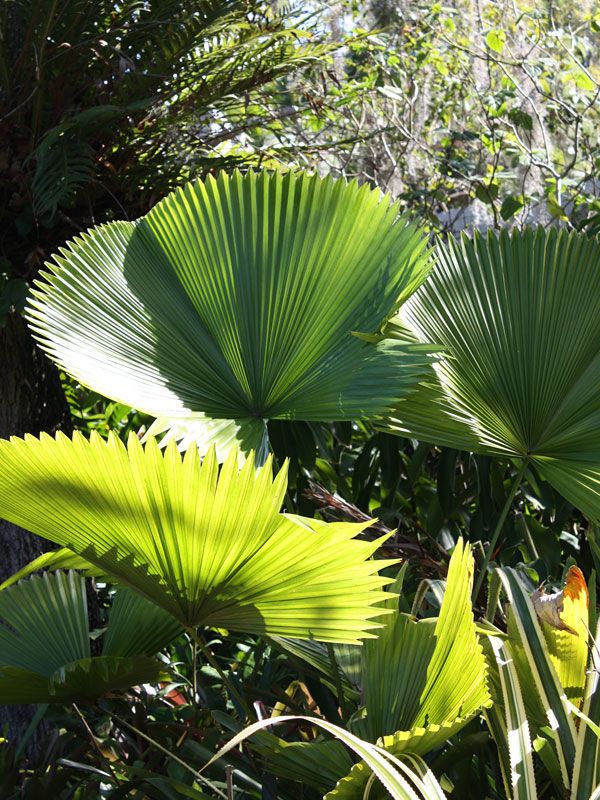
Licuala Grandis or Ruffled Fan Palm is a striking plant with its umbrella-like foliages. This plant is compatible with other big foliages plants to create a shady impression. This plant has pleated leaves and grows well under bright indirect sunlight. Like other plants, they like well-draining soil. Since it has giant leaves, you can grow this plant in the first line to be an attractive background.

Medium Foliages

The next ornamental plant that we will discuss for your garden is the Medium Foliages plant. You can use this ornamental plant in a variety of tropical garden concepts and designs that you have. Moreover, this ornamental plant will be very effective for you to use for a small garden. Let’s discuss them one by one!

  • Philodendron Xanadu

Philodendron Xanadu

Philodendron Xanadu has unique foliages. It has leathery leaves that can attract attention. The deep green leaves will mature and becomes larger up to 40cm long. Philodendron Xanadu likes to grow under bright indirect light. It loves high humidity and well-draining soil. Growing this plant in the middle row is catchy enough to give an aesthetic landscape to your garden. Moreover, you can grow them along the pathway.

  • Hibiscus

Hibiscus

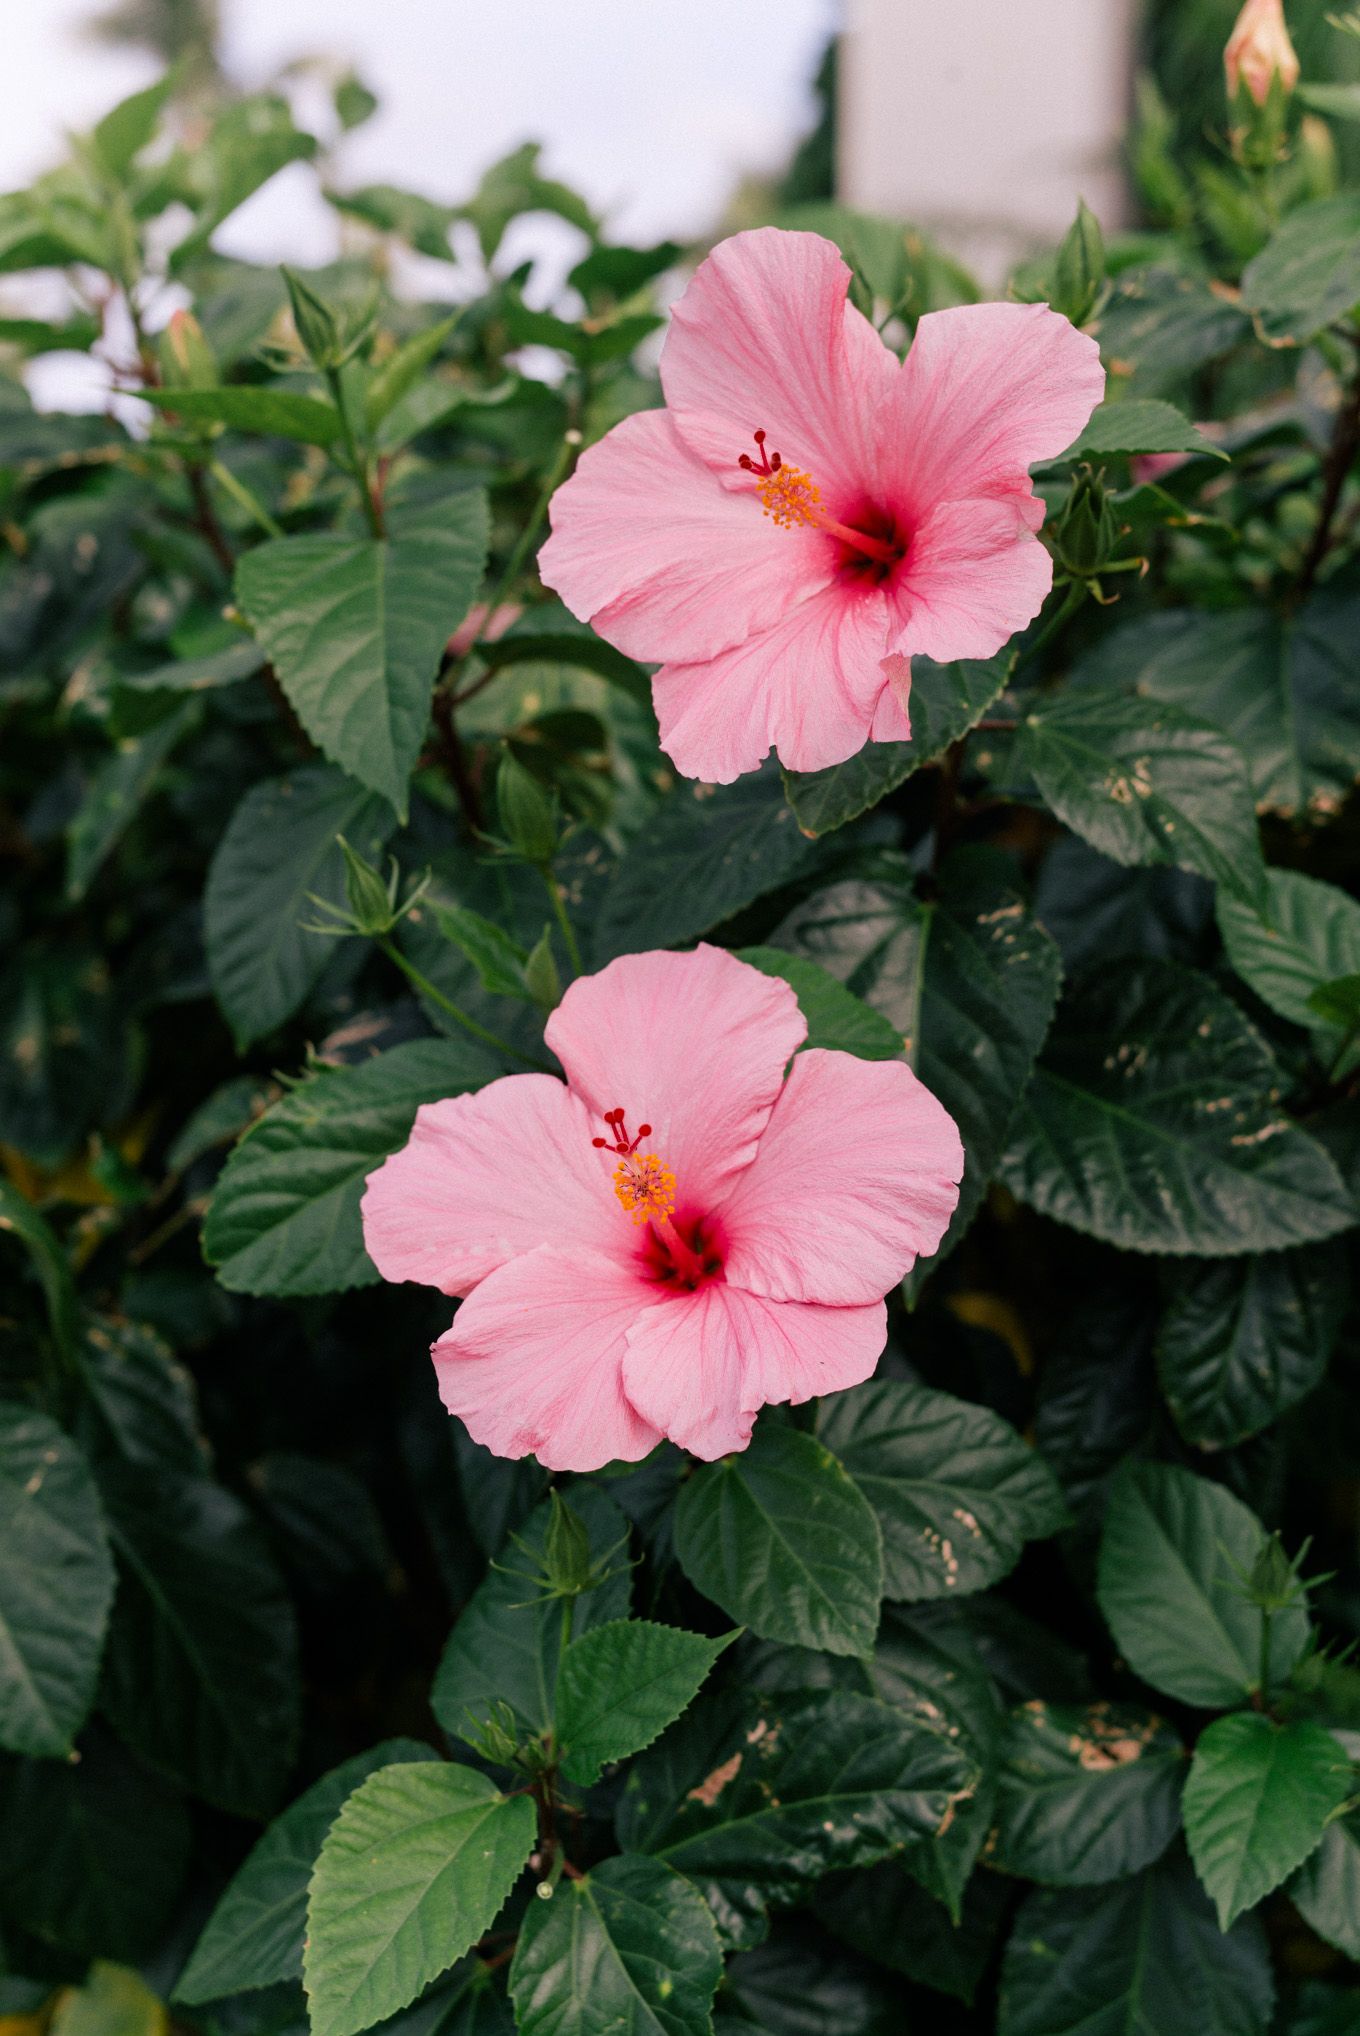
Hibiscus is a flowering woody plant that people usually grow as hedge plants. The key to grow Hibiscus is combining the right ingredients to make fertile soil. The well-draining soil is the best for Hibiscus. Keep this plant to get moist soil by watering them regularly in dry conditions. Don’t let them get waterlogged soil because it kills them slowly. This plant looks attractive to grow in the middle row and let people meet them.

  • Alocasia Amazonica

Alocasia Amazonica

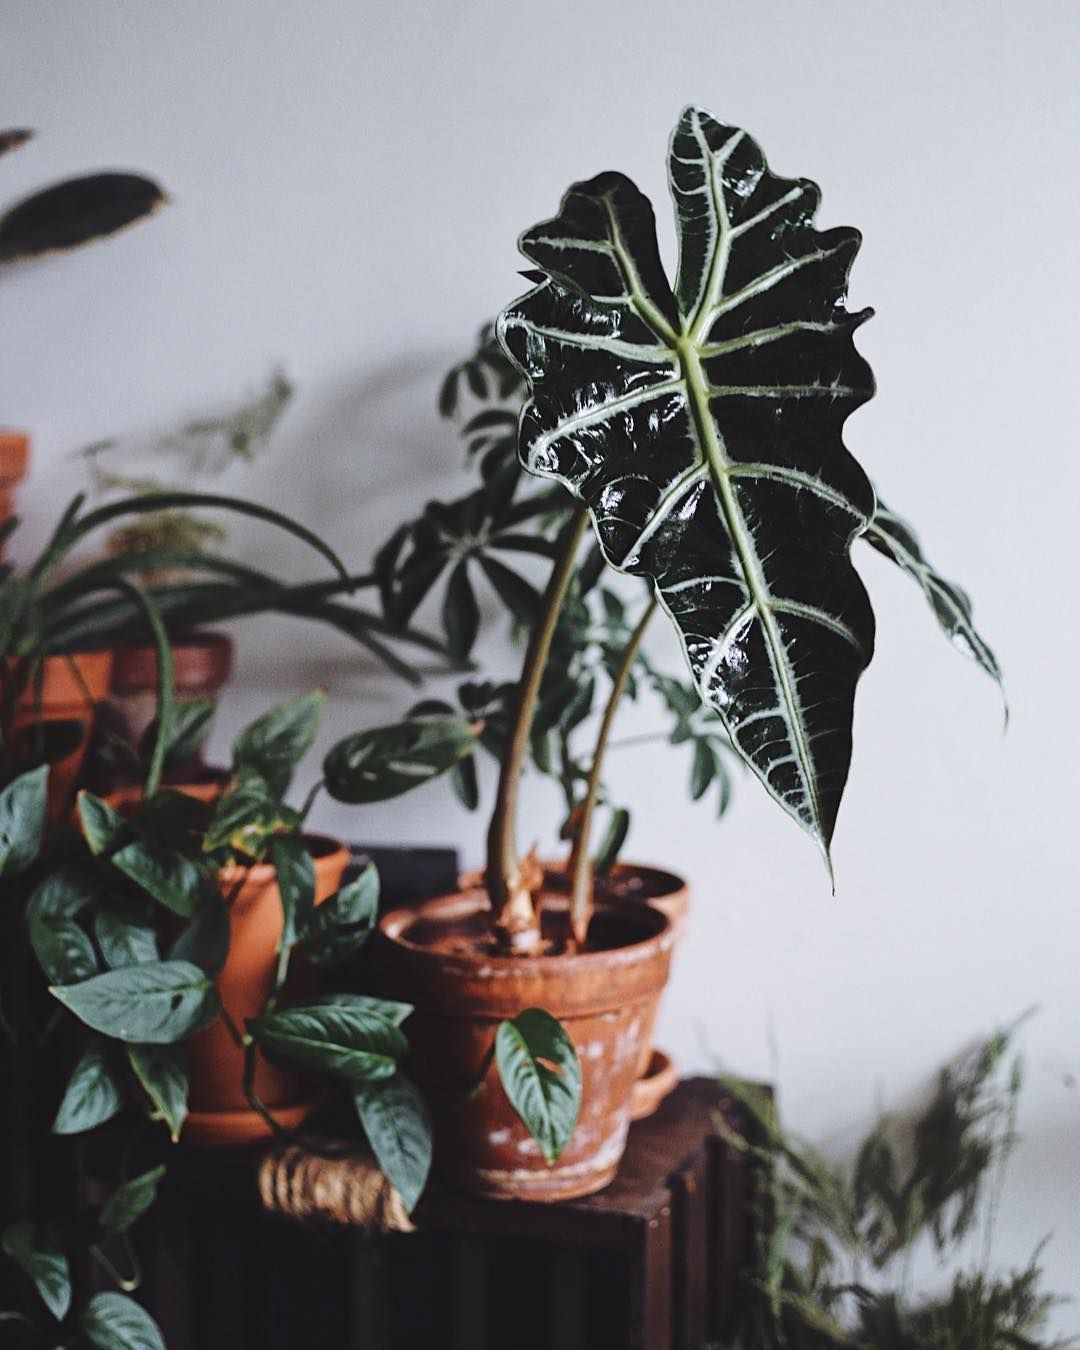
African Mask Plant or Alocasia Amazonica is a stunning tropical plant that has deep green leaves and deep white lines. This plant has arrowhead foliages. Like other tropical plants, Alocasia Amazonica likes the bright indirect sunlight. You can grow this plant in the second row in your tropical garden. The foliages will attract attention if you show them vigorously in the garden.
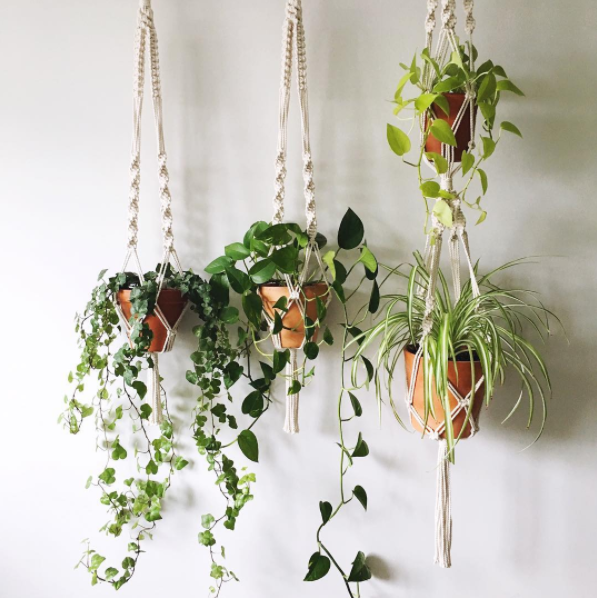
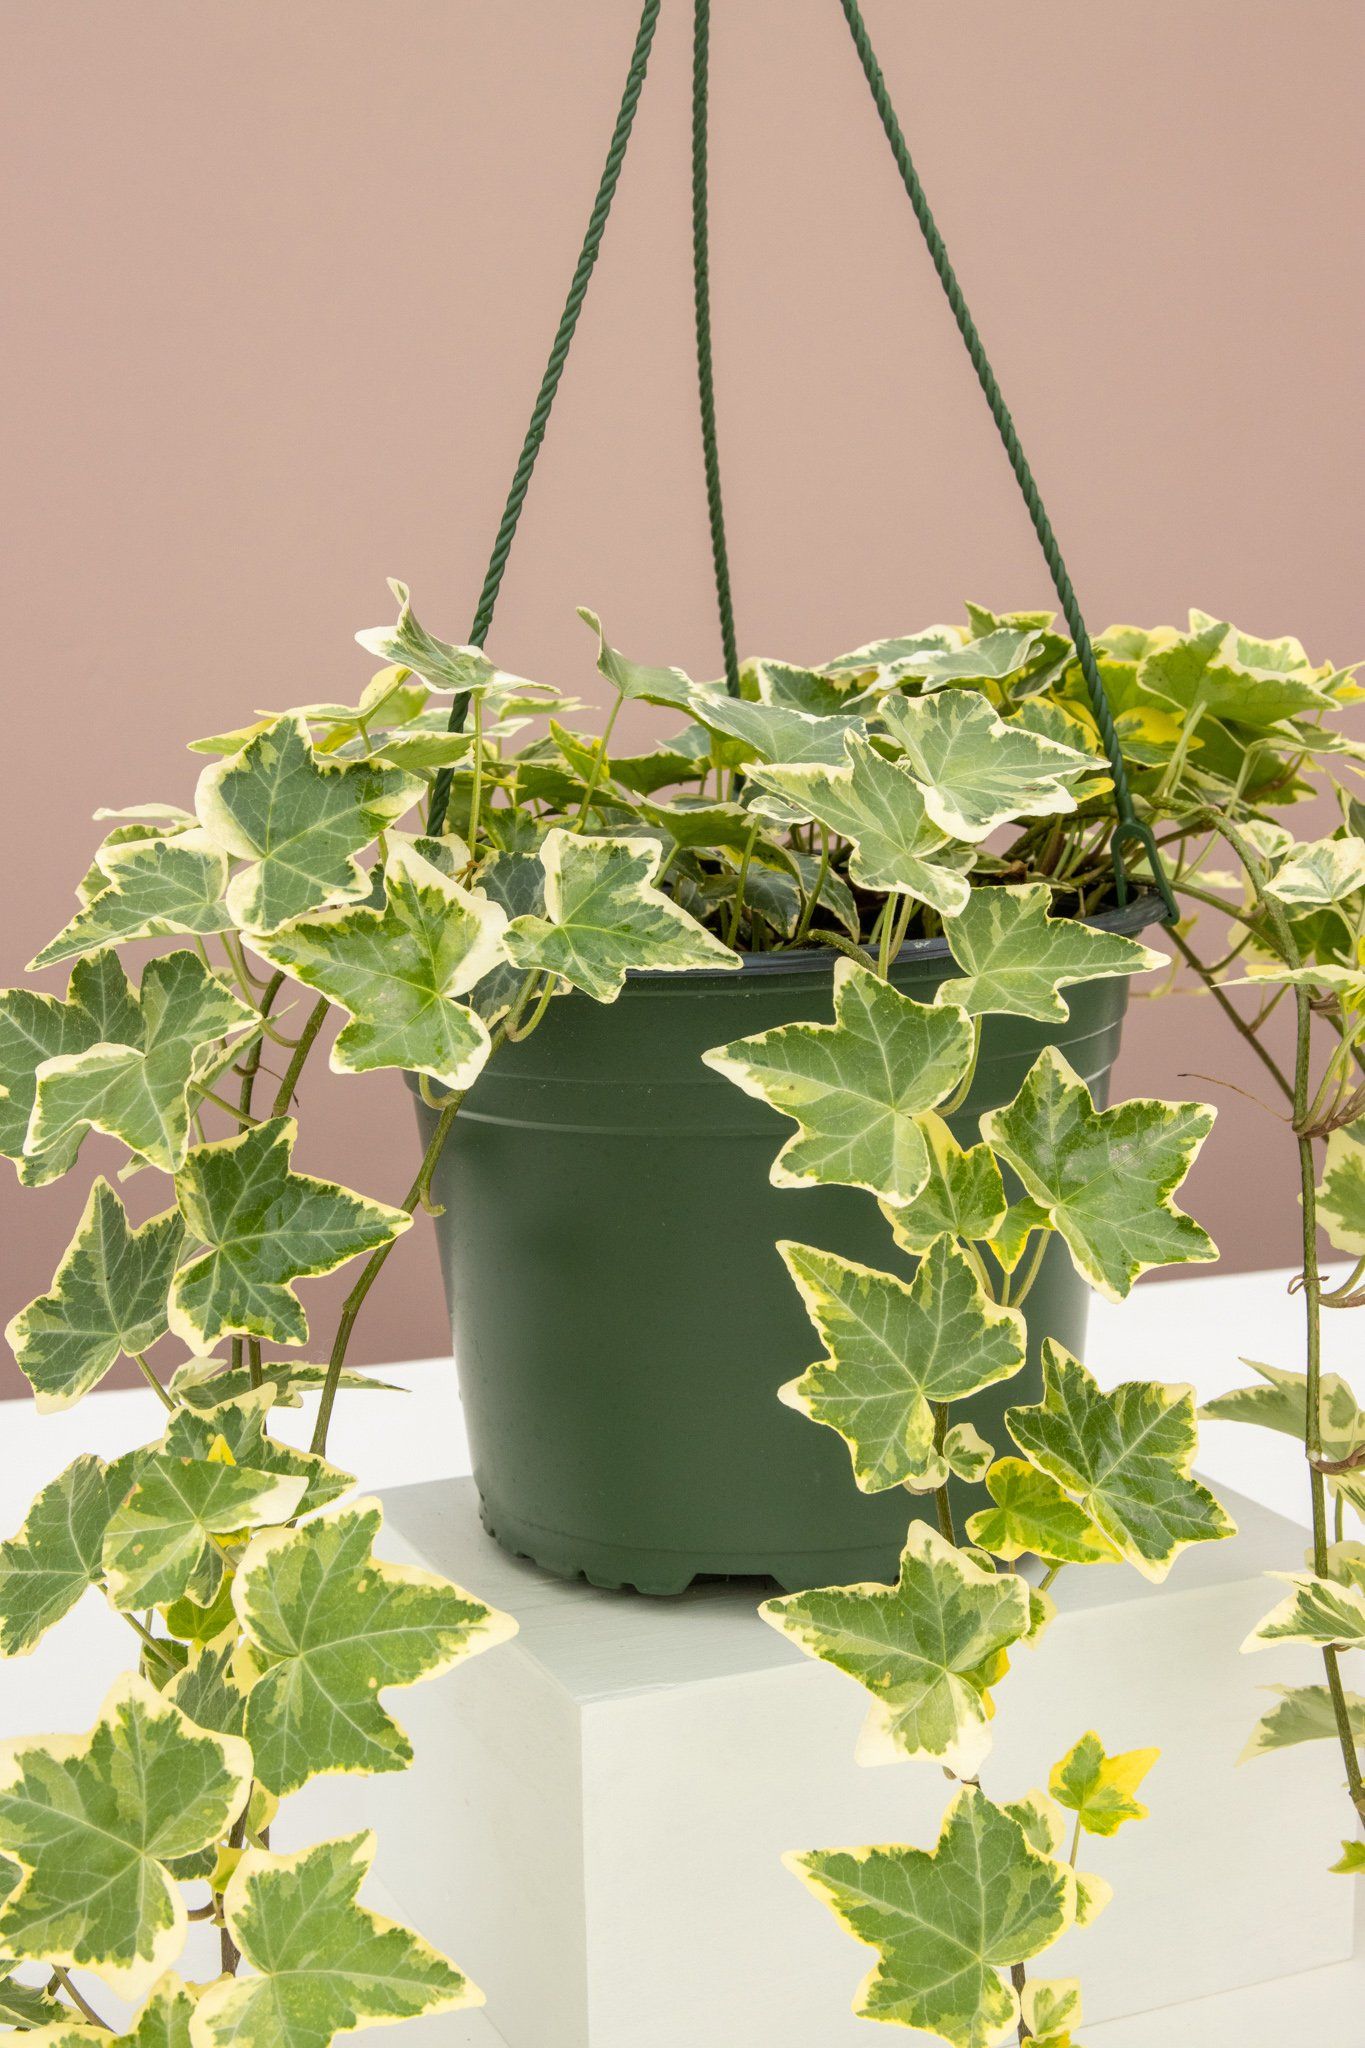
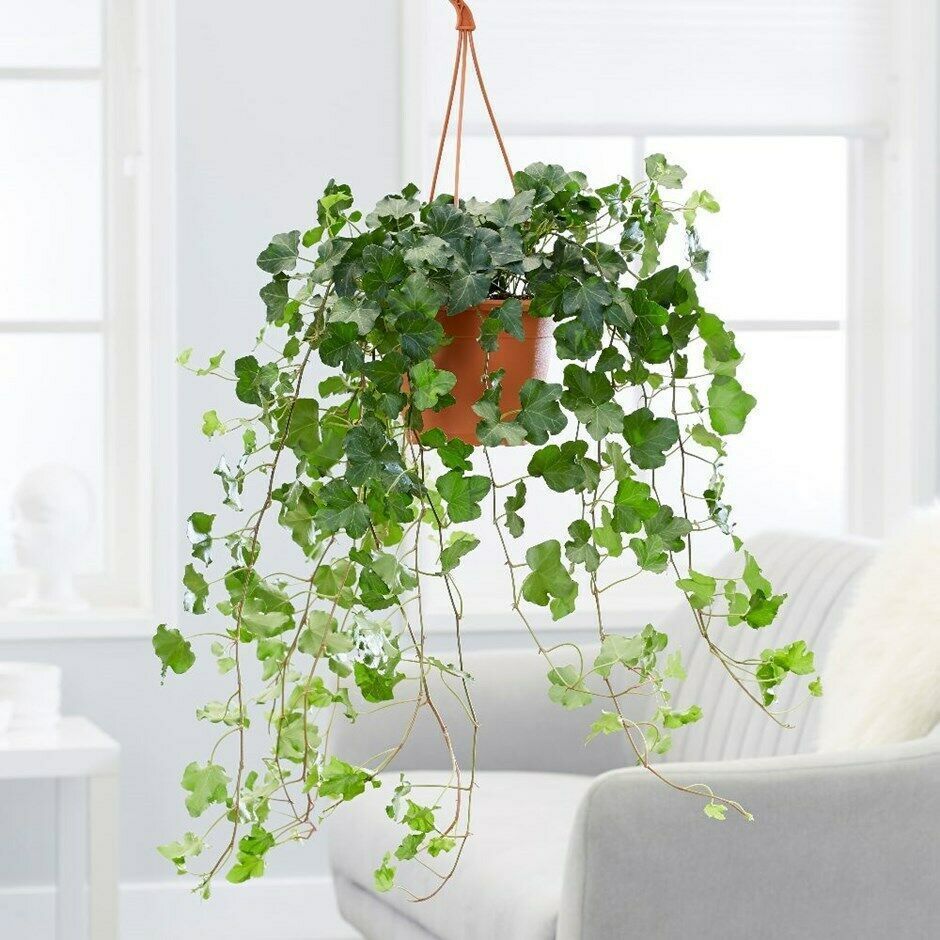
Vine Plants

The next ornamental plants for your tropical garden are vine plants. Using these ornamental plants can give you a unique and aesthetic garden look. In addition, you can create various designs and concepts that you want using these vines. This will make your garden appear more stunning. Let’s discuss!
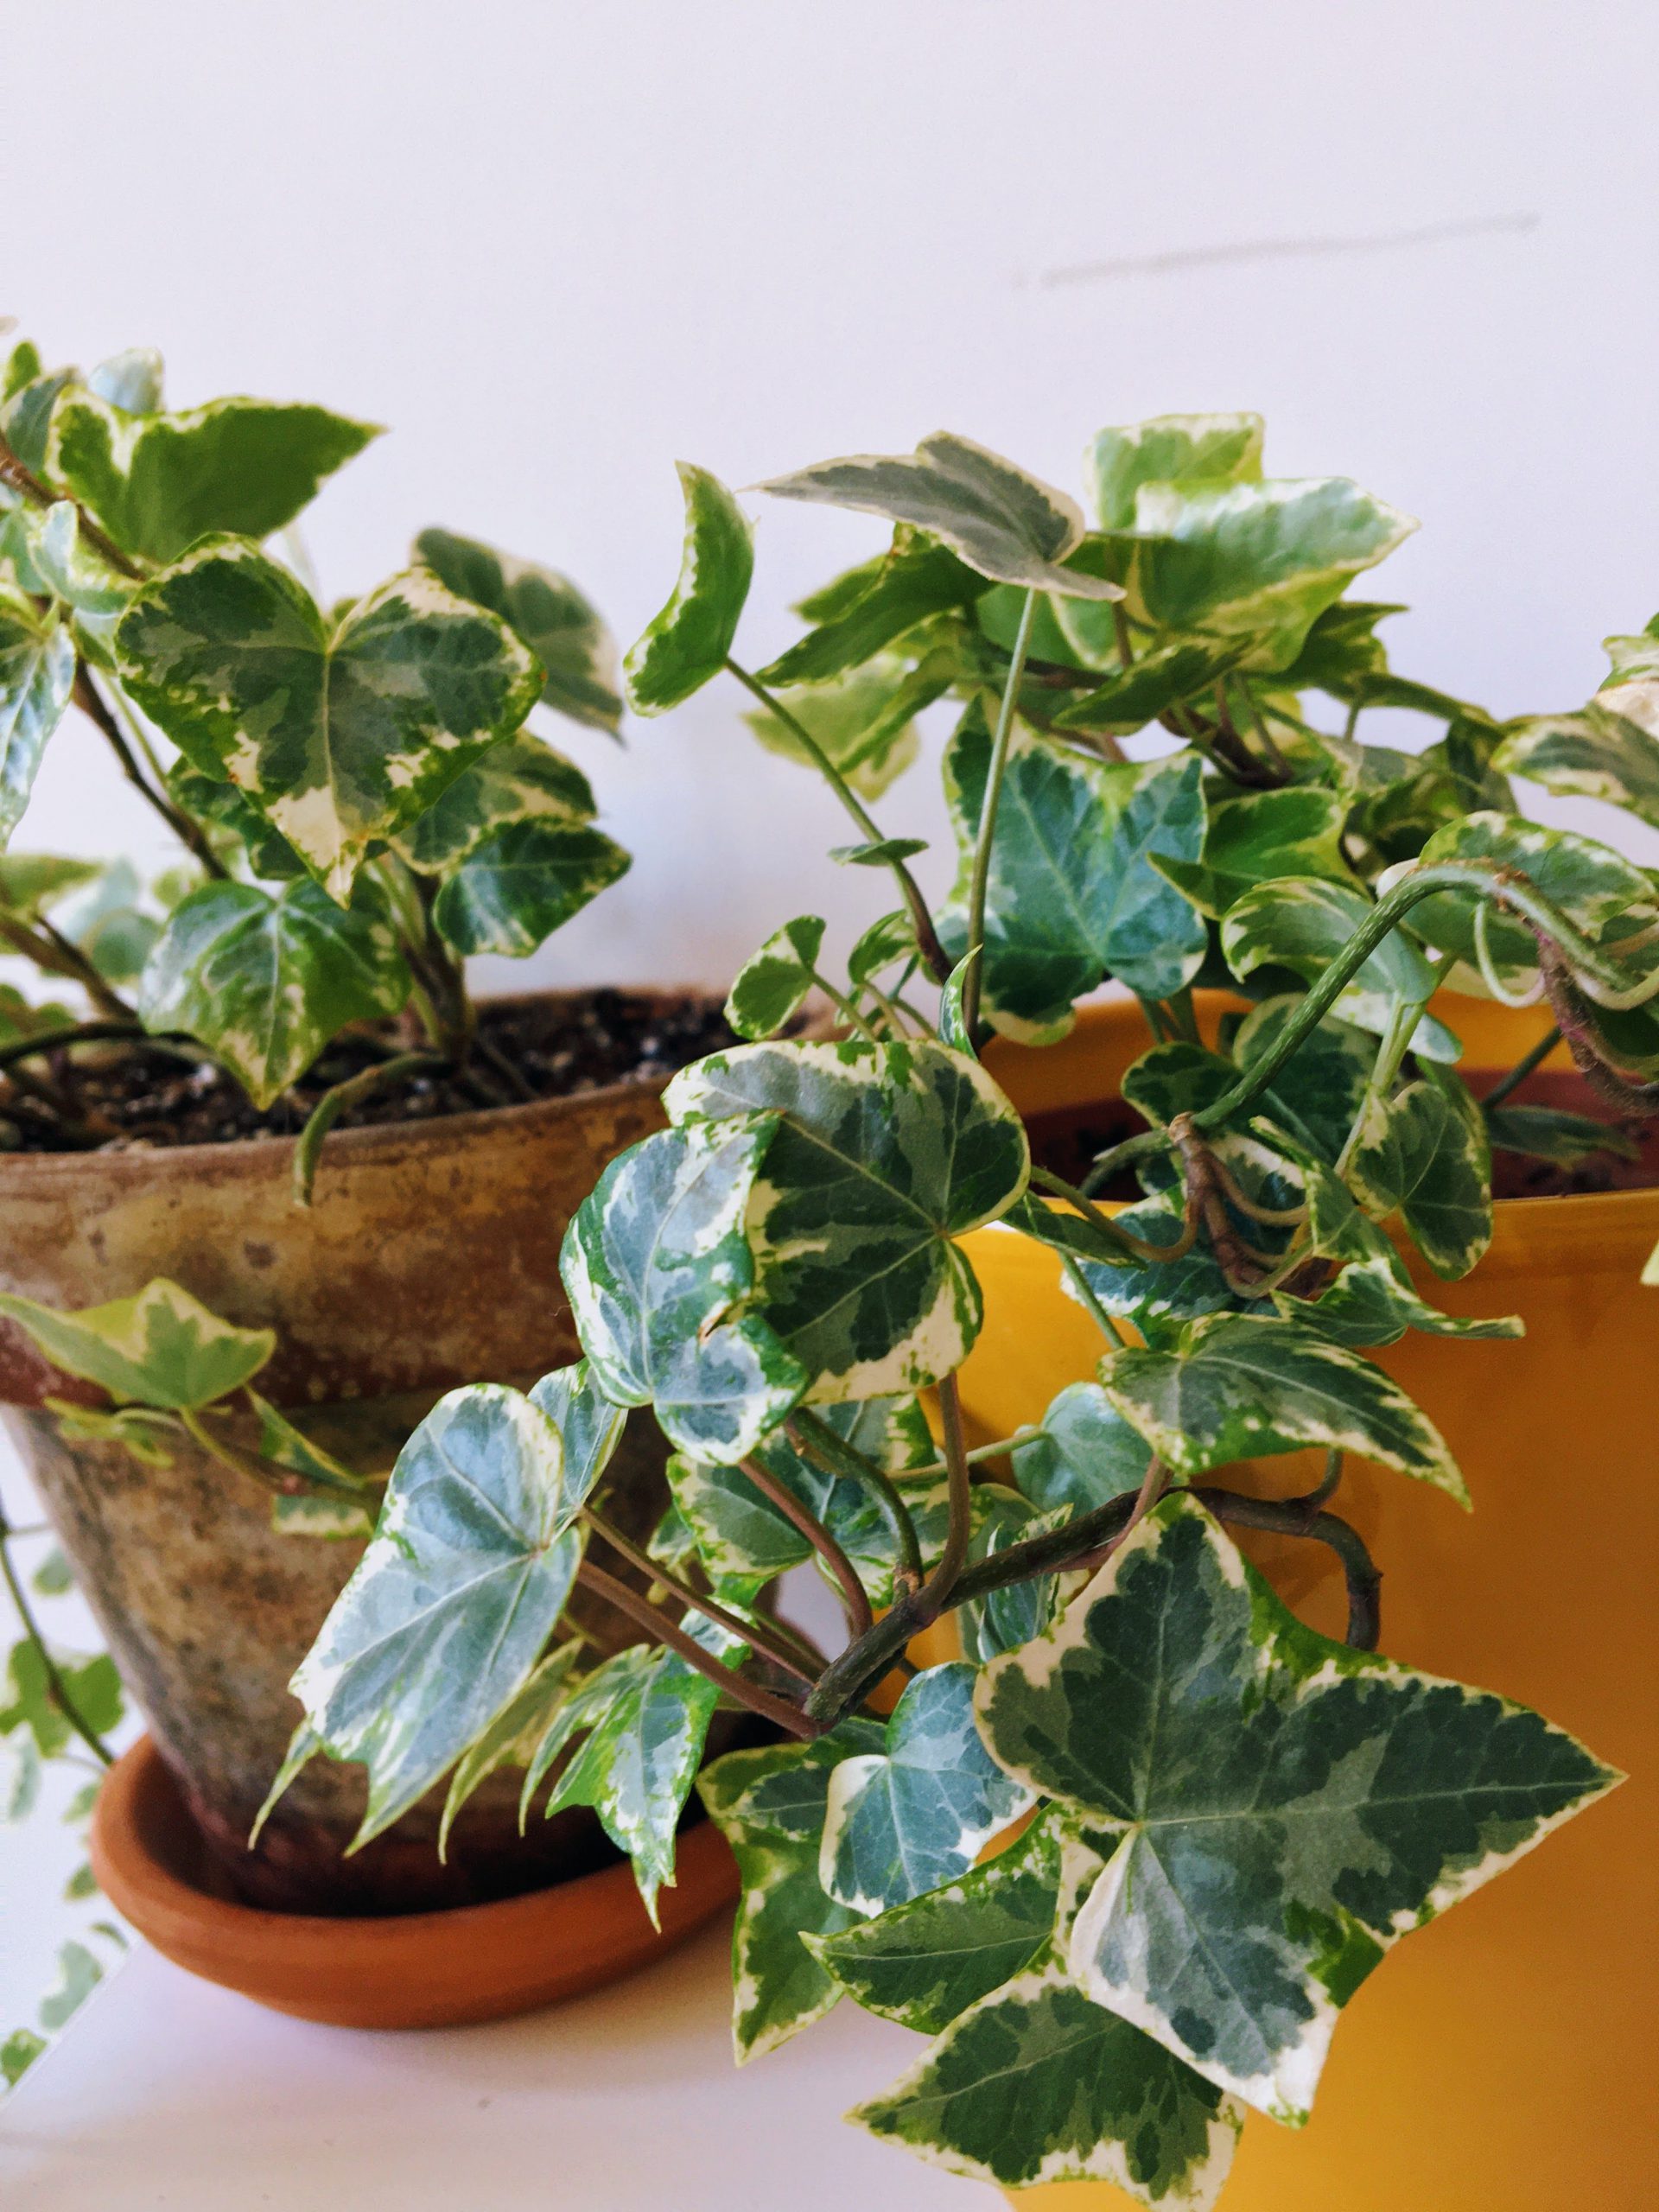
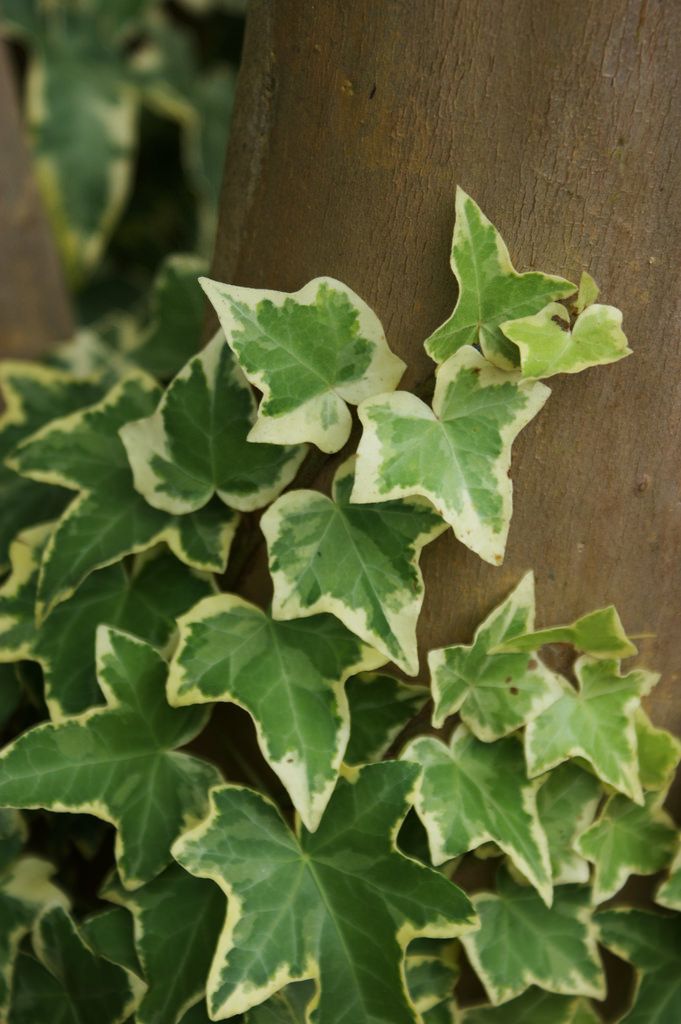
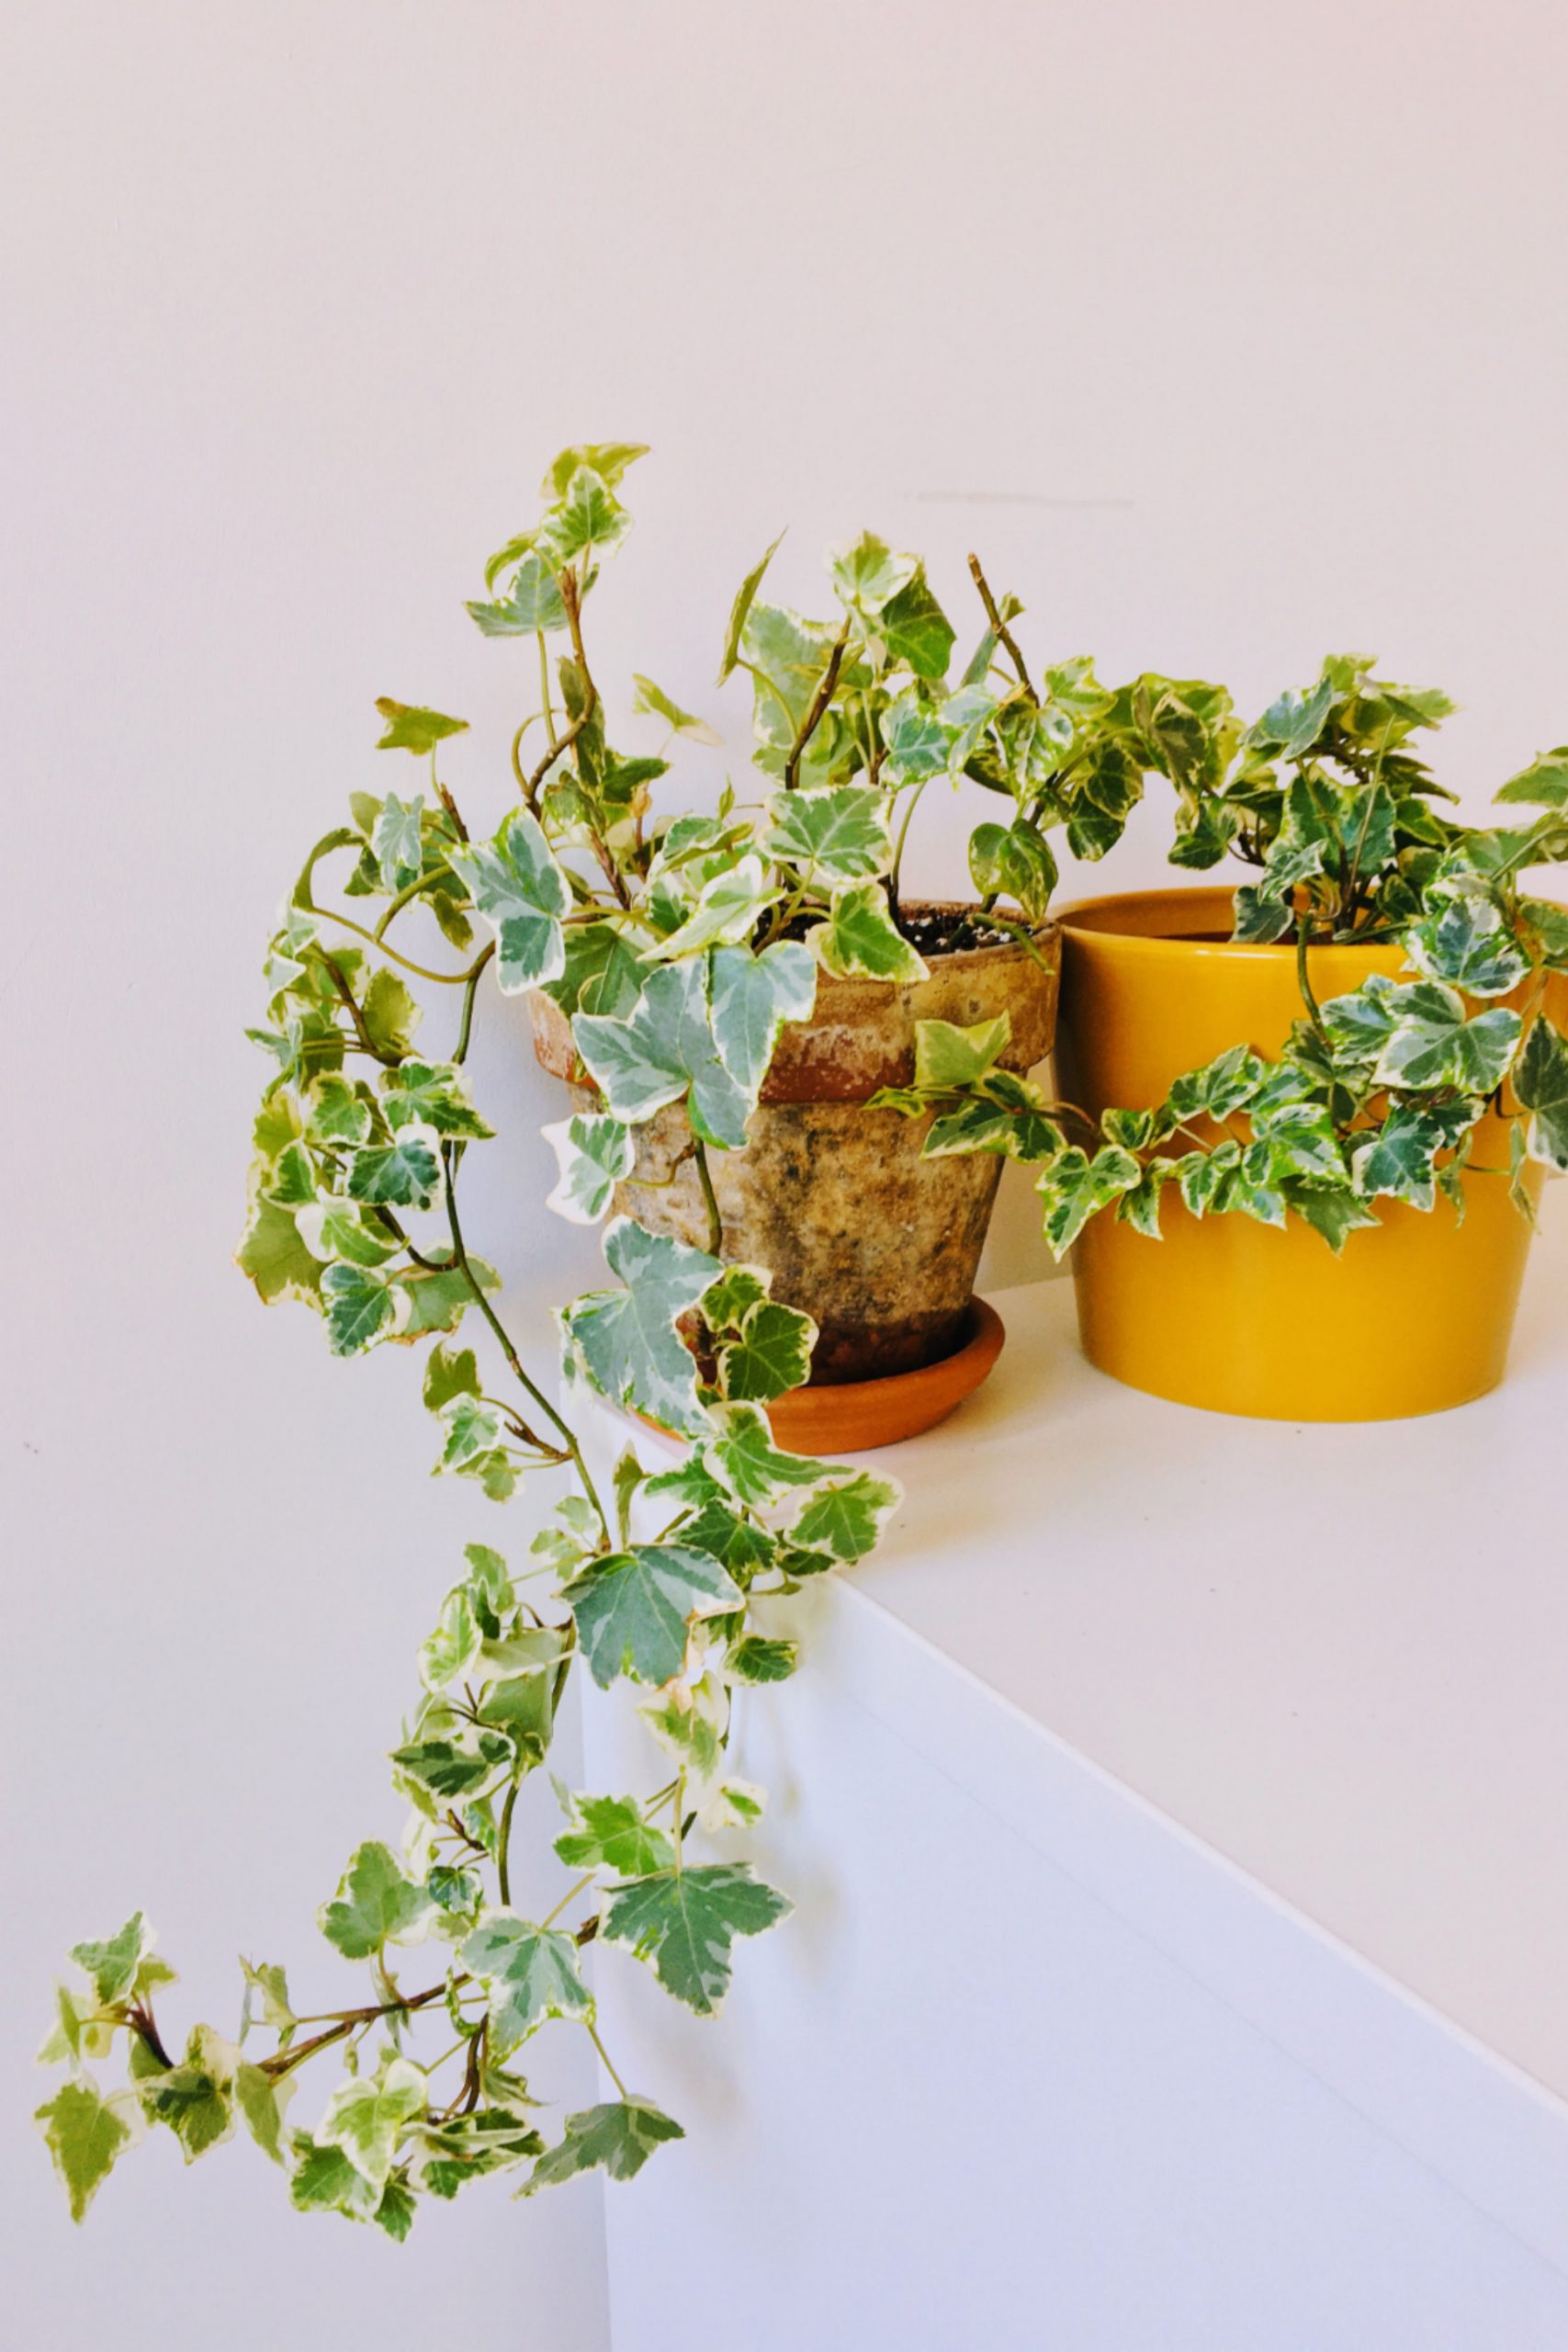
  • Pothos

Pothos

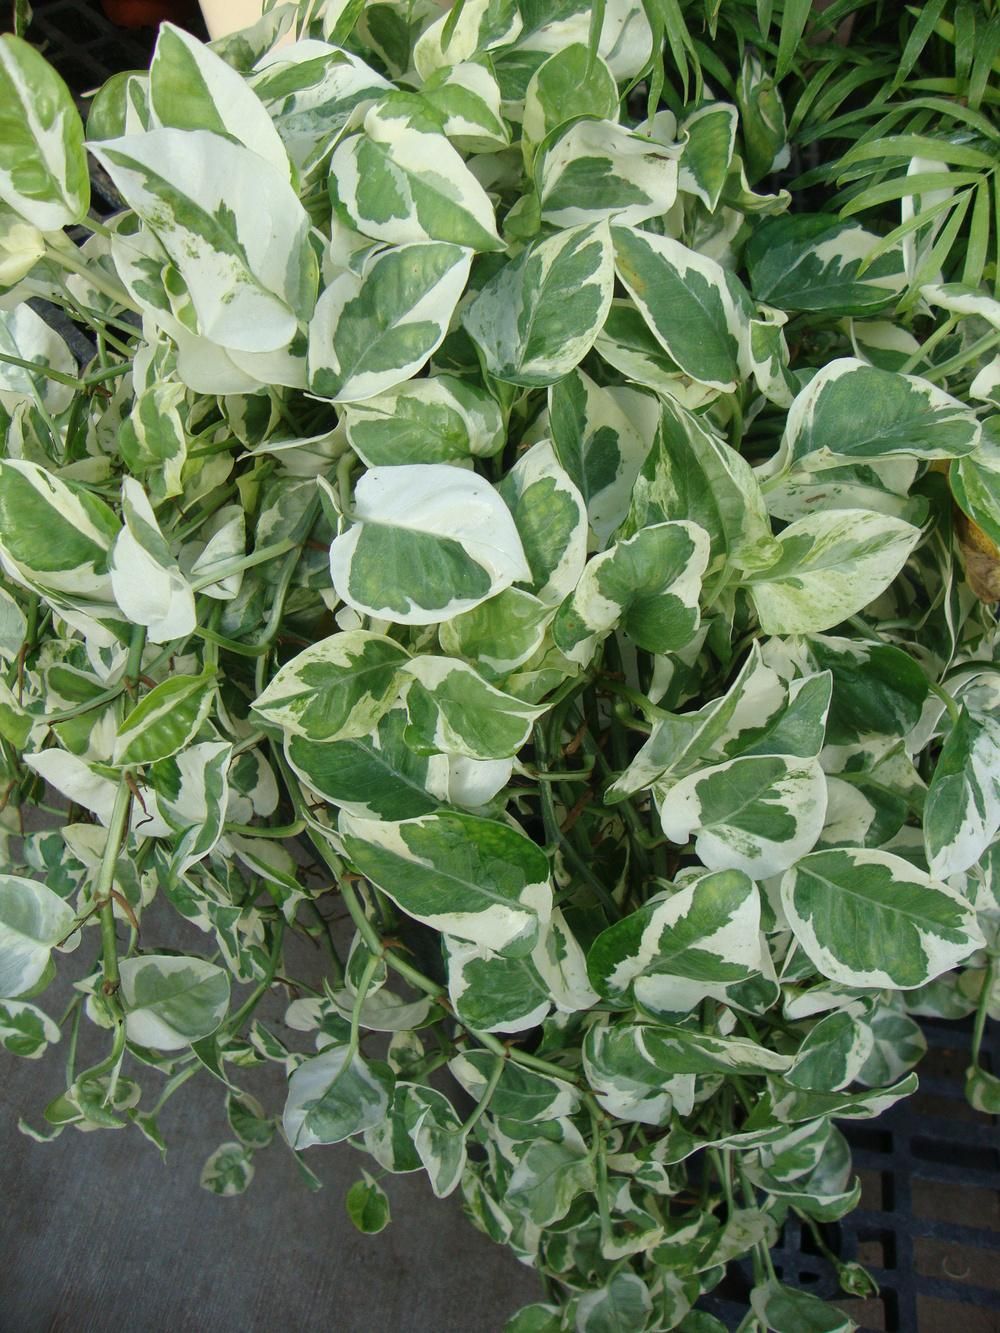
Pothos includes the category of tropical vine plants. This plant has round leaves and is available in various species. Golden pothos, Pothos silver satin, and N’joy pothos are the common Pothos to thrives indoors and outdoors. The attractive foliages make this plant looks compatible with a tropical garden. Pothos suits the third row or in the frontier line.

  • Coral Vine

Coral Vine

Coral vine plant or Mexican creeper is a flowering vine plant with pink or white flowers. This plant is also known as Antigonon leptopus. Growing this plant is easy, thus, it looks stunning to make your tropical garden has colorful hints. It is an adaptable plant and tolerates partial shade. You can grow Coral vine plants in almost every row in your garden. As long as it gets full sunlight, it grows well and vigorously.

  • Jasmine Polyanthum

Jasmine Polyanthum

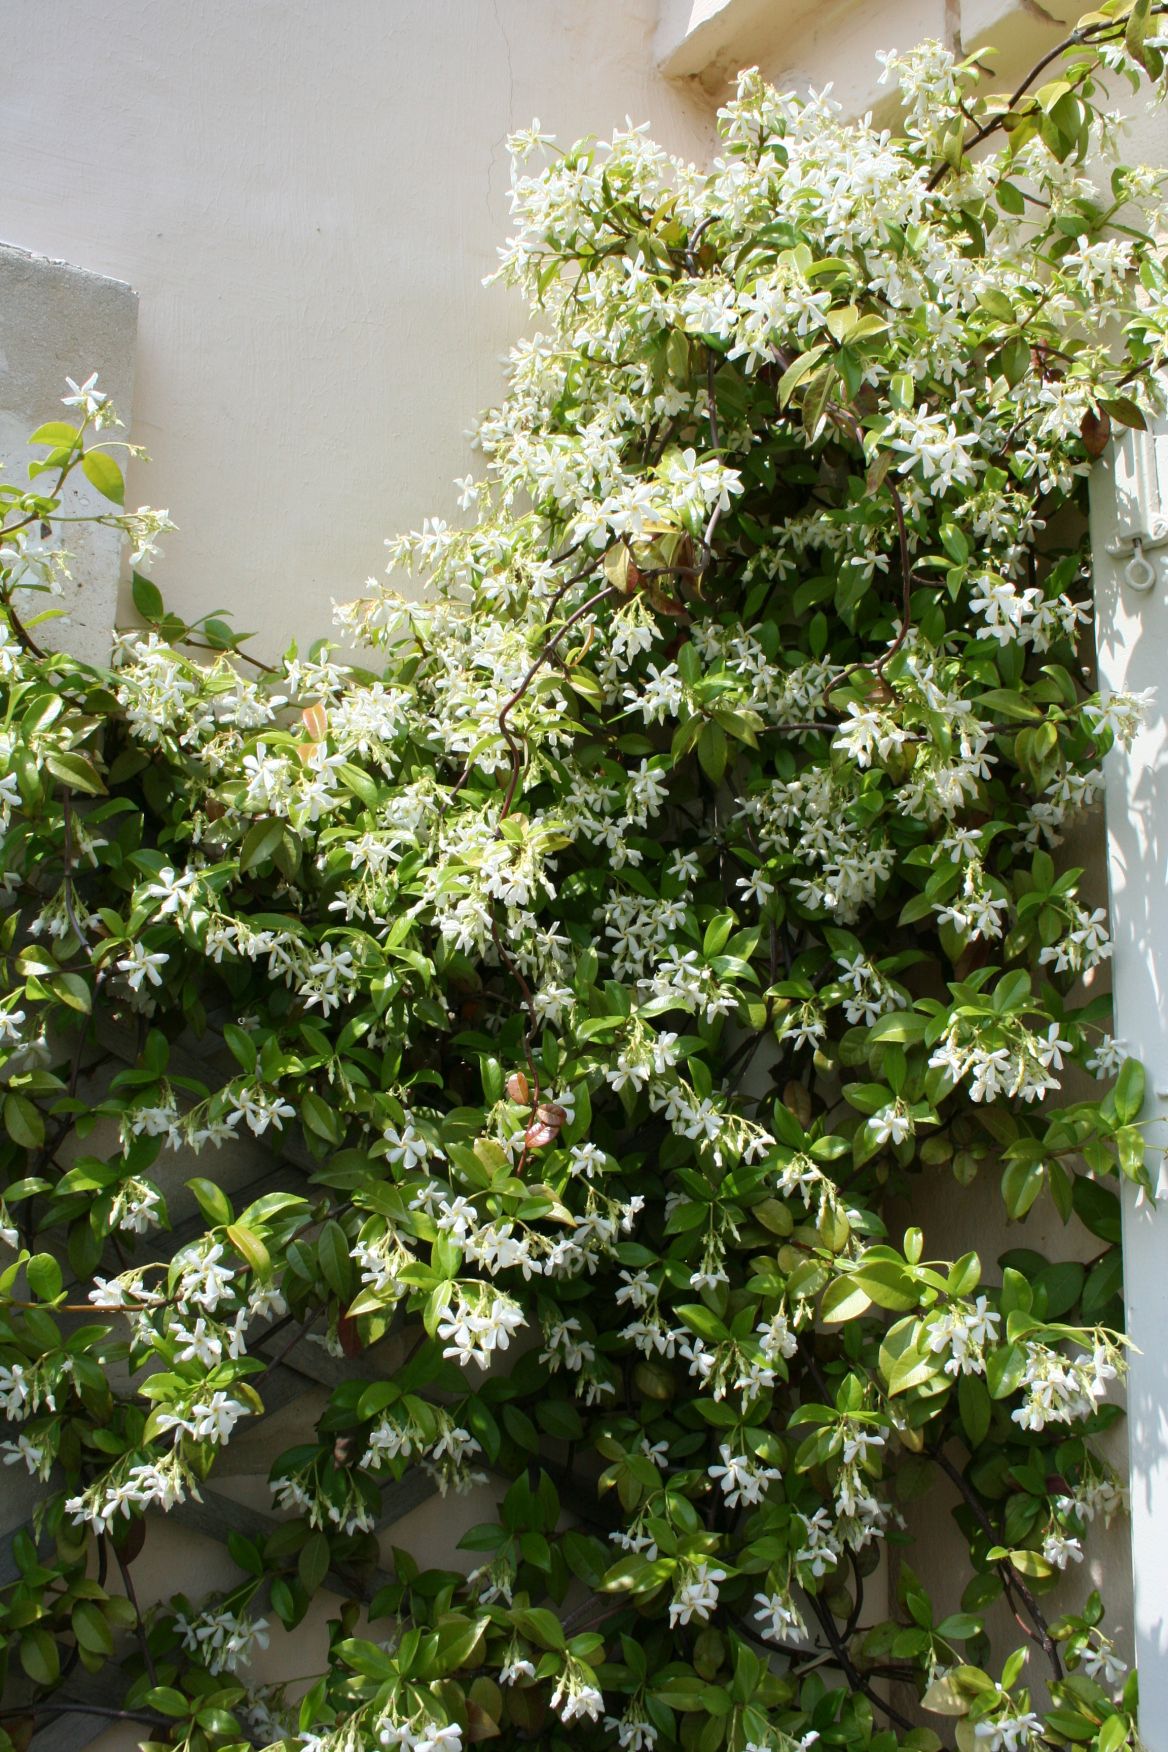
Jasmine Polyanthum or Pink jasmine is a vining plant with striking white flowers. It has tiny white flowers. If your tropical garden high humidity, this plant will thrive well in the cold environment. Jasmine Polyanthum needs full to partial sunlight. It needs moist soil and regular watering once a week. You can grow this plant around your tropical garden because this plant is an easy grower.

Conclusion

Thus our discussion of Tropical Ornamental Plant Ideas for Your Home Garden. The tropical plants we have mentioned above are the small numbers of myriad tropical plants on earth. You can find thousands of attractive plants from the Ficus genus, Philodendron genus, and Monstera genus, and many more. We hope this article increases your knowledge in gardening, especially to create an interesting tropical garden. Thus, you can create a beautiful garden in a tropical atmosphere in your home. Happy gardening and good luck!

What’s the Difference Between an Outdoor Kitchen and a Regular Kitchen?

0

You may think all kitchens are alike, but you couldn’t be more mistaken when discussing the differences between an outdoor kitchen and a traditional kitchen. Outdoor kitchens require different, weather-friendly materials, and they fulfill different purposes than regular kitchens.

Additionally, outdoor kitchens require more extensive planning for electricity, gas, lighting, and plumbing. When it comes to outdoor and indoor kitchens, they’re entirely different animals.

Outdoor Grills

One difference between outdoor kitchens and regular kitchens is that grills are practically required for outdoor kitchens. This is because grills are often too bulky to fit in an indoor kitchen, but with grill-outs, barbecues, and summer festivities, the grill comes in handy in an outdoor environment.

Grills can be costly, but the money you spend on a grill goes toward one of the focal points of your kitchen. Unfortunately, the majority of outdoor grills are gas grills, which require gas hookups. You can potentially choose a charcoal grill, but they are challenging to maintain.

Outdoor Fridge

The difference between the outdoor fridge and the regular fridge is that outdoor fridges are typically smaller since you will likely also have a larger fridge inside for storage. You don’t need two big refrigerators taking up a ton of space. You can use the outdoor fridge to store the necessities for the meal you’re in the process of cooking and perhaps a few adult beverages if you feel so inclined.

As with outdoor sinks, stainless steel rated for outdoor use is an excellent option. If you want to be especially economical with your outdoor fridge, you can get a tiny fridge and then buy an additional cooler for all of your beverages.

Outdoor Sinks

Outdoor sinks are a relatively easy choice to make since you need to ensure they’re outdoor rated. Stainless steel primed for the outdoors is practically the only option for outdoor sinks. Stainless steel won’t rust or fade in the sun and they’re extremely low maintenance.

A quick wipe-down will suffice for cleaning purposes and with their durability, they’re a no-brainer for outdoor kitchens.

Outdoor Kitchen Flooring

Unlike indoor flooring, you’re somewhat limited in your options for your outdoor kitchen. However, there are some unique options you can’t implement into your indoor kitchen that make outdoor kitchen flooring exciting. Stone flooring options are perhaps the most impressive.

Concrete is the most popular choice due to its price and easy installation. It’s also easily customizable and you can either dye or stamp it. However, concrete can stain easily, which is one of its only downsides. You can also quickly accumulate wear and tear on the flooring.

Outdoor Kitchen Countertops

Picking materials for outdoor kitchen countertops is almost as necessary as the cooking appliances themselves. You also need to give yourself plenty of space with your countertop, so you don’t feel cramped while prepping. Outdoor kitchen countertop dimensions are similar to indoor kitchen countertops, with the average height around 36” and the standard size for a bar top around 42”.

Outdoor Kitchen: Power, Gas, and Water

Utilities are another thing to consider with your outdoor kitchen area. You need one that comes with electricity, natural gas, and plumbing. When installing and designing your outdoor kitchen, it’s best to use a contractor who can adequately prepare you for all the connections your kitchen needs, including outlets, light fixtures, and ensuring everything is up to code.

These installations cost much more if you choose to go with an outdoor satellite kitchen. Satellite outdoor kitchens mean your outdoor kitchen is disconnected from your main house. Perimeter kitchens are much easier to furbish than satellite kitchens.

Entertainment and Seating

Outdoor kitchens without seating and dining options are pointless. You might also want to install a television or a stereo system near the kitchen for entertainment purposes.

Additionally, you want your outdoor kitchen to be a gathering place, and if there’s nowhere to sit while you’re gathering, it can be awkward and challenging to turn your outdoor kitchen into what you want it to be. There’s something to be said for hanging in nature undisturbed by entertainment, but that can get old too. It’s always nice to have a balance.

When it comes to installing entertainment, the biggest question is deciding where to put it, so it’s not exposed to the elements. People often opt for a pergola or gazebo to separate the outdoor entertainment area from the outdoor kitchen.

How Much Does it Cost to Build an Outdoor Kitchen?

Outdoor kitchen prices range considerably, but the average cost is between $4,000-$20,000. Depending on the type of kitchen you plan, however, and the expenses related to installing gas, power, and water, the price can surpass $50,000.

Outdoor Kitchens- Prefab Vs. Custom- What’s the Difference?

Prefab outdoor kitchens come in big box stores and they get delivered to your curbside. Prefab outdoor kitchens can be challenging to move and often require hiring a contractor with proper equipment. In addition, these kitchens eliminate some of the planning requirements for your outdoor kitchens, limiting your ability to customize your kitchen.

Custom kitchens are the exact opposite. They require more extensive planning and costs, giving you more freedom and flexibility in the planning process.

Conclusion- What’s the Difference Between an Outdoor Kitchen and a Regular Kitchen?

Outdoor kitchens provide you with different benefits than indoor kitchens. Still, they also come with additional obstacles and require you to plan your kitchen design differently than you would a traditional kitchen design or redesign.

They use different materials, appliances, and they serve different needs than regular kitchens. Your indoor kitchen is ideal for hosting events, parties, and gatherings during the colder months. But when the sun is shining, who doesn’t want to go outside and enjoy themselves?

Outdoor kitchens offer you the ability to soak up some rays while gathering with your friends and family, cooking up some delicious food, and kicking back a few beverages. Aside from the different materials outdoor kitchens require, they create an entirely different vibe than standing around the indoor kitchen island with your guests.

Aesthetic Ornamental Plants for You to Grow as Your Hedge Fence

0

Homesfornh.com – Hedge plant brings an attractive impression if you grow them around your house. This is a natural fence that needs good maintenance. Growing these plants will make your home looks fresh and interesting. Moreover, it challenges you to create an exciting garden for the outdoors. You can also create it on various exterior parts of your home such as your backyard. This will give you various advantages of aesthetic and functional value. Creating hedges by growing aesthetic plants offers you many benefits, especially for home landscaping and gardening activity. For this reason, in this article, we will discuss Aesthetic Ornamental Plants for You to Grow as Your Hedge Fence. Let’s discuss these topics one by one!

Bamboo

Bamboo

Phyllostachys Bamboo is the common plant to grow as a natural fence. This hedge fence plant is native to Central America and Mexico. It has various species. Growing this plant around your house is attractive, even you can other plants to accompany this plant. The natural fence is another form of a natural screen for home exterior design. They need moist soil all year round to grow faster. Even though growing bamboo takes time, but it guarantees you get an aesthetic hedge fence.

Boxwood

Boxwood

Boxwood or Buxus Sempervirens is a greenery plant from southern Europe, northern Africa, and western Asia. Also, Boxwood plant has beautiful foliages and a colorful appearance. Growing this plant is not easy, it needs consistent maintenance, especially in watering needs. When you have a big parent plant, it will grow bushes. You can grow new plants by propagating the stems. The new grower plant needs full to partial sun. It loves regular watering to stimulate its roots from dry conditions.

Bay Laurel

Bay Laurel

Bay Laurel is a perennial plant with deep green leaves. It is a leafy plant that grows large and fast. Bay laurel likes full sun, then it grows faster if you grow it in the front yard or backyard. It lives well in a dry season but you need to water it at least once a week. This plant forms a giant bush that looks attractive to cut into a certain shape. Even you can grow them by propagating the stems.

Thuja Occidentalis

Thuja Occidentalis

Thuja Occidentalis or American Arborvitae is a green plant to grows vigorously. It is native to eastern North America. Thuja has green leaves with ponytail shapes. It is a low-maintenance plant but needs water properly before the soil starts to dry. You can grow this plant in the front yard or backyard as hedges. Since it grows like a common tree, it creates a shady atmosphere for your home. Thus, it is good for other plants to grow under the Thuja tree. Some people usually use the top branch of the Thuja tree as a Christmas tree.

Chocolate Vine

Chocolate Vine

Chocolate vine or Akebia Quinata is the purple flower plant with light green leaves. It is a vining plant that usually creeps on other plants. Thus, you may ever see this plant on a fence or a trellis gate. It has a familiar look by their flowers. You will recognize it by the shape of purple flowers and creeping appearance. This plant loves bright indirect sunlight but it tolerates full sun conditions. You can propagate it by the grower stem and care for it till the roots appear.

Beech ‘Fagus Sylvatica’

Beech ‘Fagus Sylvatica’

Fagus sylvatica ‘Tricolor’ or beech plant is an interesting plant with colorful foliages. Beech is native to North America. This plant has 13 species from the Fagaceae family. It has various showy leaves. You will see at least two colors in every beech plant. This plant tolerates full shade and semi-shade. It likes moist soil but lives well too in a dry condition. Some people usually grow them to decorate most gardens and become a natural fence for their homes.

Berberis Ottawensis

Berberis Ottawensis

Berberis Ottawensis Superba has beautiful foliages. This Berberis Ottawensis has deep red-purple leaves with light yellow flowers. It loves sunlight and will bloom the flowers in summer. This plant tolerates partial shade, even it needs less water rather than other hedge plants. If you plant a new Berberis in your garden, it requires regular watering during the first year. The new Berberis needs a good treatment, thus provide it with enough fertilizer to feed them.

Hydrangea

Hydrangea

Hydrangea has an elegant flower. Also, Hydrangea Arborescens is the species of the family Hydrangeaceae. It brings a calm atmosphere with their white flowers. This Hydrangea can live in a hard condition but they will bloom in spring. This plant loves the full sun and prefers moist soil. The well-draining will thrive them well, especially when you watering them regularly, three times a week is fine for their roots. If you plant myriad hydrangea, you will have a whitish look in the front yard. It looks beautiful to grow them in as a shrub plant.

Thus our discussion about Aesthetic Ornamental Plants for You to Grow as Your Hedge Fence. Growing many plants at home can bring a fresh and shady atmosphere. This idea provides a good environment for you and your family. It offers fresh oxygen from the perennial plants. The hedge plants above are the little number of plants to grow as a natural fence. We suggest you give more green plants at home by growing hedge plants around your house. We hope you like a gardening activity and may try to grow the hedge plant. Happy gardening and good luck!

How Use of Masonry Can Create a Tranquil Landscape Design

0

Masonry is a typical work to handle, it requires experts, want high skill people on the go, and if they can work together, then things can be different to give you a long-lasting finishing touch to your place by special care, perfect finish, and a want-to-be-done landscape being designed for you.

Though when it comes to landscape design, it generally refers to a place that must have the feel of nature, a great scenic view, and feels comfortable to owners and visitors too by its unique natural and custom features or creations that are perfectly designed to give exact comfort to all.

Not only you want any such tranquil landscape that suits to the eye and has a unique masonry finish, but you also want such specific designs and creations attached to it which have specific effects to a different type of people and can let them enjoy by the presence of such arrangements settled within such landscapes by expert touch and professional effort.

Thus More than anything it depends on experts who work in masonry to handle the place in a way so it would look attractive, soothing, and peaceful, and for such effort, it requires a few things to add to your place to have a better landscape design for you and your loved ones.

However, before you get ready to start on your masonry project to have perfect landscape design, there are few things to closely look for, and they do affect the touch and impression of the landscape for which they need to be considered, so they may include: 

> To decide what type of landscape would suit your place

> To find out how it would look to visitors

> Things that can be mainly added to make it more attractive

> To only add those finishing touches or features that can suit your own eyes

And these are few things that must be observed before deciding to have any such landscape designed through masonry so it would look perfect and get settled.

Exact Sunlight Covering Points

There is a possibility of creating such points by use of masonry where sunlight comes perfectly, can cover the entire points and this way the view would look perfect as a great landscape to cover things nicely both for household persons and other viewers.

Perfect Shade Cover

Again, by use of such masonry, also such points can be created outdoors, where shadows linger for a longer time, people can sit on such places for resting purposes, and this way it would suit great as a unique and comfortable landscape design.

Cool Backyard Ponds

Also by use of masonry, cool backyard ponds can be fixed, they can be created close to the certain green and lush area, and they would help to not only give a boost to the landscape but also shall fulfill a natural touch to it.

Exactly Suited Waterfalls

Again, such types of waterfalls are very high in demand when it comes to create them by masonry and make the landscape beautiful, as what they do is that they make a different pathway and completely change the glow of the landscape to look more exocentric and settle it around with perfect natural motion.

Highly Maintained Gardens

These gardens mainly made with outdoor brick walls are also part of masonry work to make landscape design better, and they can work both as a resting place and an admiring view, and this way they serve perfection to the landscape.

A Relaxed Outdoor

Lastly what you want more than anything when you plan for landscape design through masonry is to have a relaxed outdoor, a place that welcomes everyone, and has a lot of beauty to it.

And it can be created easily by such effort to give you maximum comfort to give it a call to settle things to have a great togetherness around.

Conclusion

Thus these are few perfect designs that can be added to make your landscape look more handsome, perfect to welcome, and it would help you to attract more friends and visitors to have the best of times.

What it does through such a perfect finish of masonry that it adds a certain charm, an efficient glow, and it all suits with the mentioned designs to add which would make it a unique place for all to come and have great moments together.

Polyculture Garden for Your Home : Harvesting Healthy Vegetables Easier

0

Homesfornh.com – Polyculture is a technique to plant and growing various plants in the same soil. The planting process starts from growing the seeds together on the fertile soil. Applying polyculture is beneficial to maximize the harvesting time. The polyculture garden results in more vegetables in a crowded appearance. Even though you have narrow land, this method suits any garden. In the narrow garden, polyculture is helpful to provide healthy ingredients for food for your family. Thus, let’s discuss polyculture and learn this method together in this article. But before that, here are some advantages of using polyculture for your vegetable garden.

  1. Having various plants in one garden
  2. Make the soil more fertile because each plant help microorganism to reproduce
  3. It has fewer pests because the growth

With these various advantages, you can easily create a polyculture vegetable garden at your home. You can grow a variety of vegetables that you want according to your needs. In addition, you can also freely create the concept you want. For that, let’s discuss!

Vegetables for Polyculture

In creating the concept of polyculture in your garden, you need to pay attention to the types of plants that you can use. To grow vegetables, various types of vegetables are most appropriate and suitable for you to grow using this method. Here are a variety of vegetables that can be grown using the polyculture method. Let’s discuss them one by one!

  • Lettuce

Lettuce

Lettuce is a vegetable that tolerates moderate sunlight. This plant lives well in high humidity. Growing this vegetable in your polyculture garden requires moist soil with good drainage. Thus, you should water it every day. An outdoor garden with full sun is fine for lettuce to grow.

  • Broccoli

Broccoli

Some kids don’t like to eat broccoli. This vegetable has a deep green head when it ripes. Broccoli likes to grow in a sunny place. It likes humidity, thus broccoli grows well in moist and well-draining soil. It takes 100-150 days for broccoli to grow from seeds. Prune your broccoli head before it turns to bloom a flower.

  • Carrots

Carrots

Carrot is a plant that likes full sun. This plant needs consistent moisture soil. The good soil stimulates them to produce tasty carrots. Watering this plant once a week at about one inch when you start growing, then two inches for the next two weeks.

  • Leeks

Leeks

Leeks can grow under partial sunlight. This plant is a slow grower, thus give them adequate water, water-soluble plant food, and sunlight. Plant the leeks’ seed in summer or spring is a good option, especially outdoor.  Most leeks are ready to harvest at least 120-150 days after planting.

  • Tomatoes

Tomatoes

The best tomatoes are in their taste. The fresh and juicy taste means that your tomato plants get enough sunlight and nutrition in the soil. Tomato lives well in the rich, loose, and well-draining soil. They like full sunlight for 6-8 hours a day. You need to water them in the early growing season, especially when the soil is dry.

Layout of Vegetables in a Polyculture Garden

Layout of Vegetables in a Polyculture Garden

In creating a polyculture vegetable garden in your home, you also need to pay attention to the layout of each vegetable you plant. This is very important for you to do so that every vegetable you choose can grow well. By growing these vegetables properly, you can get a variety of benefits provided by each vegetable you grow. For that, the following is the discussion.

  • Lettuce as the Center Plant

Lettuce is a green vegetable that usually you find in a salad. This plant can grow by polyculture technique. Lettuce is healthier when you grow carrots, parsnips, and beetroots around your lettuce. These plants help your lettuce to get fertile soil.

  • Tomato as the Center Plant

Do you like to eat tomatoes? You will find tomato slices in a sandwich. Tomato is a fresh vegetable that commonly grows in a sunny garden. It has a fresh red color when it ripes. To grow this vegetable in your garden, you can give it some good friends. There are carrots, onions, and cabbages that will stimulate your tomato to be happy and healthy.

  • Carrots as the Center Plant

Carrot has many benefits to cook as healthy food. You can add carrots to your salad. It is also the favorite food for rabbits. This animal likes to eat carrots, especially the fresh carrots that get no chemical fertilizer. Planting this vegetable in your garden will save on your money. This plant will survive naturally in your garden if you grow leek, cabbage, radish, onion, peas, and lettuce around your carrots. These plants help your carrots to survive from pests and get healthy soil.

Easy Ways to Create Polyculture

Some gardeners that have a small garden like to grow various plants together in the same garden. They make a medium to grow some plants to get a great harvest. For that, the next topic that we will discuss in this article is a variety of easy ways that you can follow in creating polycultures for your garden. Use the right way, then you will get optimal results from every vegetable you grow in it. Let’s discuss!

  • By Mixing The Seeds

The first way you can do in creating a polyculture garden in your home is to combine various seeds into the right layout. You do not need to arrange every seed you plant too carefully. Most importantly, you can create space to grow well from every vegetable you have according to the right layout.

  1. The first way is mixing the seeds

The first way is mixing the seeds

Take one spoon of each kind of seed. Pour them in a bowl, then mix them. This step has a function to get a proper combination before you start planting.

  1. Spread them to the entire surface of your field

Spread them to the entire surface of your field

After you mix them a bit, give some water to the soil to make it moist. You can spread them directly on the soil. The random position will surprise you for the next two weeks after the buds appear.

  1. Spread the thin layer of coconut coir

Spread the thin layer of coconut coir

Coconut coir has a loose texture and best for well-draining material. It also absorbs water properly. Spread the coconut coir to stimulate the seeds to grow. It will keep moisture on the surface and prevent the soil to dry quickly.

  1. Water them regularly

Water them regularly

Watering the seeds is a must to do. Regular watering helps their growth every day. Use a watering can to manage water tension without moving the seeds. This step depends on your area. When the temperature is hot then frequent watering will keep them moist. Let the soil dry completely before the next watering for your vegetables.

  • By Classifying Them in Some Rows

By Classifying Them in Some Rows

The next way you can do this is to arrange each seed that you plant in a neat row arrangement. You can separate any vegetable seed you choose into a beautiful display. This also makes it easier for you to take care of plants according to their type.

  1. Classify the seeds

This method has the same steps as polyculture by mixing various seeds, but it uses some classification based on the species. Thus, you don’t need to mix them. This method makes it easy to harvest only the plant that you need.

  1. Create the rows

Make some rows or lines by digging the soil a bit to separate the plant. Don’t miss to check the soil if it has loose textures, moist conditions, and well-draining.

  1. Put a note on the soil to know the plant

It is important to know the plant that you grow in the row. Since you have some rows, they will grow different kinds of buds for each row. This step makes it easy to use the polyculture system.

Conclusion

That’s our discussion about Polyculture Garden for Your Home : Harvesting Healthy Vegetables Easier. Polyculture is a beneficial technique to grow various plants in the same soil or container. This is a traditional way to have a great harvest. By having some plants together, their natural nutrients from roots will help each other to keep the soil fertile. This technique is also useful for a small garden that wants to grow various vegetables. We hope this article helps you to grow various vegetables in your garden. Keep healthy and happy gardening.

Growing Microgreens at Your Home : Eat Healthy Food Everyday

0

Homesfornh.com – Microgreens and sprouts have almost the same shape and characteristics, but microgreens have differences that you can notice. Microgreen has a smaller size and. Microgreen has 2.5 to 7.6 cm tall. It is a baby vegetable that has tiny green leaves. While sprout has no leaves and it grows from seeds. Microgreens have an aromatic green scent from their roots. It is a healthy young vegetable to boost your immune. Growing this vegetable at home is not difficult. Even you can grow them in the kitchen, near your windowsill, in a greenhouse, or outdoor. For that, in this article we will discuss Growing Microgreens at Your Home: Eat Healthy Food Everyday.

Benefits of Consuming Microgreens

Consuming microgreens can give you various benefits. You can get a good functional value for your daily life. This will take care of your health and provide you with a delicious healthy meal. For that, here’s the discussion!

  1. Microgreens contain many goods nutrients. It is a healthy vegetable that contains antioxidants, iron, potassium, magnesium, zinc, copper, vitamin, and mineral.
  2. You can add some microgreens to your cook to make it more delicious. Microgreen has rich flavors depend on their seeds. This vegetable is useful to get a strong taste such as spicy, sour, and bitter.
  3. Having a healthy life by eating microgreens regularly. The nutrients in microgreens can reduce the risk of Diabetes, Heart disease, Alzheimer, and certain Cancers.

Gardening Preparation

Before you start gardening using microgreen plants, there are various things you should pay attention to. For that, the next topic that we will discuss in this article is the various preparations you should do before gardening. There are various things that you have to prepare from gardening tools to the media you use for gardening. Let’s discuss them one by one!

  • Hand Trowel and Gardening Fork

Use a hand trowel to dig the soil in little amount. This tool is useful to pair with a gardening fork. The gardening fork will smoothen the soil and you can use a hand trowel to take them into the container.

  • Terra Cotta Pot

Terra cotta pot is one of the best containers to grow microgreens. It can absorb water properly and keep a natural humidity in the soil. This pot looks interesting to put in any sunny room without interrupting the interior design.

  • Long Watering Can

When growing microgreens indoors, you need to give them enough water to grow their buds. High humidity is important to stimulate their growth because they love moist conditions. Use a long watering can to pour adequate water in low tension. Make round movements when watering your microgreens.

  • Potting Mix

The potting mix consists of good nutrients. These ingredients are useful to make your microgreens grow healthy and happy. It feeds your microgreens by the roots. Potting mix provides good nutrients to grow like a small bushy vegetable.

Easy Ways to Grow Microgreen at Your Home

After knowing the various advantages of consuming microgreens and the various preparations you must do to grow them, the next topic that we will discuss in this article is various easy ways to grow microgreens at your home. There are various ways that you can follow from seed selection to harvest time. For that, let’s discuss!

  • Select the Seeds

Select the Seeds

Choose the seeds that you want to grow. Some vegetables that have seeds can grow to be microgreens. Lettuce, peas, radish, broccoli have the seeds for growing microgreens. Take one spoon of microgreens seeds. Pour them in a glass of water. Soaking them for 24 hours and let them absorb water. The best seeds don’t appear on the surface, they will stay on the bottom. Use a spoon to remove all seeds on the surface of that glass. Rinse the seeds twice to remove the chemical substance or other dirt.

  • Prepare the Medium to Plant

Prepare the Medium to Plant

Microgreens like to get high humidity, it needs less warm light. Before you pour the seeds, give some water to make the soil moist. To grow microgreens indoors, potting mix is a common medium for them to grow. Pour some water to moist the soil, make sure that it is not dry or too wet. Flatten the soil and smoothen them properly for the air and water flow.

  • Spread the Seeds for Each Terra Cotta Pot

Spread the Seeds for Each Terra Cotta Pot

Spread your microgreens seeds on the top of the soil. They will cover the entire top of the soil for a bushy result. After it covers the soil properly, sprinkle some soil on top to create a thin layer. You don’t need to plant them too deep on the soil because it is enough for the seeds to grow near the surface. Put a small note on the terra cotta pot to give a name for your microgreens. It will be hard to recognize each plant when they grow new babies.

  • The Right Place to Grow Them

The Right Place to Grow Them

After you finish the planting step, put your microgreens in the place where it gets enough sunlight. Growing them near your window is good to stimulate their buds. The sunny place will grow the buds in 2-5 days after planting. The adequate light makes them grow straight and as long as it gets high humidity, your microgreens will grow faster.

  • Maintenance and Watering

Maintenance and Watering

Check your microgreens every day by measuring the buds that will appear from the soil. Spray the soil 2-3 times a day by using a spray bottle. Give an adjustable nozzle for this plant. The intensity of spraying water depends on the humidity in your home. Make sure that the soil is moist and not too wet or soggy.

  • Harvesting Time

Harvesting Time

You will see the germination after 2-5 days. Keep spraying them until they grow the leaves. It takes 7-10 days for the leaves to grow. Once it grows bigger, you can start to water the soil without watering its leaves. You can harvest the microgreens from two to three weeks after you plant them. Use a sharp scissor to cut them on the base part just above the soil.

  • Find the Recipes

Find the Recipes

Sourdough eggs and microgreens toast is a delicious recipe from microgreens. Salads, soup, sandwiches, and pasta are a delicious food that microgreens are the fresh ingredients for them. You can eat microgreens from your garden. It will be healthy food for you and your family.

Conclusion

Thus our discussion about For that, in this article we will discuss Growing Microgreens at Your Home: Eat Healthy Food Everyday. Microgreens are nutritious vegetable babies that you can grow at home. This plant grows like a tiny green bush in a simple tray. You can use wet tissue paper, potting mix, or coconut coir to grow them. Microgreens need more water, 2-3 times a day is enough to keep the humidity. Growing microgreens at home is easy gardening. We hope this article is helpful for you to create your microgreens garden at home. Happy gardening!

Growing Vegetables from Kitchen Scraps : Healthy Living in Low Budget

0

Homesfornh.com – Kitchen scraps are the unused ingredients after the cooking process. These ingredients offer a new bud to grow at home. This idea saves on your money because you get free seeds and plant to grow healthy vegetables and herbs. Don’t waste the kitchen scraps by throwing them into your trash bin. In this article, we want to show you some kitchen scraps that are possible to grow well. A vegetable is a healthy ingredient from a living plant. Since it includes living plants, then you can regrow them by their scraps. It is easy to regrow these vegetables by their scraps. For that, in this article, we will discuss Growing Vegetables from Kitchen Scraps: Healthy Living in Low Budget. Let’s discuss!

Carrot

Carrot

Do you like to eat a bowl of soup? Some people like to add carrot pieces into chicken soup. This ingredient is good for the eye’s health. You can make various foods and drink by using this vegetable. Carrot juice is a common drink that gives many benefits. Carrot is an easy vegetable to regrow from its scrap. You can buy some Carrots and cut their bottom part. Make sure that you will not cut the roots. If you want to grow the roots, you can try water propagation before burying them in a facing-down position in the soil.

Bok Choy

Bok Choy

Bok Choy is a green vegetable to make you healthy. This vegetable is delicious to add in Ramen, Shiitake Broth, and Chicken soup. If you like to eat Bok Choy, you can make a little Bok Choy garden by using its scraps. Cut the Bok Choy at least 5 cm from the bottom part. If it has roots, you can plant them directly in the soil, but if it has no roots then you should grow them in the water propagation.

Spring Onion

Spring Onion

Spring onion is a green plant to make your food more delicious. Many people use it to arouse a yummy taste. This plant has a similar smell to the onion. Since it has an onion taste, it is quite simple to add an onion smell by using this plant. Don’t throw the bottom part of this plant into your trash bin. Collect them and put them in a water container. After ten days, it grows new roots that are ready to plant in the soil.

Potatoes

Potatoes

Eating french fries in the cold winter is a nice idea. Potatoes as the main ingredient to create french fries are expensive to store every time. Try the live hack to grow potatoes by using water propagation. Cut your potatoes and make a gentle slice to get some eyes on this slice. Put three sticks to hold this potato pieces stand and its bottom part touches the water. Three eyes to grow new potatoes. To regrow potatoes, the key is its eyes that will grow new roots.

Leek

Leek

Leek is a versatile vegetable from the Mediterranean. It includes the Onion family. You may find this vegetable to complete the ingredients in roasted chicken, fried chicken, boiled, and braised dishes. Make use of your Leek scrap into a living plant by regrowing it. Wait for this plant to regrow new roots for at least 10-14 days. After your Leek is rooted, let it dry for at least one to two days. Planting your Leek in the soil. Cover all the bottom parts perfectly.

Celery

Celery

Celery is a vegetable that has green leaves to make your dishes tasty. Create a living Celery by using its scrap is efficient to reduce the cost in your daily list. Regrow this plant from its root end of the bunch. Like the other growing vegetables, the water propagating technique is effective to regrow this plant easily. The new roots will grow after two weeks in the water. In the growing process, don’t forget to change the water once every three days. When the roots emerge, you can plant the celery in the soil the next day.

Lettuce

Lettuce

Lettuce has a fresh taste. It looks fresh when it gets a little water on its plant. The light green leaves from Lettuce are beneficial to cook as Quick Nicoise Salad, BLT Wraps, and other Salad recipes. Since it has fresh leaves, you may regrow this plant to enjoy the fresh Lettuce in dishes every day. Cut the bottom of your Lettuce about 1-2 inches. It takes two weeks for Lettuce scrap to regrow the roots. When it gets clean water, then change the water every three days.

Mint

Mint

Do you like to add a mint leaf to your drink? This leaf makes your drink feels fresh and delicious. Having a mint plant at home is beneficial. It cuts the cost to buy them in the market. Moreover, if you want to get more mint plants at home, you can propagate some stems rather than waste them. Cutting all the lower leaves and remove 3-4 leaves to give mediums to regrow the roots. Pour water in a container till it is enough for the cutting stem to absorb it. Don’t pour too much water.

Ginger

Ginger

Ginger is a herb plant from Southeast Asia. This herb has a fresh spicy taste to make dishes and drinks more delicious. As a member of Zingiberaceae, this plant relates to galangal and turmeric. It is quite easy to grow the Ginger plant by its scraps. Prepare potting mix and smooth soil. Take your Ginger, 1-2 plants are enough, then plant them in the soil. Watering this plant every day and wait for 3-4 weeks for it to regrow new buds. You will see green buds emerge from the soil.

Chili Seeds

Chili Seeds

Chili is a must-have ingredient to have at home. It completes the dishes at a dining table. Having Chili plants at home gives you many benefits. Even it grows well at a dry temperature. When you cook in the kitchen, then taking some Chilies to a cook, you can remove its seeds and save them in a dry container. The dry seeds are easy to regrow. You can plant them in the garden or even in your kitchen.

Thus our discussion about Growing Vegetables from Kitchen Scraps: Healthy Living in Low Budget. Eating and growing vegetables is one of the essential steps for a healthy life. Cook some healthy and delicious foods from vegetables to increase your immune. Even you don’t need to buy the vegetables because you can regrow them by their scraps. Some vegetable scraps are easy to regrow and may save on your money. The information above is important for you to growing vegetables from kitchen scraps. We hope you can try some steps above and share this life hack with your friend. Happy gardening and keep healthy!

Tips to Care for English Ivy and Beautifully Hang Them in Your Home

0

Homesfornh.com – Hedera Helix or English Ivy is a vegetative plant. It is stunningly a vine plant from Central and Northern Europe. English Ivy usually grows outdoor on the fence, outdoor wall, gate, and any suitable places. This plant is an aggressive grower, then it needs to propagate when the leafy stems become larger. This plant is often decorating old houses or buildings. It transforms the old-fashioned exterior to feel a forest-like ambiance. This plant is nice to bring inside the house too. You can use it for the interior decoration of any room you want in your home.

As an indoor ornamental plant, it thrives well in the moist temperature, then it invigorates the atmosphere inside the room. For that, in this article, we will discuss Tips to Care for English Ivy and Beautifully Hang Them in Your Home. We will discuss the first topic of tips for caring for this plants. Meanwhile, the second tips that we will discuss are some easy ways for you to follow in hanging these ornamental plants beautifully. Let’s discuss them one by one!

Tips to Care for English Ivy

The first topic we discuss in this article is some tips you can follow to care for the English Ivy plants you have in your home. By having ornamental plants, you certainly want the plants you have to grow healthy and beautiful. For that, you can follow the various tips that you can follow below so that your ornamental plants are always beautiful and fresh. Let’s discuss!

  • Soil Care

Soil Care

This plant likes moist soil and low humidity. This plant loves the fertile soil from the potting mix. The right potting mix is healthy for your English Ivy and provides good drainage for this plant. Since it likes the moist condition, it thrives well in well-draining soil. Grow this vegetative plant in smooth soil with compost mixing.

  • Water

Water

The need for water is important for all living things. Even though English Ivy likes moist soil, it still needs water to survive all year rounds. Give enough water for this plant when you see the signs of drying leaves. Yellow leaves and the edge of curving leaves are the common sign of underwatered plant. Before watering this plant regularly, make sure that the soil is completely dry. It doesn’t like to stand in soggy soil.

  • Humidity

Humidity

Since this plant likes moist soil, you should consider the humidity in your room. Humidity is a moderate key to thrive your English Ivy well. Sometimes, when your English Ivy leaves look pale then it likes more humidity. Some English Ivy species like more sunlight and some like less humidity. The temperature around 10-21° C is natural for this plant to grow. Thrive it with pebbles around the roots to increase humidity.

  • Lighting

Lighting

The sunlight is the must-have element to provide for a healthy plant. Even English Ivy loves sunlight but can’t hold longer in direct sunlight. The place with bright indirect sunlight is effective to make your plant looks fresh. To determine the need for light for a certain species from English Ivy, you can see the color of its leaves. If the leaves are white such as Ingrid Liz, it likes a shady place and tolerates low light. English Ivy with deep green leaves love to get bright indirect light, a corner space is enough for this plant.

  • Pests and Diseases

Pests and Diseases

Spider mites are the common pest for this plant. It likes to attack English Ivy when this plant in low health. Some sick signs from this plant mean that it needs serious actions to nurture it back to health. There are others pests and diseases of this plant such as anthracnose, edema, phytophthora, and bacterial leaf spot. The wrong treatment also may cause the death of English Ivy. Giving too much water and fertilizer causes a slow death.

How to Hang Your English Ivy

After discussing various tips for caring for your English Ivy plants, the next topic that we will discuss in this article is a variety of easy ways for you to follow in hanging these ornamental plants. You can flexibly create the decorations you want using English Ivy plants in the interior of your home. In addition, you can also hang it anywhere in the room you want, both interior and exterior. Let’s discuss!

  • Prepare the Hanging Spot

Prepare the Hanging Spot

Hanging an English Ivy plant can invigorate your room. It decorates the wall and brings a natural atmosphere. If your ceiling already has a hook then it is beneficial for you to use it, but if it is not, add some hooks on the ceiling by using a drill machine. By having the hooks, you can hang your English Ivy and let the vining part creates a green ‘waterfall’.

  • Use a Small to a Medium Pot

Use a Small to a Medium Pot

Using a big pot requires more soil to fill it, then it increases the weight to hang it on your ceiling. A small is lighter and easy to hang on your ceiling. You can use the old pot, but add a hanger planter from macrame will rise your light pot beautifully. Some plastic pots are available in a plastic hanger. Since you will hang it on the ceiling, then you should provide good drainage for this container. Terracotta pot can help you to absorb water and it has no holes. Don’t use the pot with holes because the water will spill on the floor when you water it.

  • Measure The Rope and Your Ceiling

Measure The Rope and Your Ceiling

You need to measure the height of the rope to hang this pot. It is important to get a proper position in a room. Don’t hang it too short because it will disturb your traffic in that room. Thus, hang it a little higher to get adequate sunlight. The outdoor atmosphere will touch your English Ivy gently and adjusts its natural habitat.

  • The Lighting

The Lighting

English Ivy will die slowly if you put it under direct sunlight. When you decide to hang it, take an effective place to grow them under the medium to bright light. A dark corner is good for this plant to grow indoors. If you want to decorate the window, you can hang it beside your window in that room.

Thus our discussion of Tips to Care for English Ivy and Beautifully Hang Them in Your Home. English Ivy plant is a stunning vining plant from English. This plant lives well in low humidity. It tolerates medium to bright light. You can thrive on this plant outdoor or indoor. Choose the right species to grow indoors if you want to create a greenery accent. It is quite easy to thrive this plant, then we give you some tips and information to nurture this plant. Hopefully, this information is useful for you. Happy decorating!

Easy Ways to Create Good Drainage for Your Succulents with No Holes

0
featured

Homesfornh.com – Succulent is a classification of plants based on their characteristics to survive in harsh conditions. Succulent has a good ability to live in the desert with dry soil and exposure to direct sunlight. This plant has fleshy leaves, evergreen look, some have tiny green leaves, and have small flowers. To thrive succulent is not easy because you need to provide the preferred environment that it deserves to get. The well-draining soil is the best medium for succulents to grow, it suits their natural habitat. Thus, we have some simple ideas on how to create good drainage for your succulent, especially to thrive in a pot and other mediums. Good drainage is important for succulents to thrive indoors. Let’s discuss!

Prepare The Materials

Prepare The Materials

Prepare the materials before planting your succulents in a pot. There are some gardening tools to help you manage the process. Hoe, hand trowel, and gardening fork are useful to move the ingredients into the pot. Moreover, you should prepare the ingredients for your potting soil. You can make use of natural materials around you such as pebbles, some pieces of broken terracotta, and smooth soil.

Prepare The Materials

The right preparation guarantees a good result in this gardening. If you find it is hard to seek the materials around you, find these materials in an online store that available in various sizes and costs. Thus, you can make a simple list of things you need to use in creating good drainage for your succulents. Make your succulents happy by providing the environment they prefer and deserve. Follow us to know all steps to create drainage for succulents.

Measure Your Succulent

Measure Your Succulent

Growing succulents indoors need a container to bring this tropical plant inside your house. Many kinds of pots from various materials offer you some catchy designs. The first thing you need to consider before choosing the pot is its ability to absorb the water. Succulent needs to avoid the dampness in their pot. The soggy soil causes rotten rots and tender stems.

Prepare The Materials

Terracotta pot or other pottery containers are good for succulents to grow indoors. It is not too big as it adjusts your plant size. The big pot holds lots of water for a small succulent, then it leads your plant to die slowly. Thus, make sure that the pot fits your plant. You can repot it into the bigger one when your plant is overgrown.

Drainage Materials

Drainage Materials

The holes under the bottom pot are functional for drainage too, even though it lets the water run out from that holes and spill on your floor, then it needs drainage materials. Succulent needs well-draining soil to make a natural environment as they live in nature. It mostly consists of stones, rocks, and sand. The things you have to prepare for the drainage system are gravel or broken pottery, perlite or white volcano rocks, pebbles, and charcoal.

Drainage Materials

You can classify these materials in different places. It is easy to arrange these materials in a pot when you separate them from one to another. Make sure that these materials are enough to plant your succulents. If you already have some of these materials at home, you can reuse them for the next planting of succulents. As long as these materials are in a good condition then it is safe for your plant.

Potting Mix

Potting Mix

We have mentioned that you need some materials to make a natural soil condition for your succulent like its natural habitat. In this step, you will arrange these materials one by one. Start from the bottom layer, arrange some pieces of broken pottery to make simple drainage. Give some crushed charcoal to prevent algae. It will absorb the water frequently, then the soil will dry completely. Next, add a coffee filter or cheesecloth to prevent the erosion of soil particles to the holes.

Potting Mix

Add adequate potting soil. Compost and smoothen soil have good drainage. Put your succulent in the middle of the potting soil layer. Make sure that the soil covers its roots completely. The last touch is mixing some smoothen soil with perlite, then pour it on the upper layer. Here, you should measure it by yourself, since it depends on your succulent size and its pot.

The Right Watering Can

The Right Watering Can

The last step is not the final step because you should check your plant regularly. It is important to make sure that you create good drainage. If your plant grows well, then it works. Even though succulents live in a harsh condition but it needs water too, especially for the first planting.

The Right Watering Can

Succulent requires water after you plant them. They need to adapt to the new environment and potting mix. Here, you do not need to use a watering can because it has too many holes with a big tension from the water flow. Use a long small spout can to adjust this plant. Don’t spray this plant by using a bottle spray but a watering bottle is fine.

Thus our discussion of Easy Ways to Create Good Drainage for Your Succulents with No Holes. Growing succulents is hard. Sometimes, you need to repot your succulent into fresher potting soil. This plant can live in a harsh condition then it requires well-draining soil. The right arrangement and combination of drainage materials may save your succulent from death. Be patient when taking care of succulents. We hope you have a beneficial knowledge to create good drainage for succulents, especially if you thrive them indoors in the pot with no holes. Happy gardening!

Daily Care for Baby Toes Succulents for a Begineer in Your Home

0

Homesfornh.com – Fenestraria rhopalophylla ‘Baby toes’ succulent is a perennial plant that looks catchy to thrive on your windowsill. It has a whitish top on every round-shaped leaf. Like its name, Baby toes succulent has a baby toe-like appearance. It is a succulent plant that sometimes is hard to grow, especially for a new gardener. For this reason, in this article, we will discuss Daily Care for Baby Toes Succulents for a Beginner in Your Home. With the right care for your ornamental plants, you can create a beautiful and attractive natural decoration display in your home. For that, let’s discuss!

Don’t Overwater Your Baby Toes Plant

Don’t Overwater Your Baby Toes Plant

Giving your succulent much water is the wrong step to care for them. The sprinkle tubes are the sign of underwatered roots, then give it enough water. Make a schedule to water them in the summer and spring, twice every month is enough for succulent. Overwatering causes death for your baby toes, especially in the winter season.

Don’t Overwater Your Baby Toes Plant

Since this plant loves well-draining soil, you need to wait for the soil to completely dry before the next watering. The arrangement of the soil ingredients influences the drainage of this plant, especially if you grow them in a pot.

Put Them in The Full to Partial Sun

Put Them in The Full to Partial Sun

Taking your Baby toes succulent inside the house requires the right spot in a room that provides adequate sunlight. It grows well under the full to partial sun. Get enough sunlight for your Baby toes at least six hours a day. The windowsill with a southern-facing window gives enough sunlight for them every morning.

Put Them in The Full to Partial Sun

If you can’t find a sunny spot, then you can give it grow light such as an LED light for your indoor plant. As long as your Baby toes stand in a warm place, then it is quite good for this succulent to grow. If you can’t put them on your windowsill, manage to put them near the door. Another idea is to hang this plant on the ceiling or thrive them in a hanging terrarium to beautify your window.

Temperature

Temperature

The temperature it requires is in a range of 66°F (19°C), but still, the warm and sunny place is the best. Since this plant is native to South Africa, it loves a high temperature. It lives in a desert-like temperature and sometimes it is fine to grow during the drastic climate changes.

Temperature

This plant tolerates any climate, even in the moist place it can thrive well but needs less water. Don’t water your Baby toes if a low temperature. It is better to move them to a warmer place. To thrive them indoors, the shady spot with bright indirect sunlight is their favorite place to grow.

How to Propagate the Baby Toes

How to Propagate the Baby Toes

Grow them by the seeds may take a long time, then the stem is good. You can propagate your Baby toes by seeds or cutting the stem. If you plant them by seeds, the new buds will grow closer to each other. It needs to propagate again, in case your Baby toes will grow more buds. When you choose to plant the seeds, don’t forget to prepare the large pot for many buds in one pot.

How to Propagate the Baby Toes

Offsets propagation is better to grow Baby toes plant. Cut the fleshy stems by using a sharp sterile knife. Make sure that you don’t leave any mark on the Baby toes plant. Let the cutting stem dry for one to two days before planting it. By having some small stems, you can arrange their place to grow for each stem.

Pests and Diseases

Pests and Diseases

If you see the yellow part in their fleshy stem, you should prune it with the right gardening tools. Check the soil whether it stands in wet or not. Since soggy soil causes rotten roots, rare watering is just fine for succulents. Don’t worry if you find the bottom stem is rotten then fall. It is normal for the plant to lose its bottom parts such as leaves or fleshy stems.

Pests and Diseases

The common pests and diseases for Baby toes are wrinkled tubes. It means that the nutrient in potting mix needs to change. The first action is watering this plant, if it turns to normal condition then the problem is solved. If it is still the same, then please try to change its potting mix.

Thus the discussion of the book about Daily Care for Baby Toes Succulents for a Beginner in Your Home. Baby toes succulent is a tiny little plant that has tube stems. The fleshy tube stems are impressive to add inside your home as an ornamental plant. In a certain region, this plant is expensive, then if you have this plant at home, take care of this plant wisely. Hopefully, the ideas of daily care for Baby toes that we have shared with you are useful to give a little guide in nurturing Baby toes succulents. Happy gardening!